I’d always wanted to build an engine and when I finally decided to have a go back in 2022, I had no idea what lay ahead. How hard could it be I told myself and boy did I eat those words…
With the SR long block still nowhere to be seen and my interest in progressing the Silvia at an all-time low, I did what any sensible person would do and decided to start a new project, you know you’ve done it too.
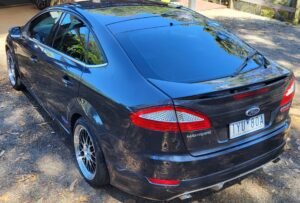
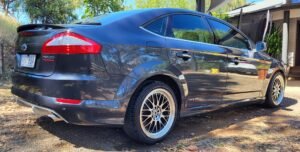
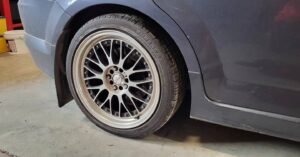
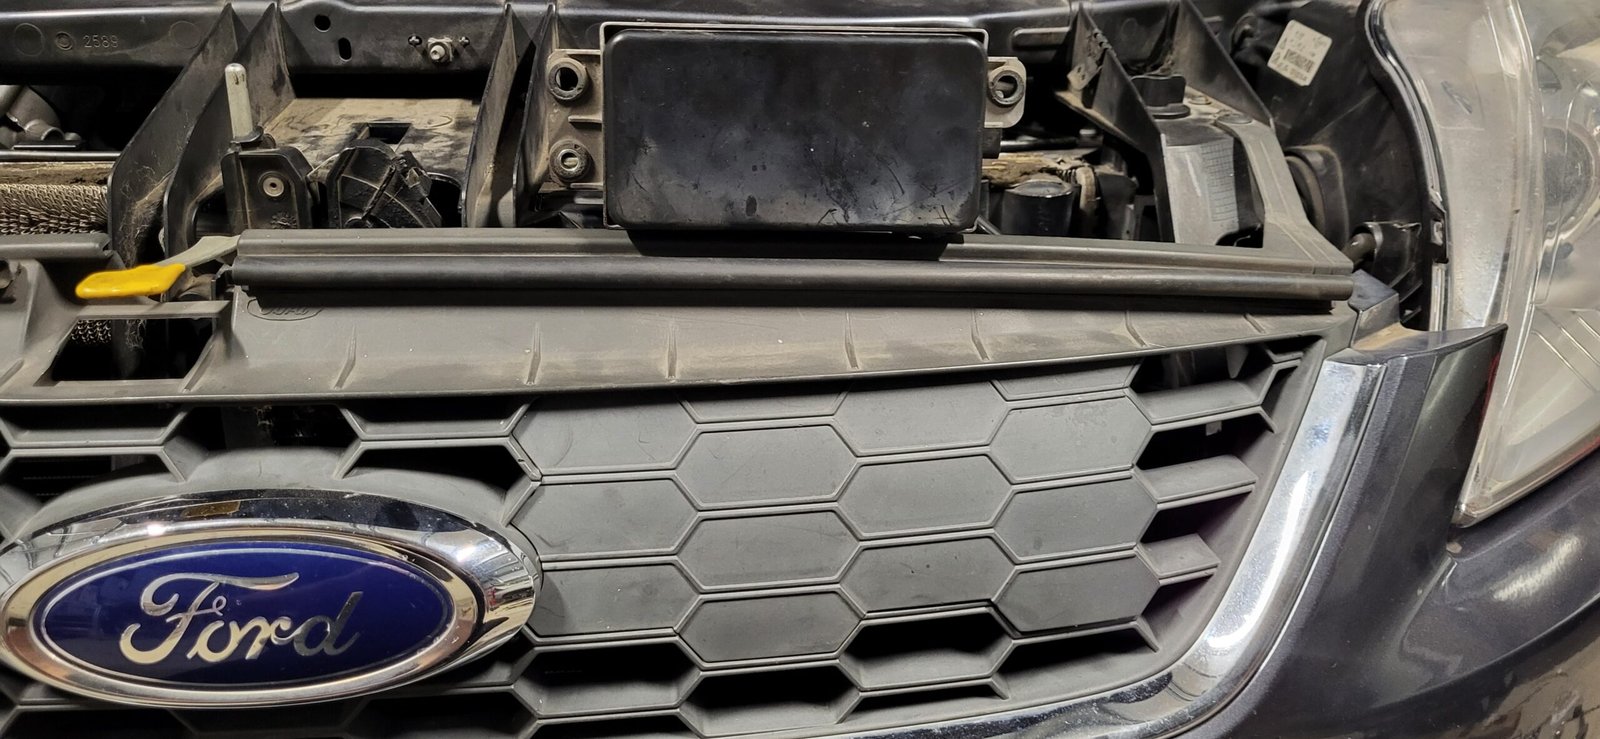
I started scouring marketplace for cheap projects with blown motors, something that needed more than just a head gasket. It had to be turbo, manual, and a 4 door as I wanted something fun to drive for the school runs after finishing the build. In hindsight, I should have bought an NA 4cylinder JDM car, but when a fairly straight 2010 MB XR5 Mondeo with a spun bearing came up for $500, I foolishly convinced myself this would be a lot more fun than a Corolla once it was done.
I drove out to meet the seller, quickly confirmed my suspicions about the terminal engine damage, tested everything else as best I could, shut it off, threw it on the trailer and bought it home.


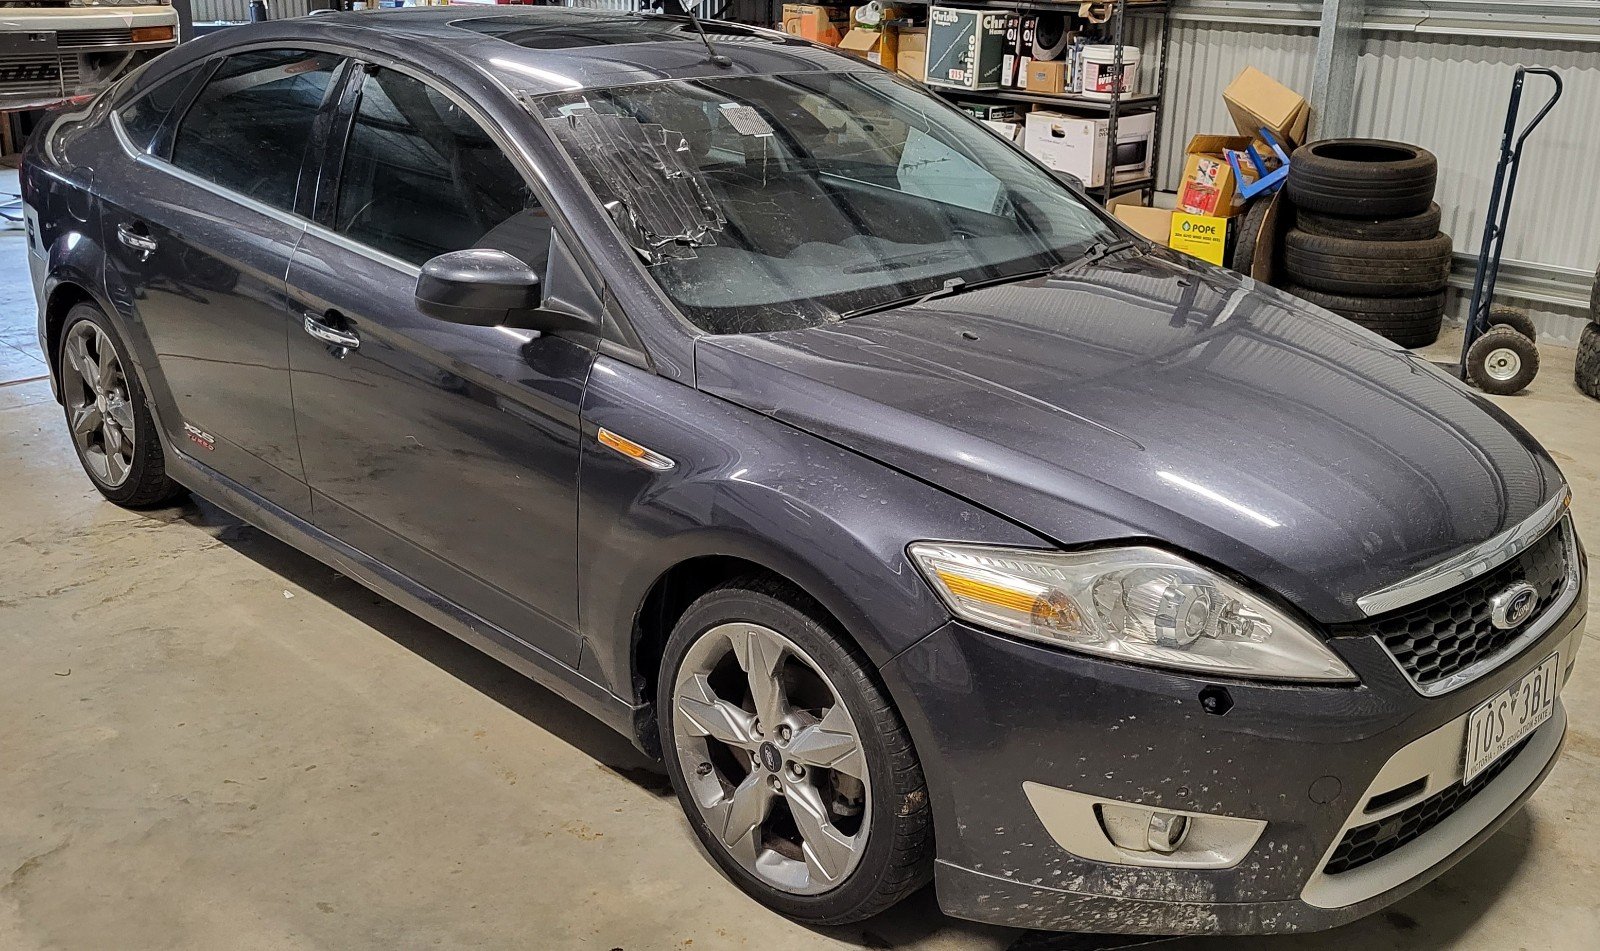
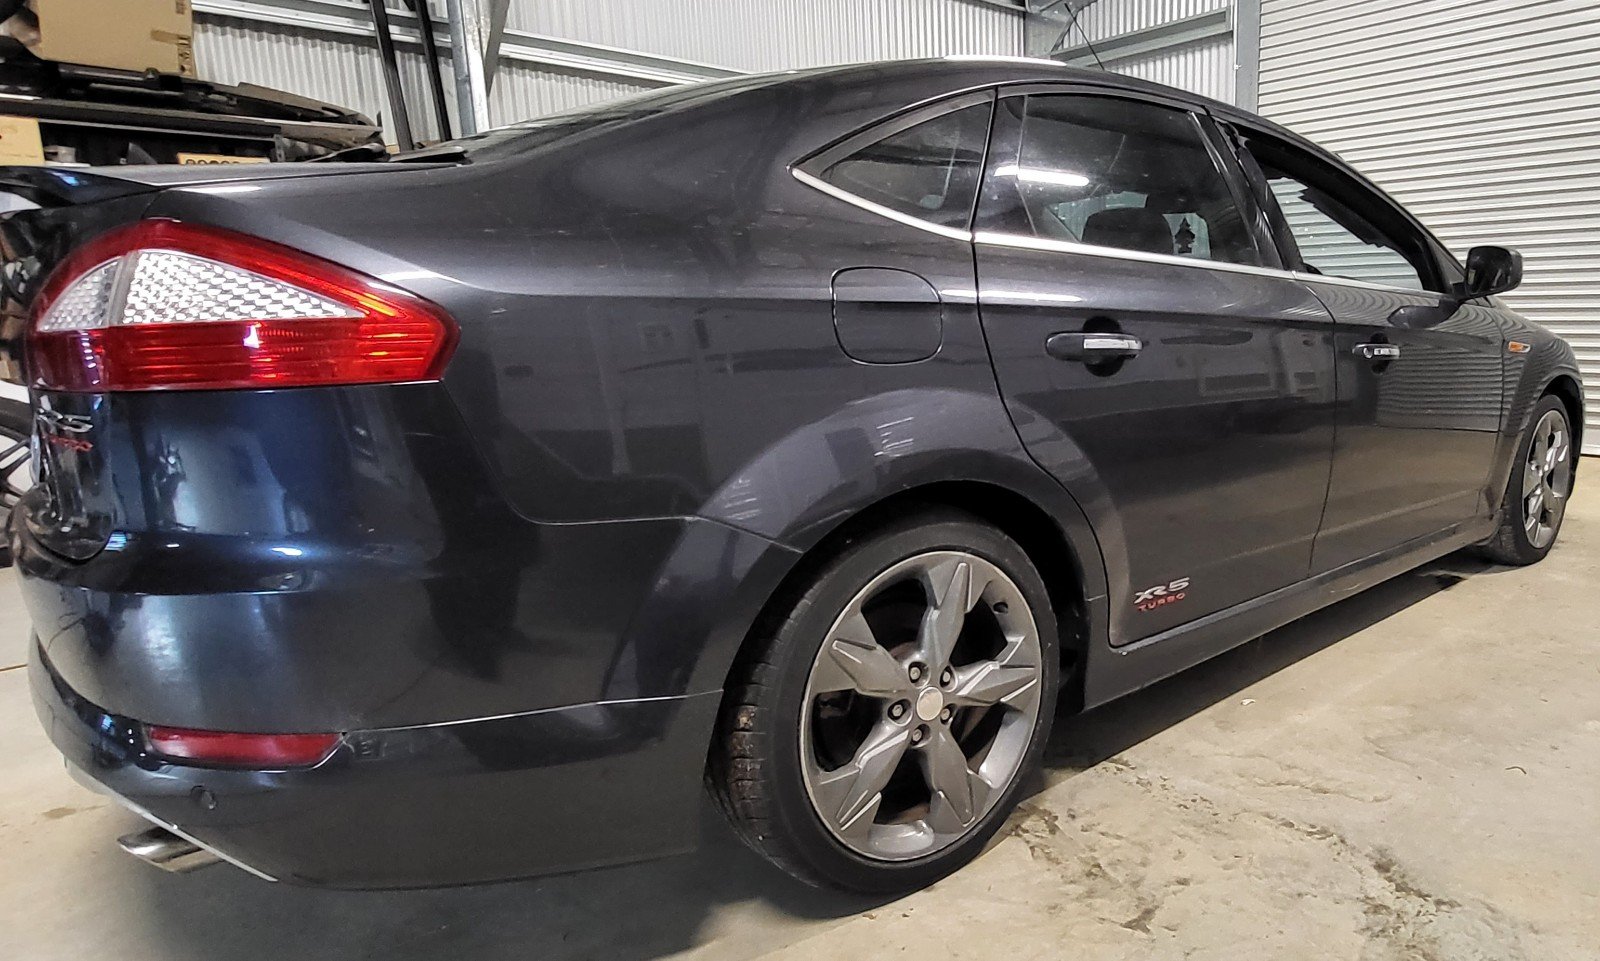

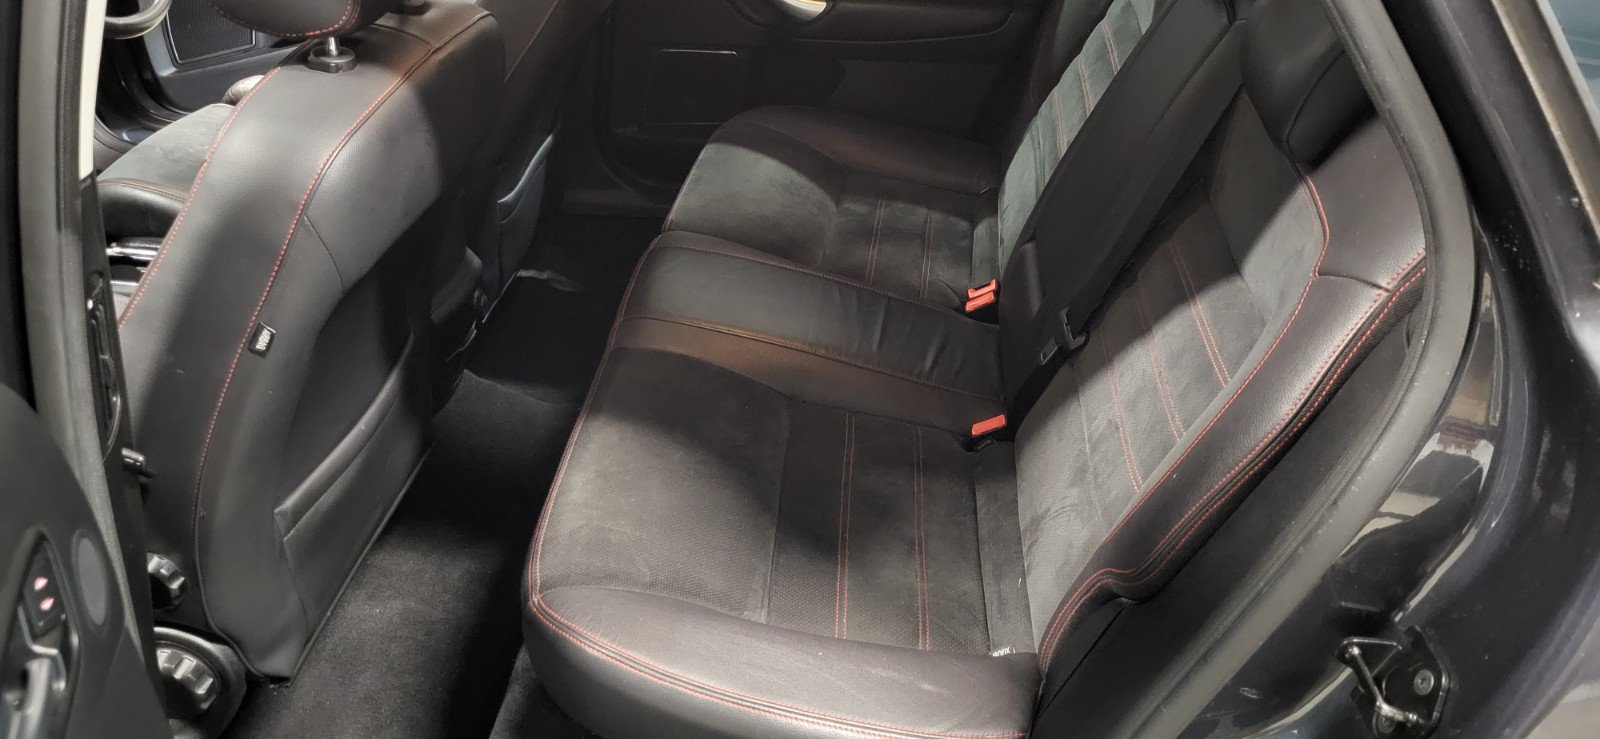

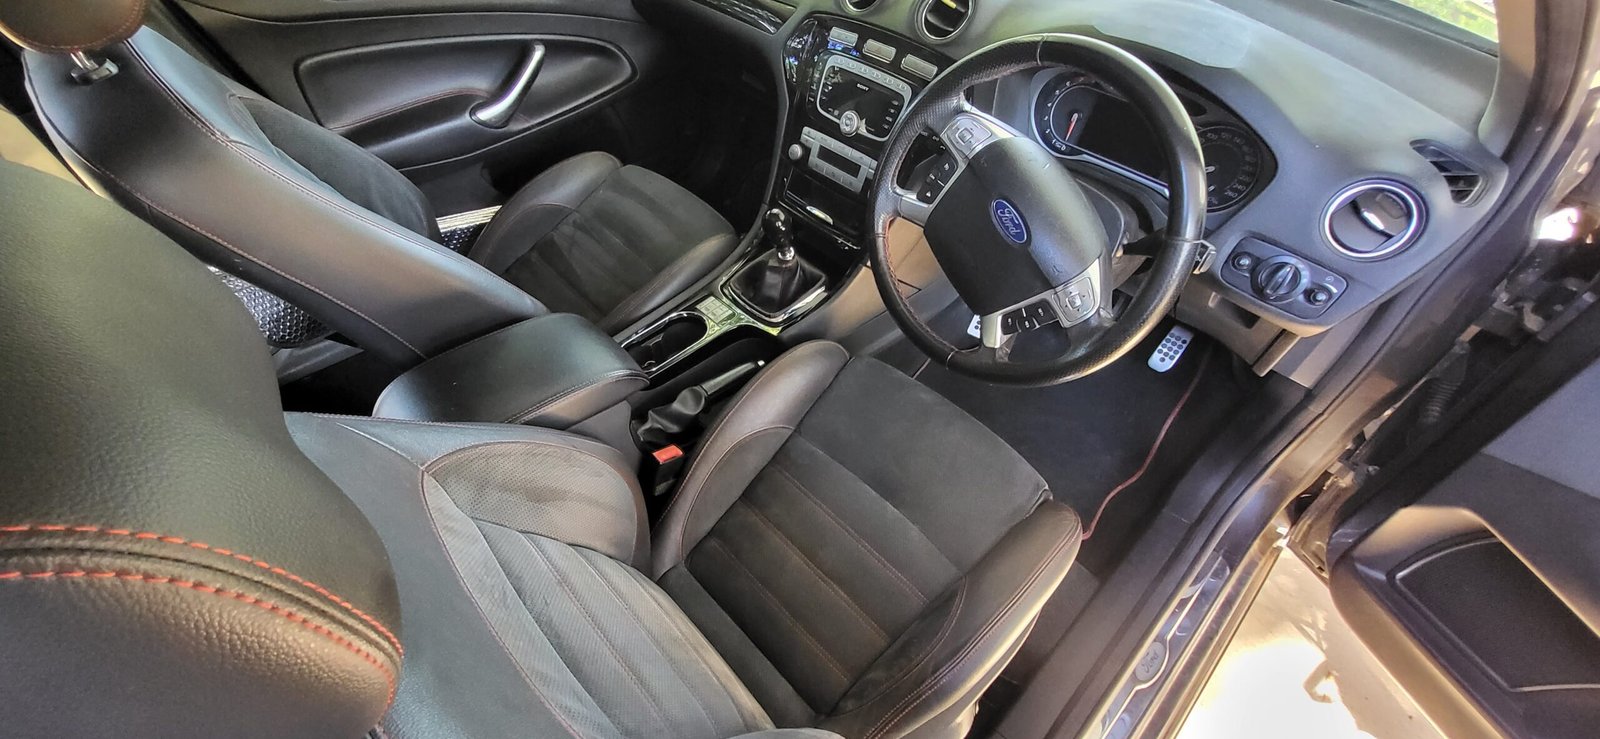
Despite the k’s, the car had a good service history and, to a degree, had been looked after in the past, electrics worked, the interior was mostly clean, the body was fairly straight, box felt good, etc. As the last of the XR5 Mondeo’s it was also fairly well appointed with heated seats, radar cruise, push button start, parking sensors and the like, not bad for a 2010 car.
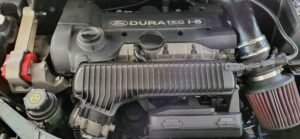
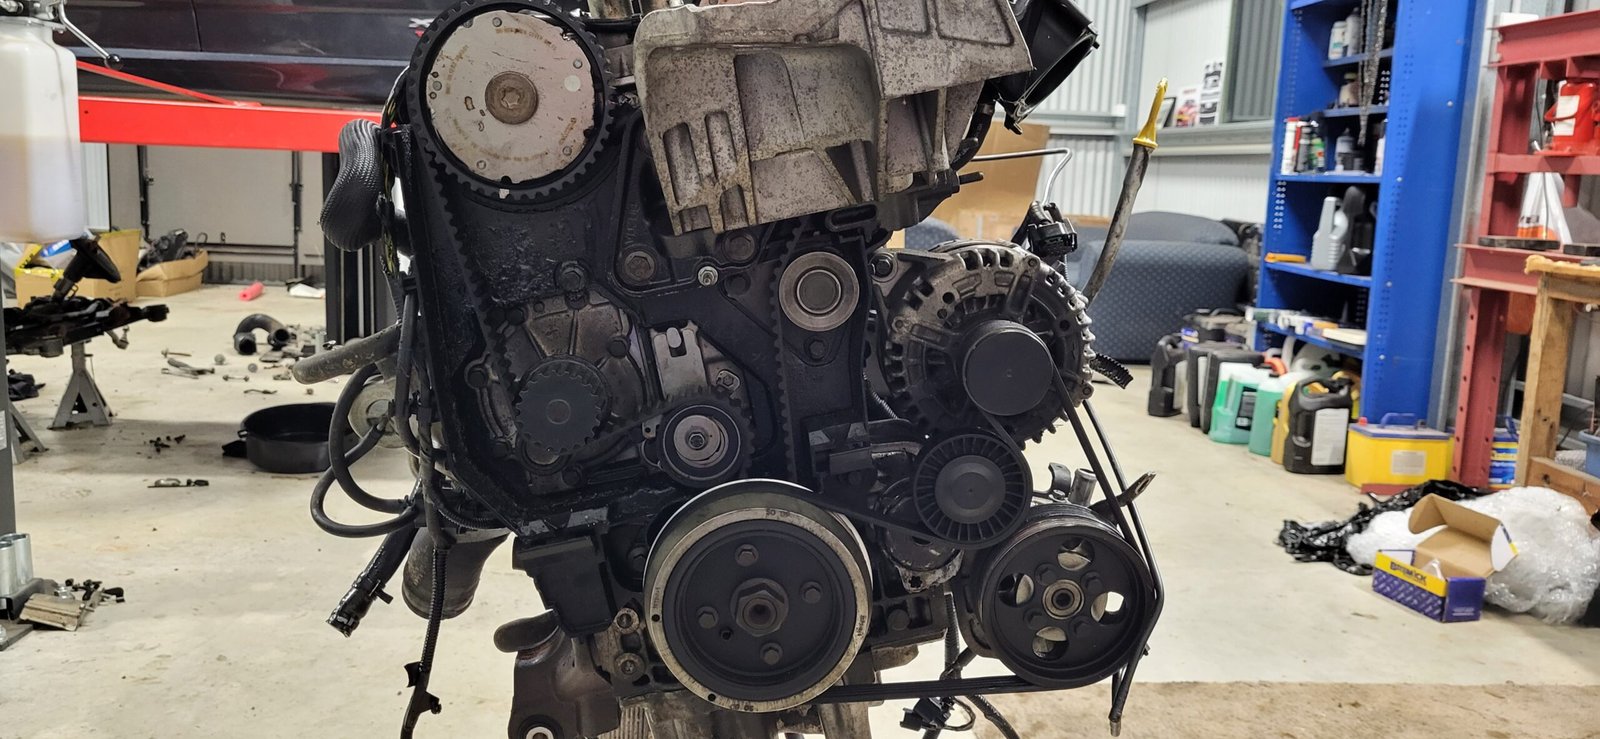
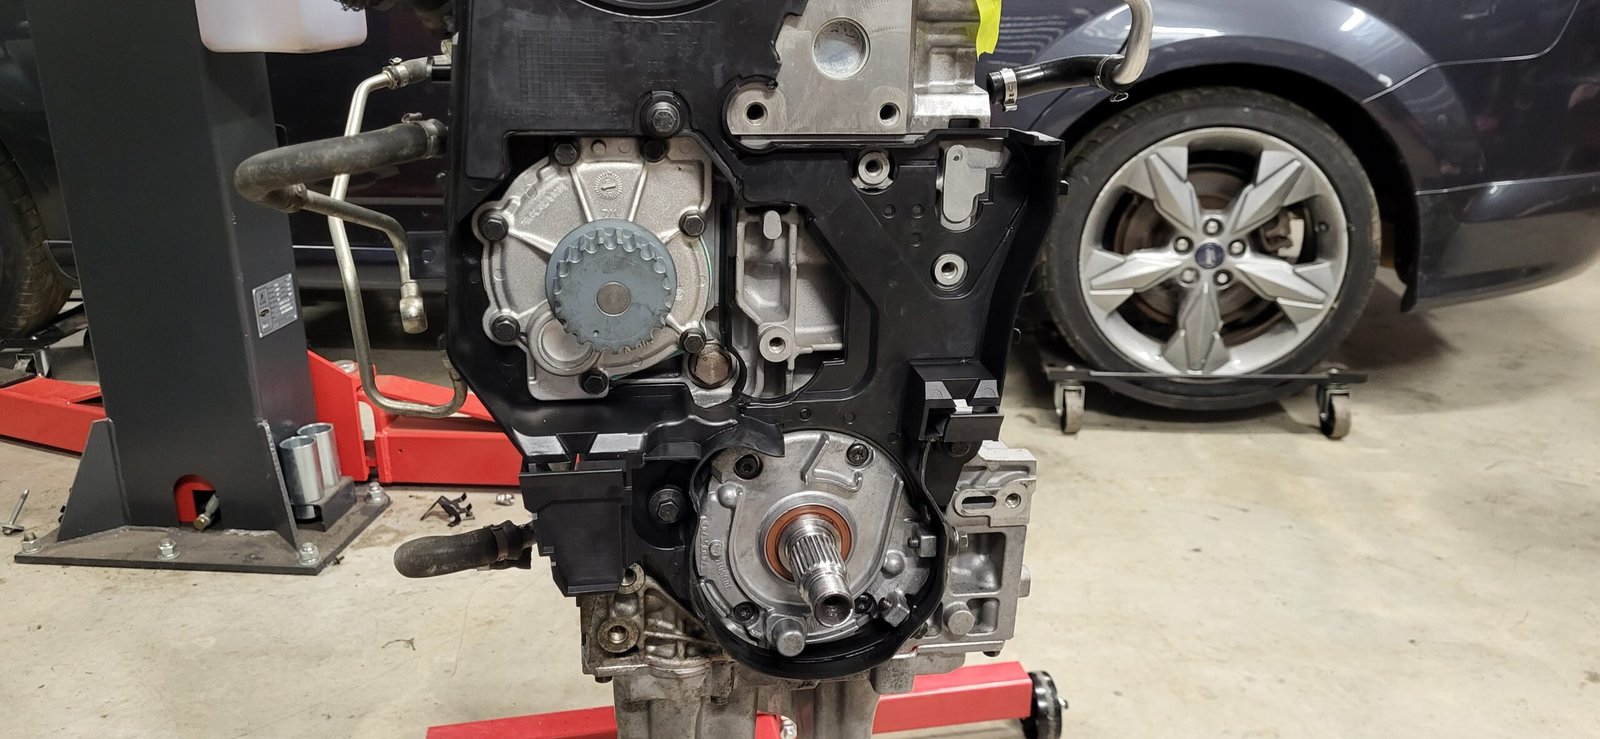
Though I was aware the car was FWD, which I knew would make repairs bit harder, what I did not realise at the time of purchase was that Mondeo is a very European car in both design and execution. Most importantly, this includes the usage of a Volvo derived 5 cylinder turbo engine, yes I knew it was 5 cylinder and turbo, but I had no idea it was a Volvo donk – woops.
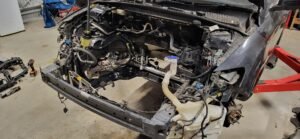
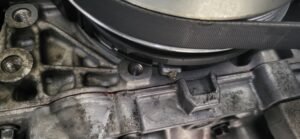
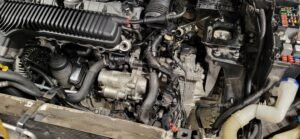
This presented the first set of challenges as I got stuck into basic clean up, repairs, and engine removal, I was not set up for Euro work and needed to acquire a few additional hand tools/bits to deal with the array of different fasteners (SAE set, Torx/E-Torx set, Spline). No matter I thought, I was always going to be buying some new tools to build the motor, what’s a few extras?
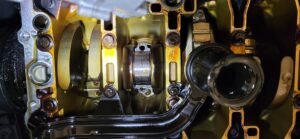
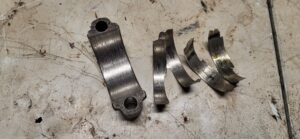
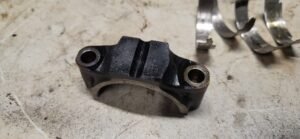
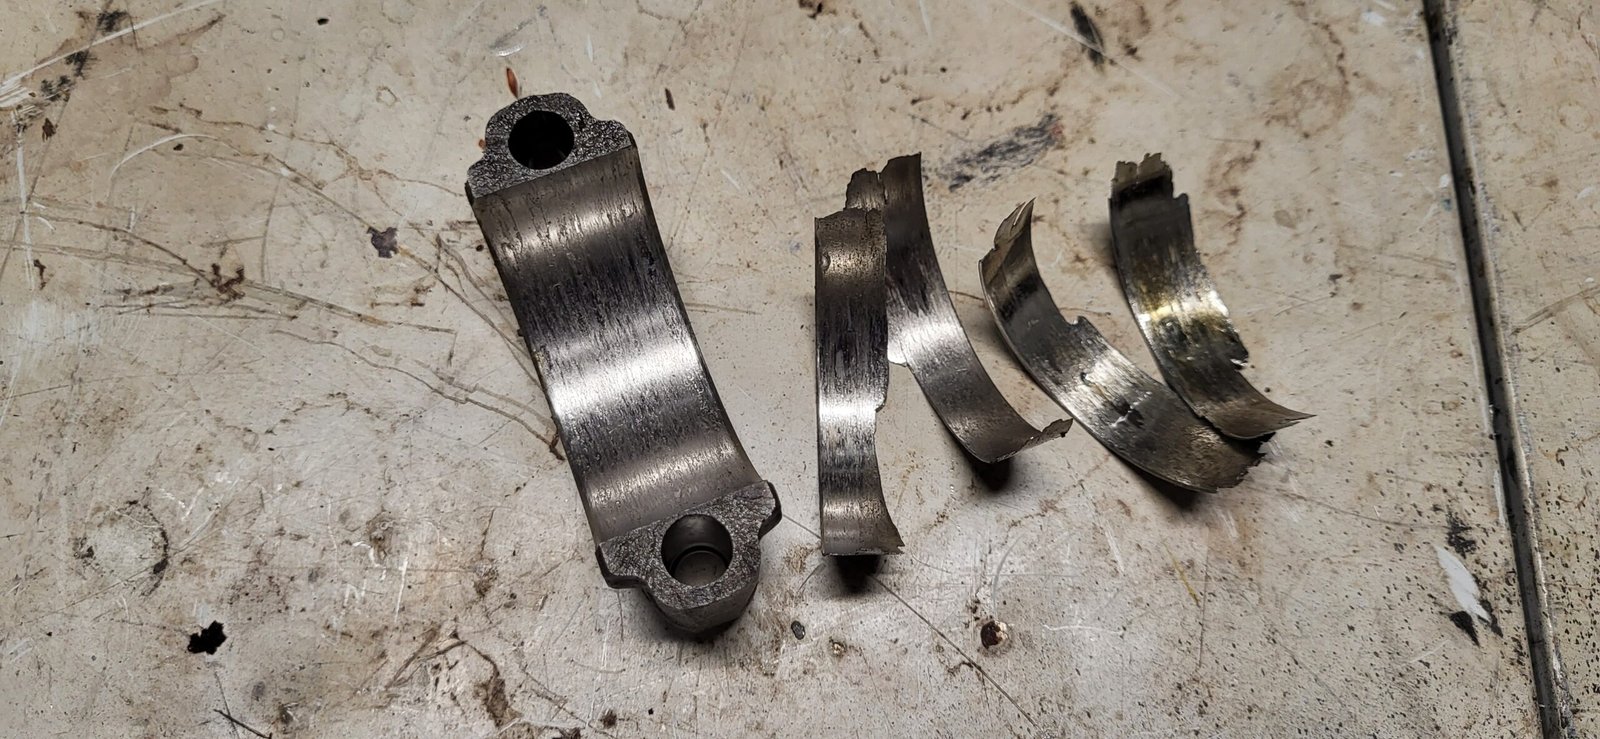
Before long I was elbow deep in the engine bay, was on lots of XR5 groups, had myself a service manual and was making progress. I first chose to remove the sump and confirm my diagnosis, it was worse than I thought. As the previous owner had run the car so many times trying to work out what was wrong, it had spun most of the big end bearings due to contamination, it was a mess.


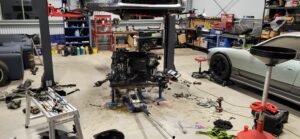
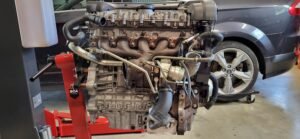
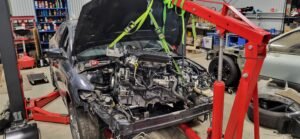
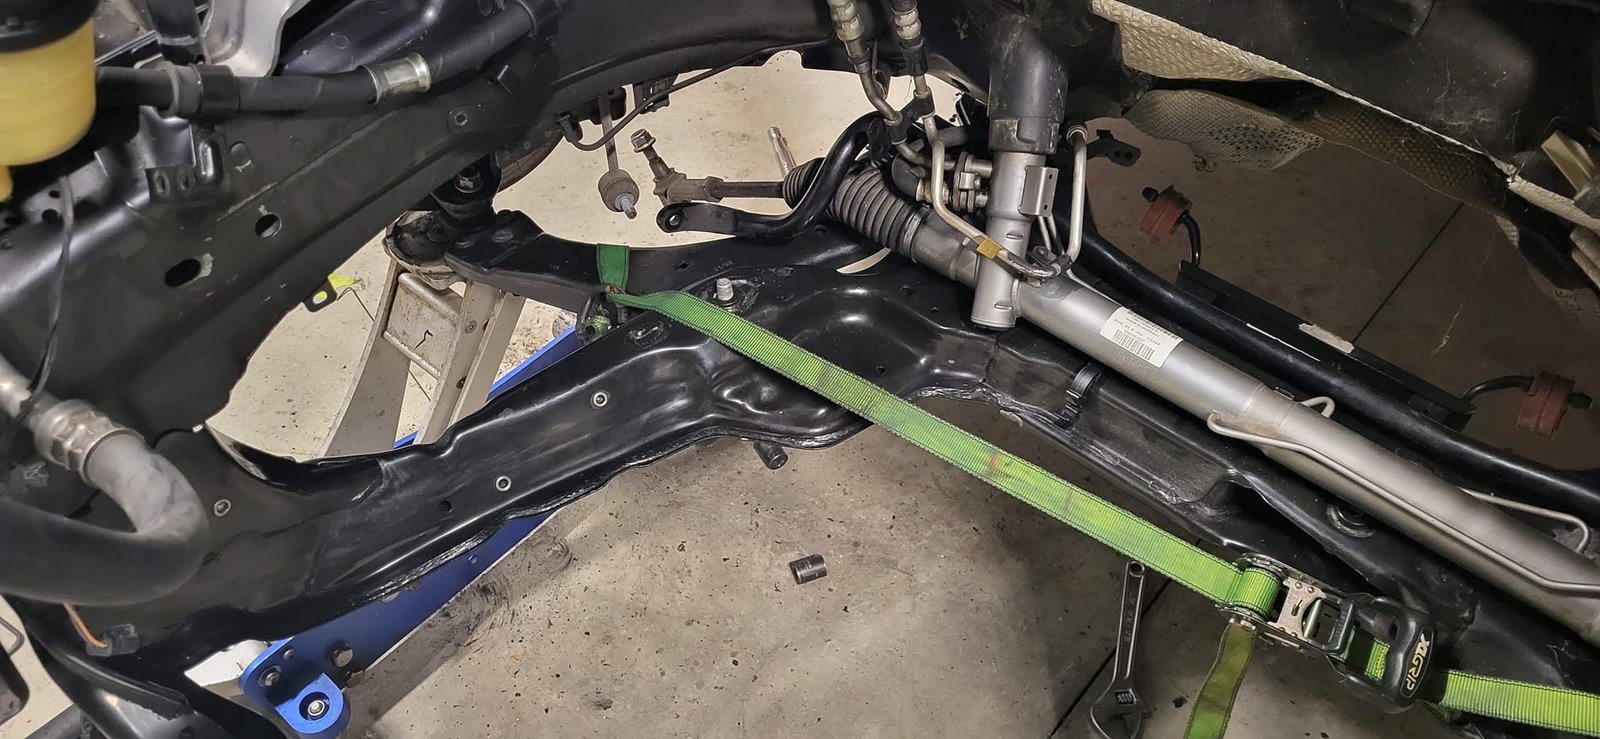
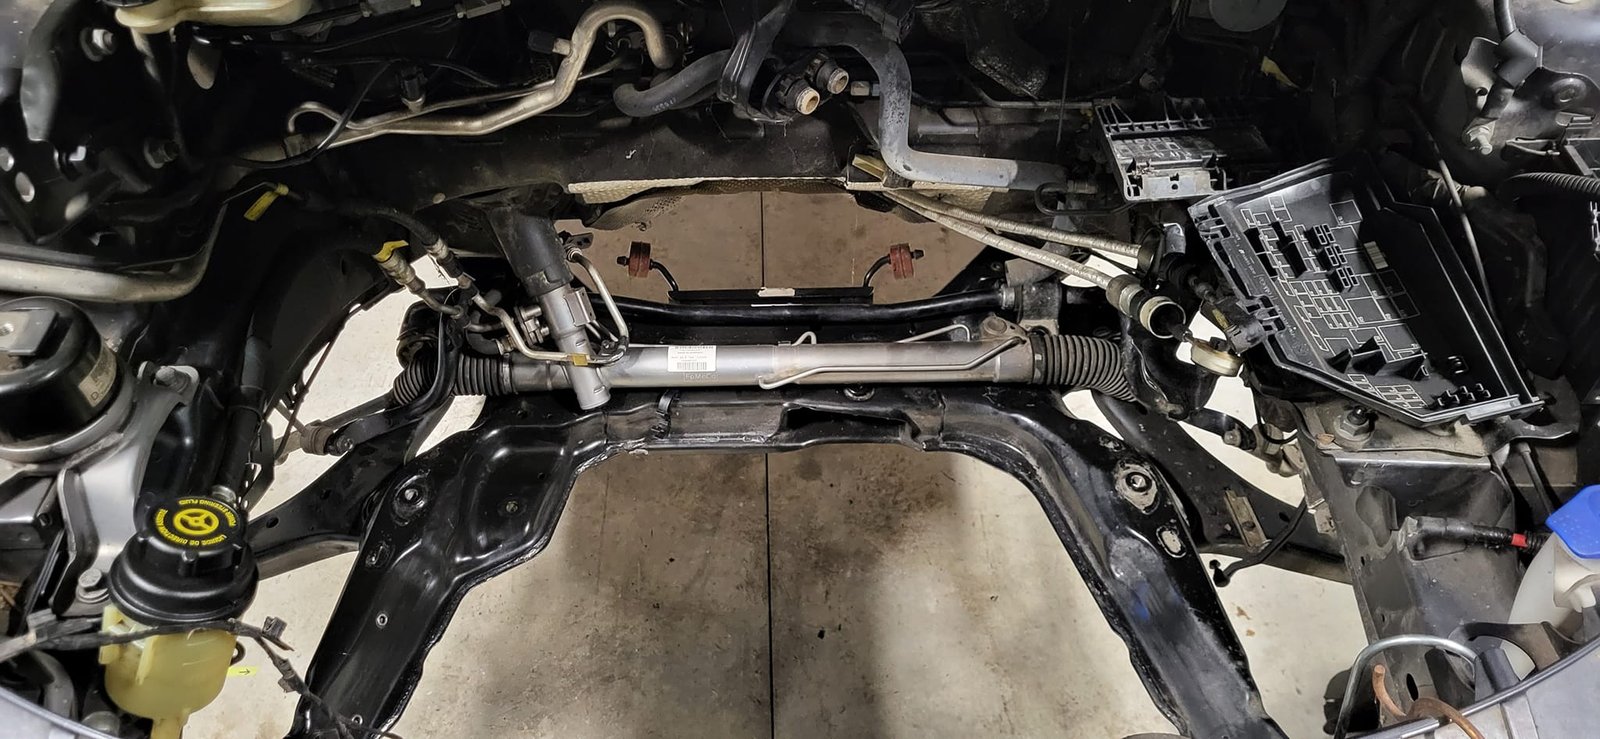
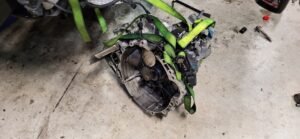
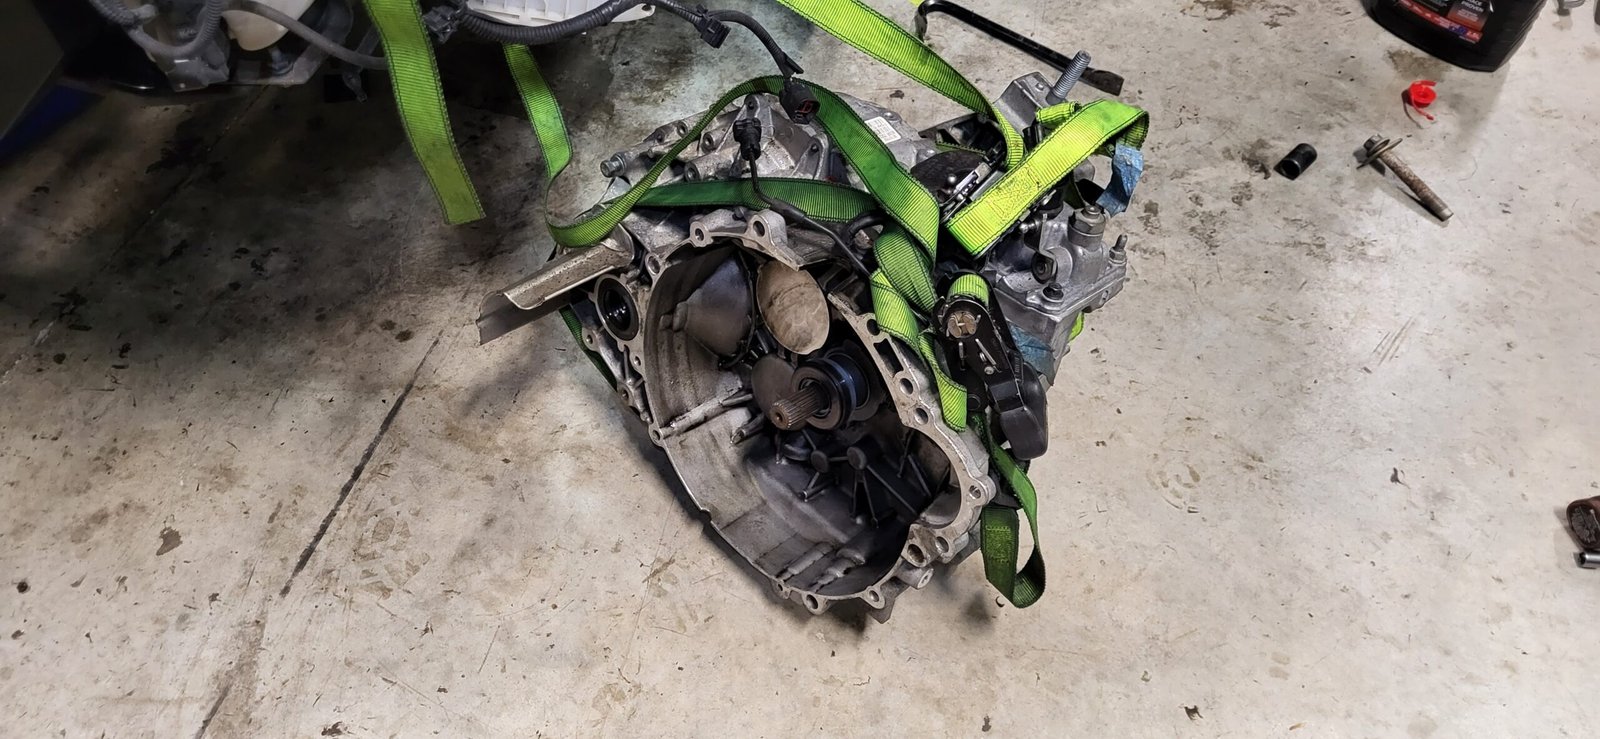
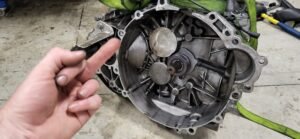
It was clearly terminal, so the next step was to pluck the engine from the bay, it was quite the ordeal and all in it was a 10hr job to get the motor on the ground and up onto a stand – by comparison it took just over 2hrs to remove the engine, box, loom, and ECU from the S13 and that was having never done it before. Being FWD you have 2 options, and I opted to remove the entire subframe and drop the complete engine and gearbox out the bottom rather than remove the front bar/AC/Radiator etc and go out the front, I was mainly trying to avoid re-gassing the AC but in hindsight that was another mistake.


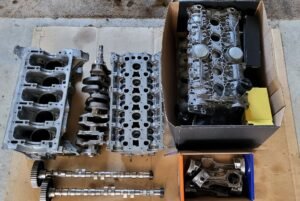


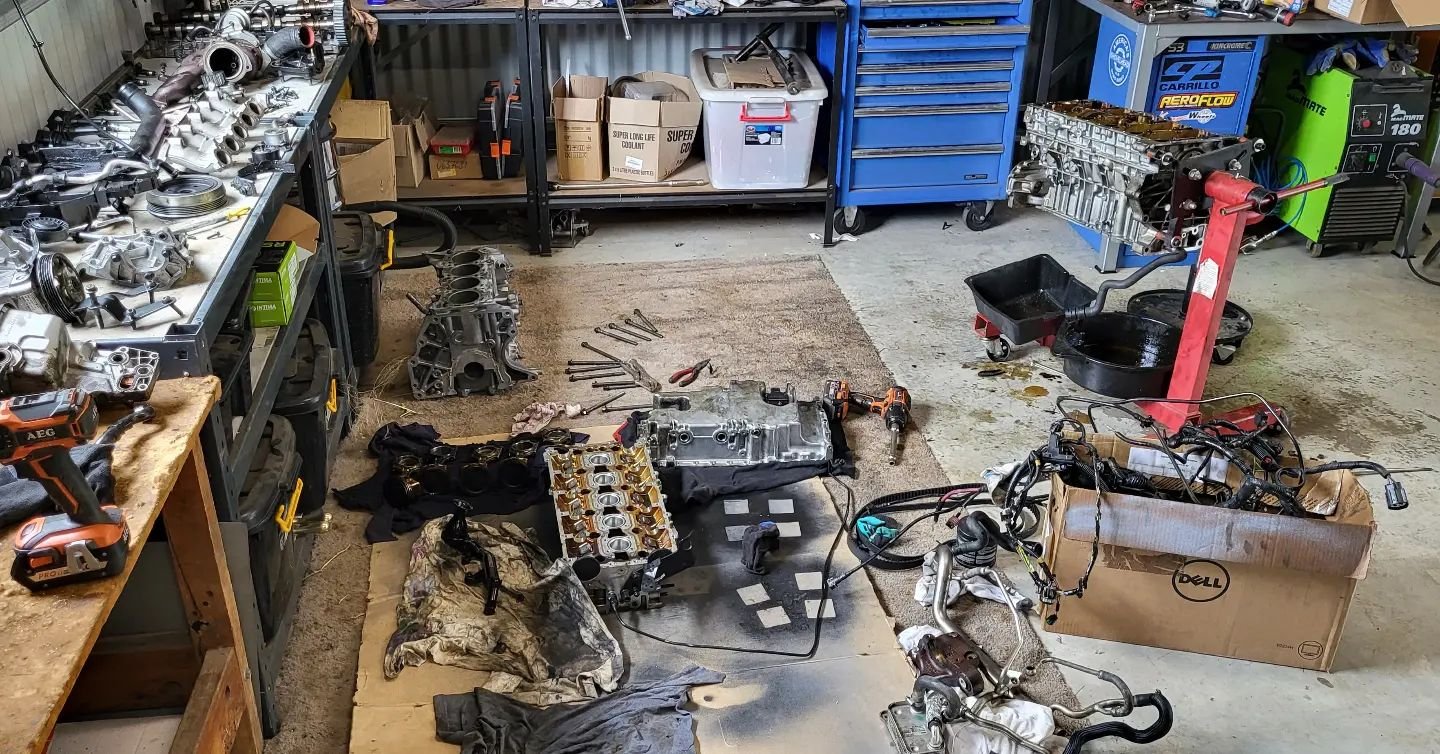

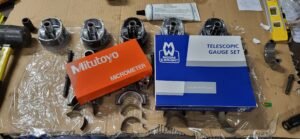
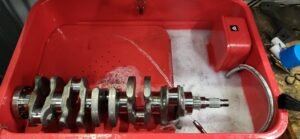
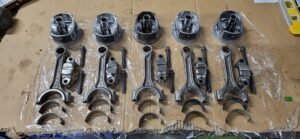
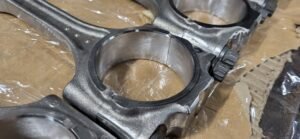
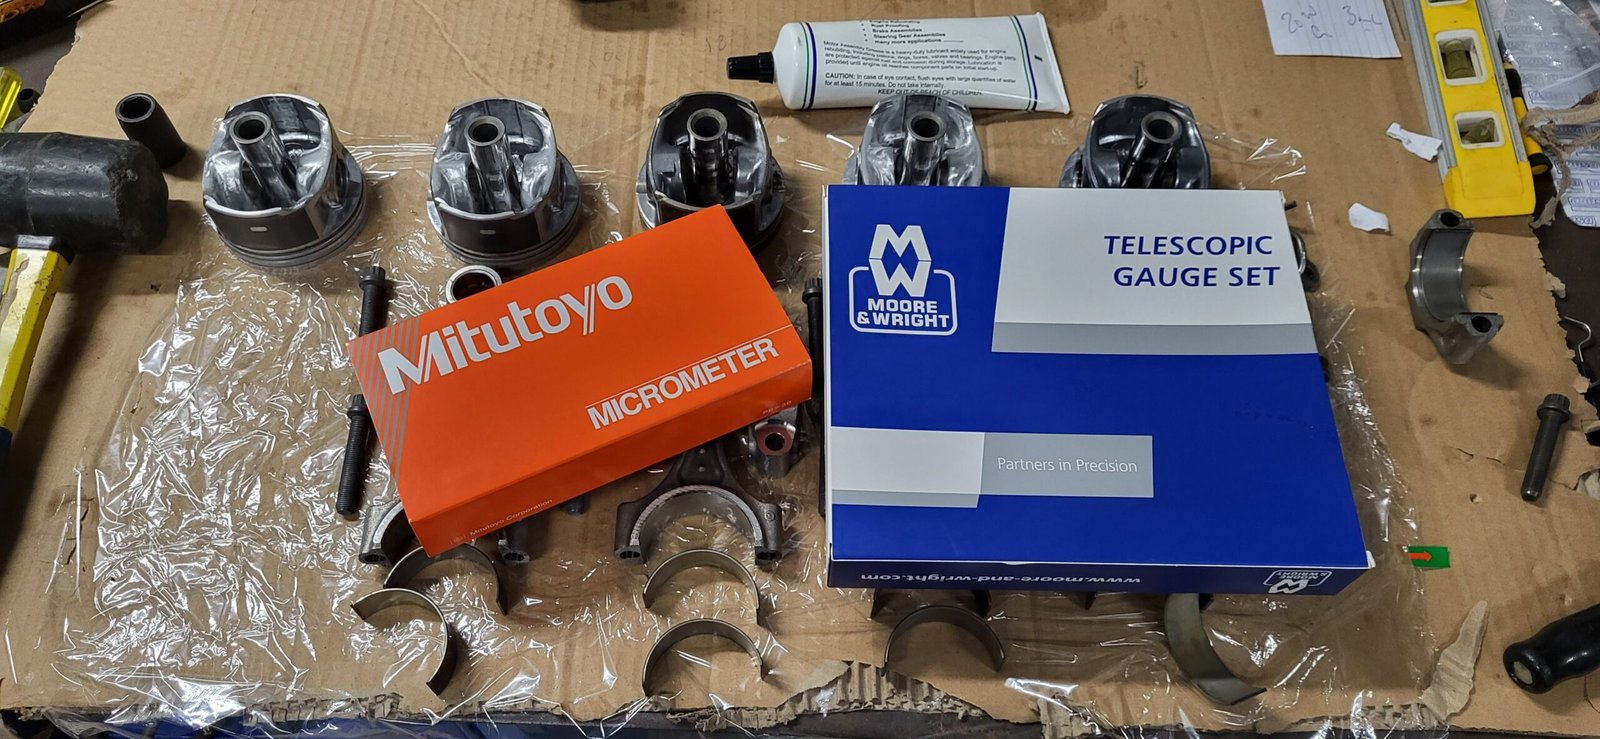
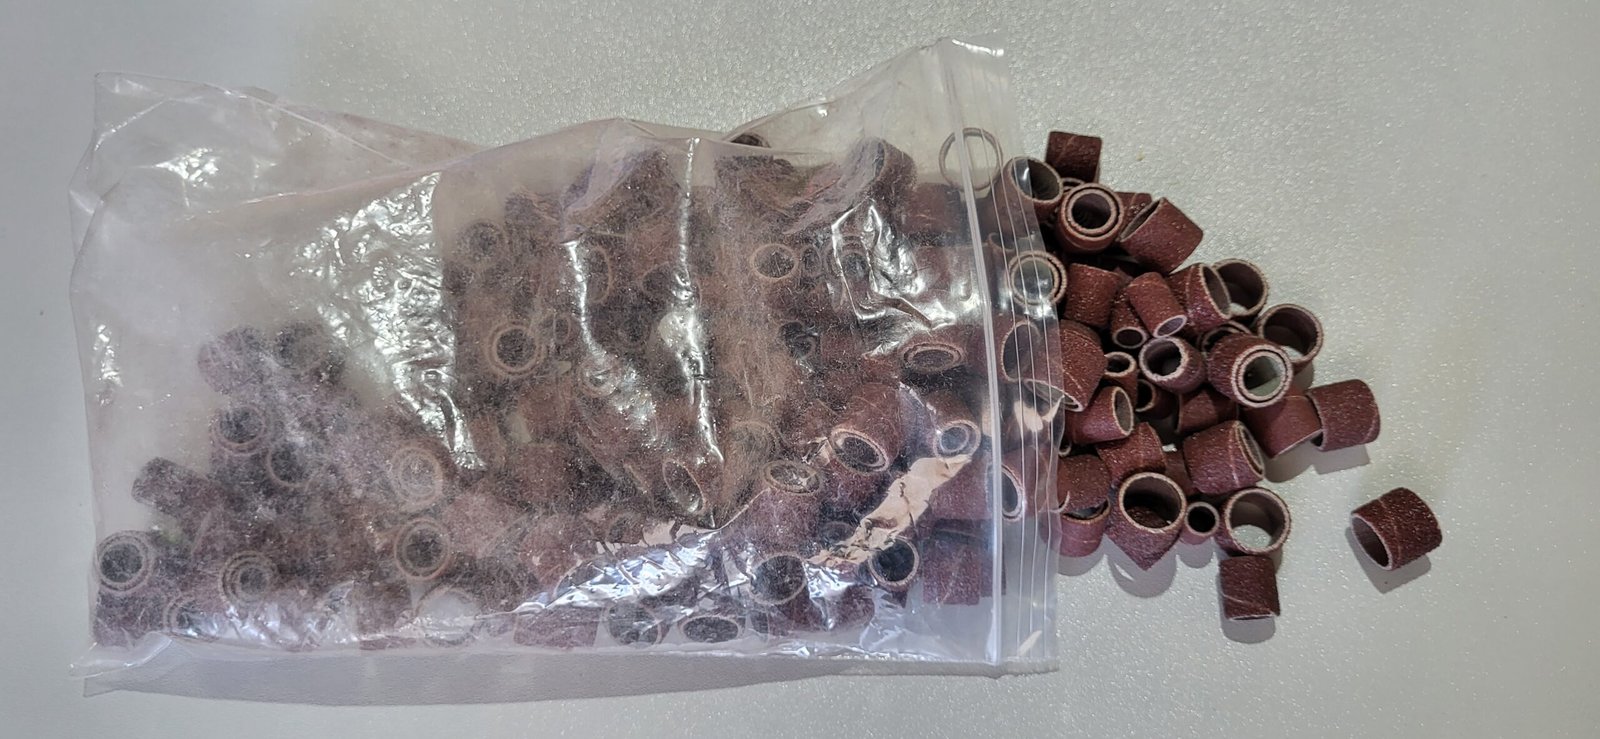
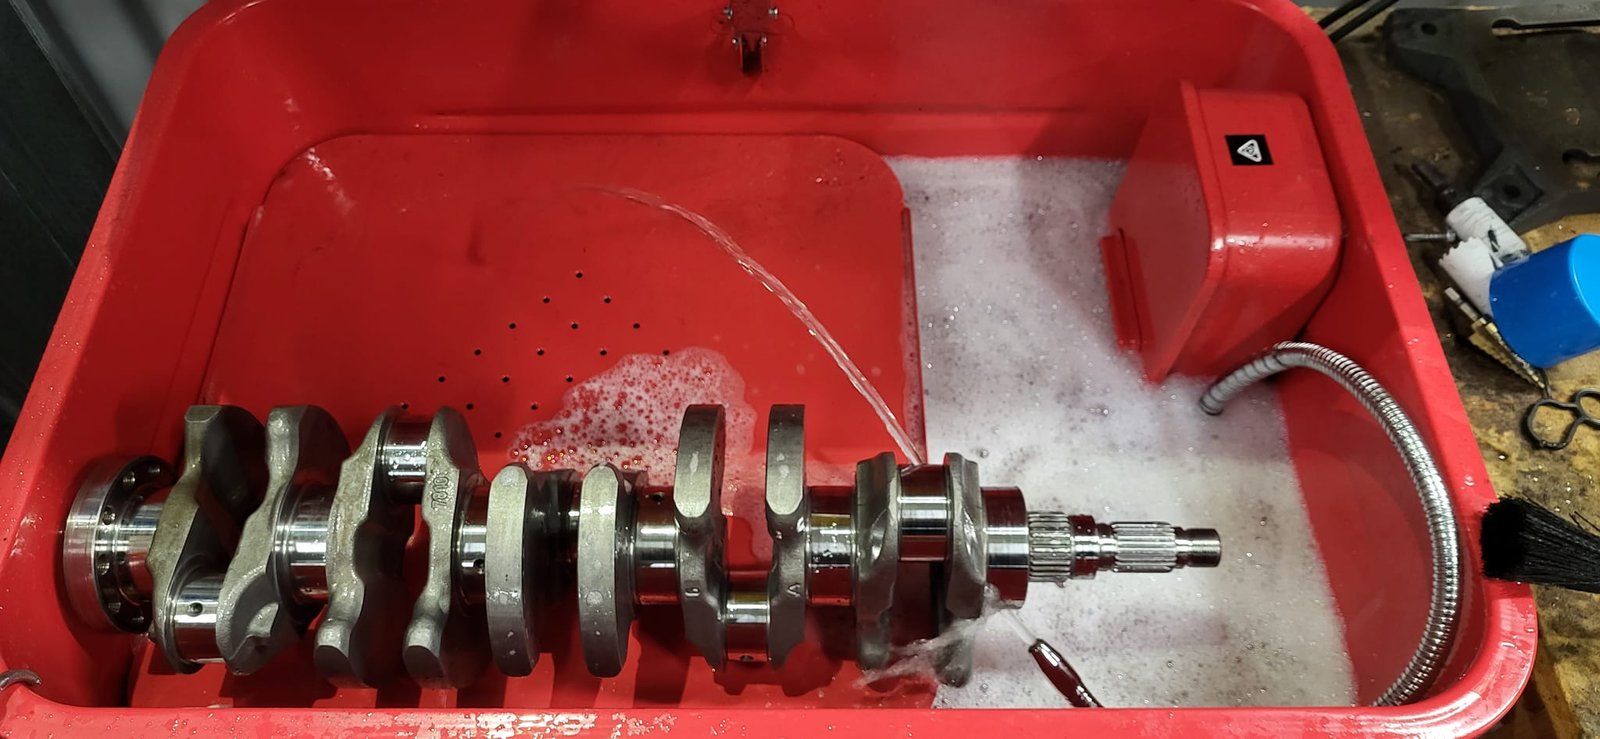
I got straight into stripping down the B5254T3 and sourcing a used rotating assembly to replace the crank and rods that were too far gone, the plan was to have the shop select the best pistons while everything else was in for necessary machining and cleaning. In the meantime, I got busy ordering rings, bearings, seals, and anything else that looked tired during disassembly, as well as a micrometer and other engine building tools, excitement was building.
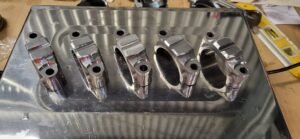
I dropped everything to the workshop and chipped away at general clean up and repair, before long everything had been cleaned, machined, pistons selected, and bearing sizes confirmed – it was time to get to work!
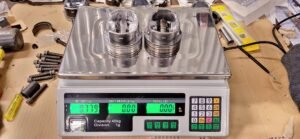
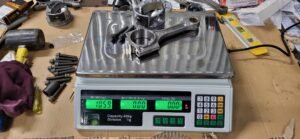
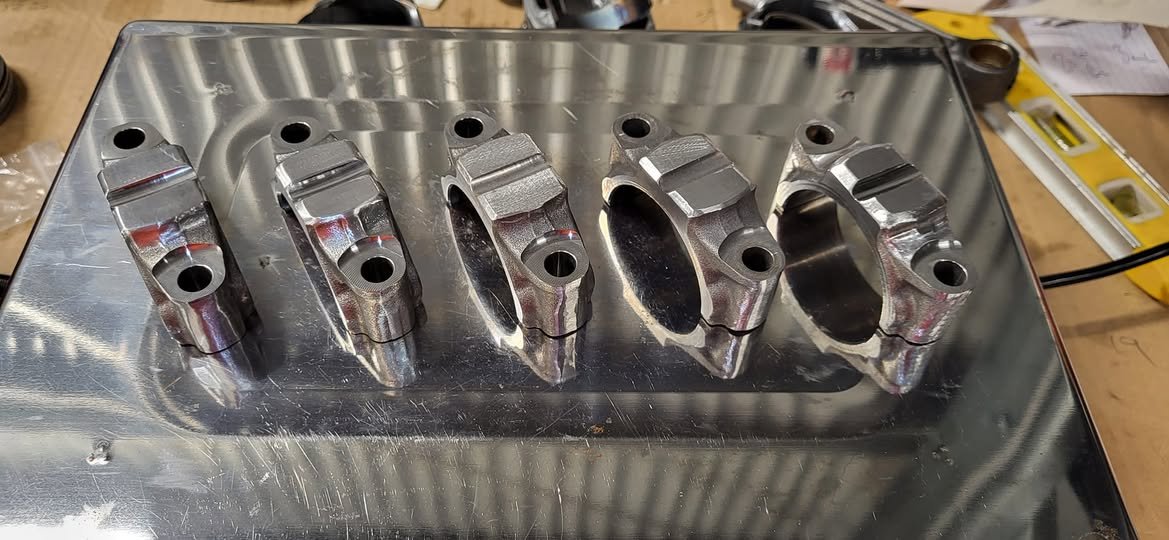
I’d been advised, never assume the machine shop has done everything perfectly, you are responsible for the outcome so triple check everything yourself. I wanted to learn so that was fine with me, I had a brief play with plastigauge, but quickly realised the micrometer and telescopic bore gauges were for more accurate and repeatable for me, a shock to absolutely nobody. At this point I made the call to have a quick look at the weights of the piston/rod components and was surprised to see up to 8 grams difference between the highest and lowest, moving parts around brought that down to 5g at best. Worse than this, something was off with the measured clearances, but more on that in a moment.
The workshop said 3 grams variance was fine for a street engine, but I thought 1 gram sounded better to me and set about delicately removing material from the cast rods and pistons. It was extremely tedious and took so much longer than I expected, it gave me newfound respect for engine builders balancing high performance engines with even tighter tolerances. After many hours, I did eventually hit the target goal of 1 gram difference, not sure I’d go that far again for a stock refresh.


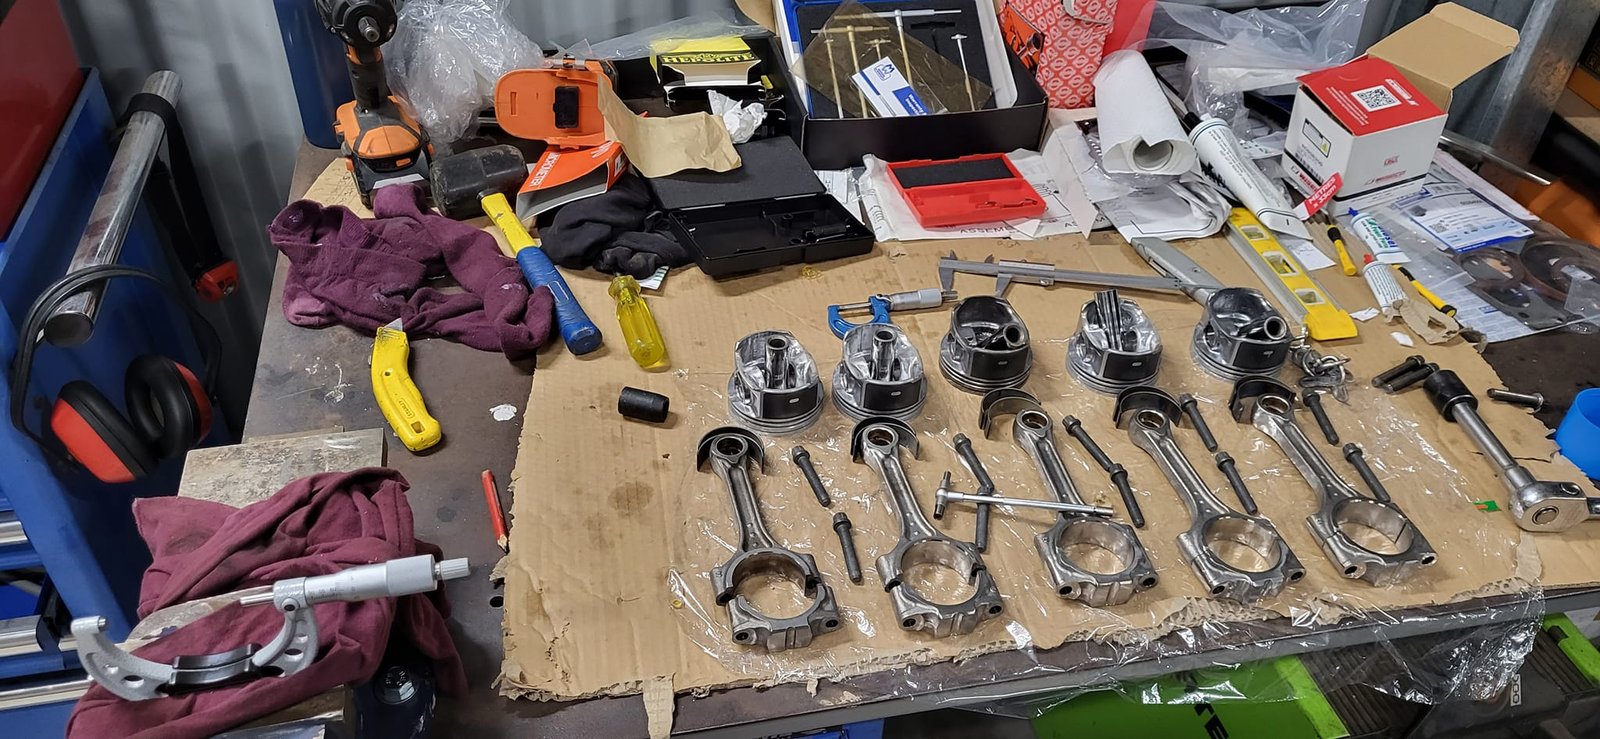


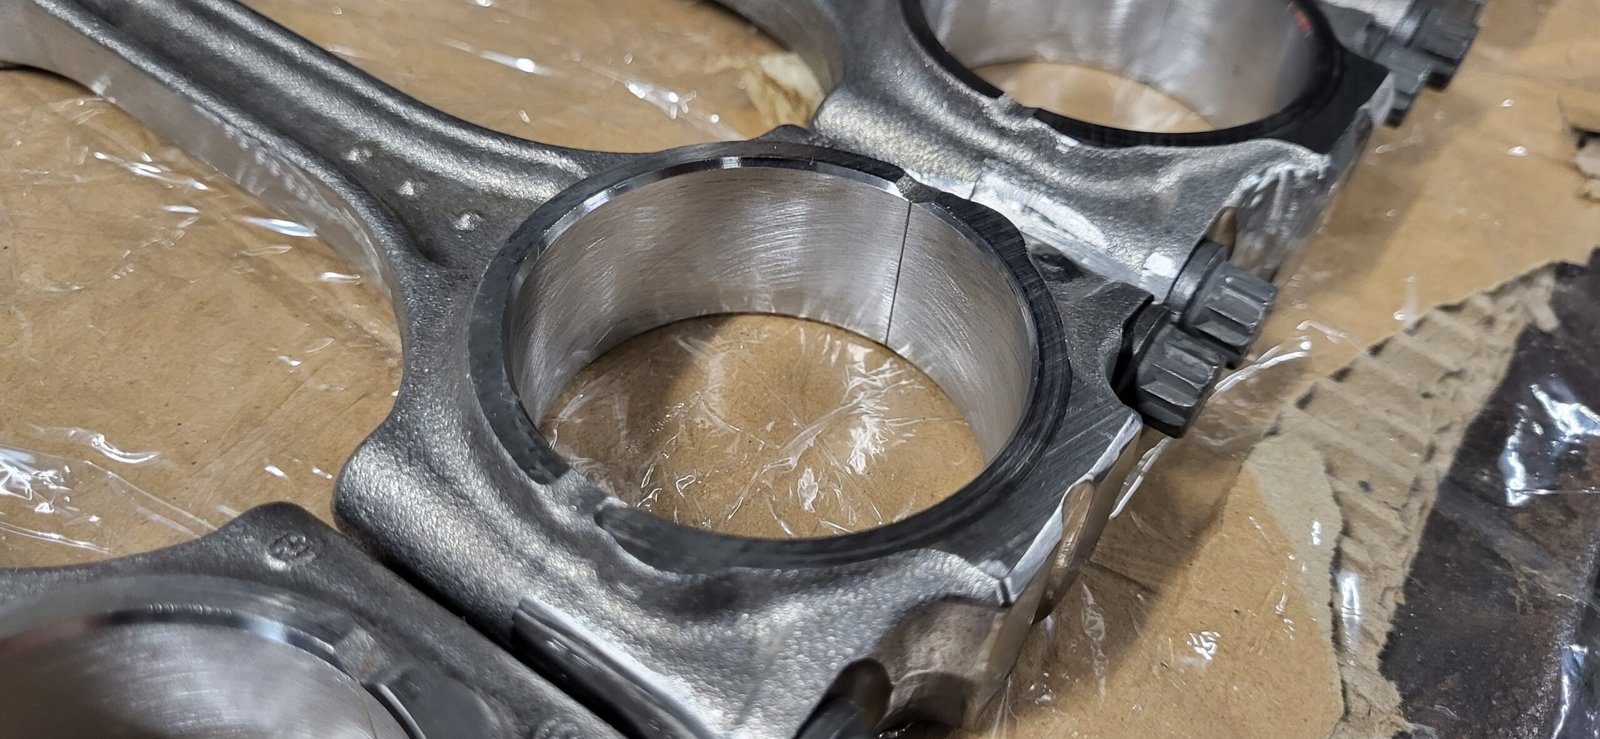
Satisfied with the weights, it was time to return our attention to those clearances, something wasn’t right as 2 big ends consistently measured tight enough to be a real issue on startup.
As this was my first engine build, I spent the time ensuring I was using the tools correctly, following a repeatable process, and even went as far as monitoring the ambient temp in the shed to rule out the possibility that this was a factor as it was winter at the time.
In the end, it didn’t sit right with me, and I took the crank and rods back to the machine shop to have all my measurements confirmed. The results were vindication, 2 of the rods were slightly oval and should have been caught during the initial check, all rods were honed, measured again, and came up to spec – excellent.
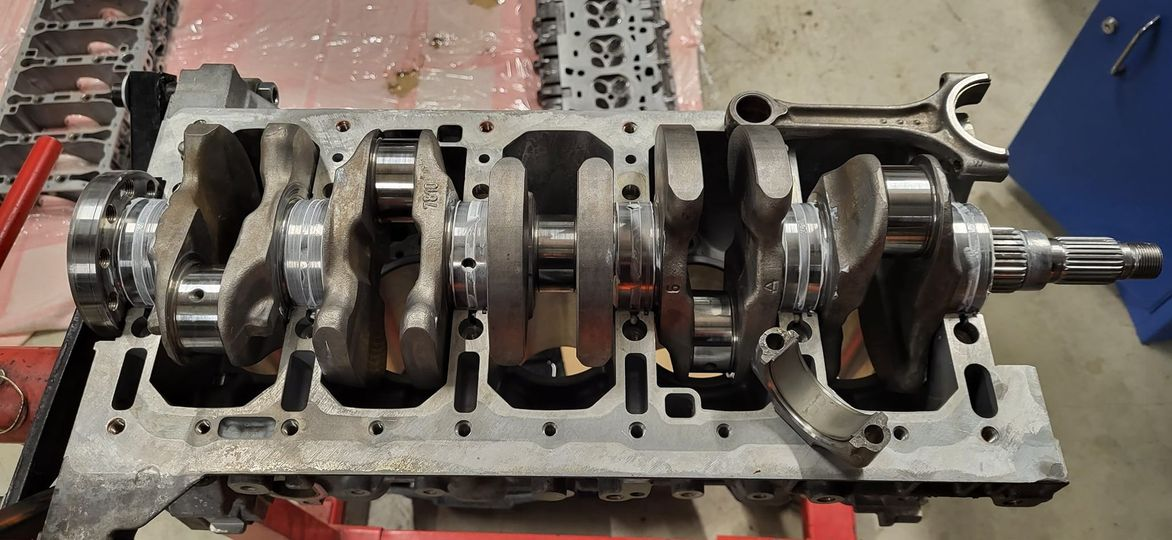
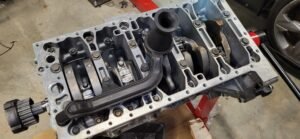
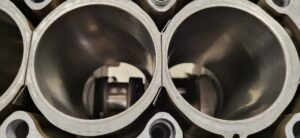
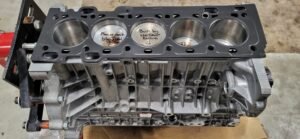
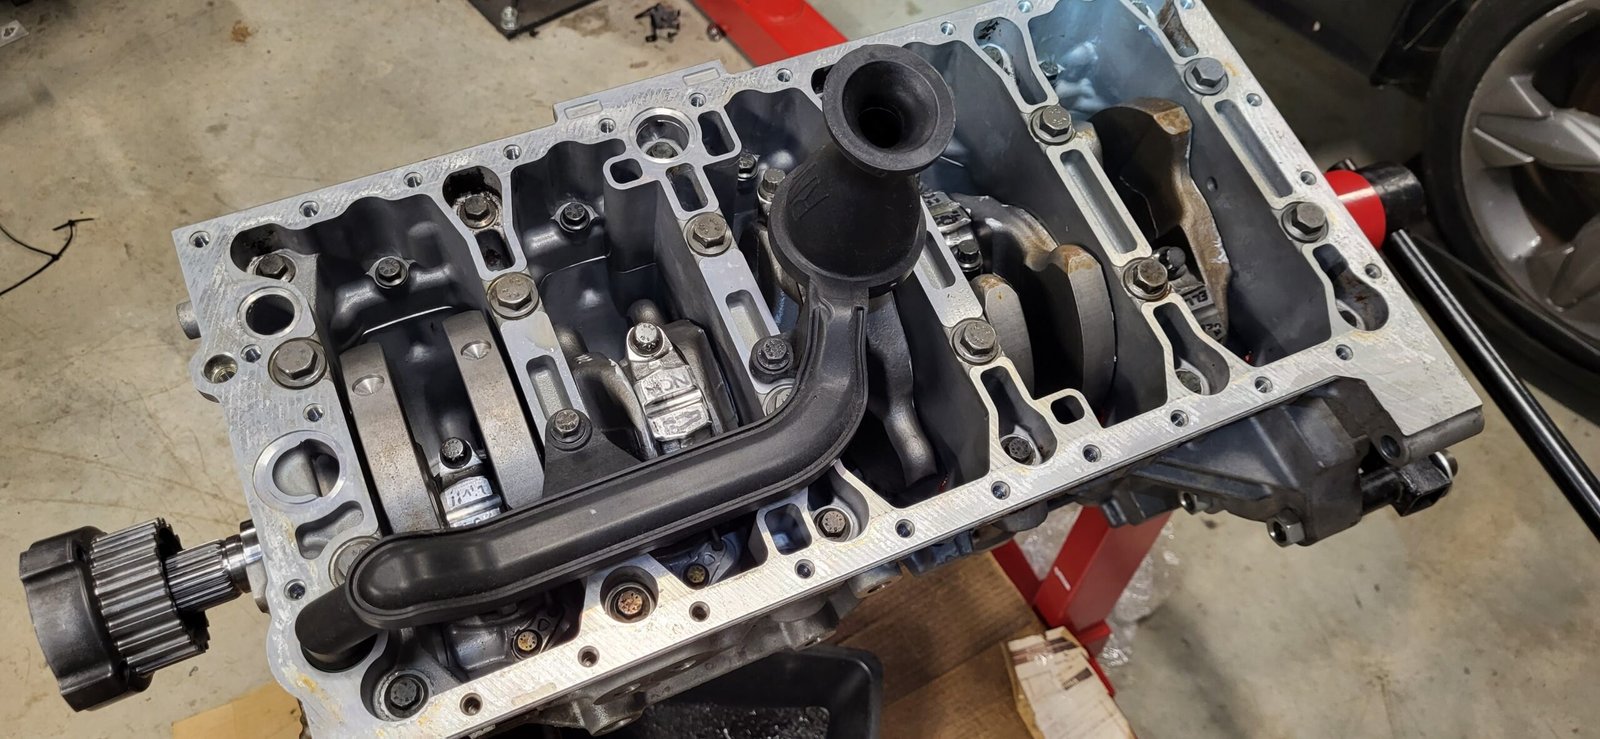
Once back to the shed, I got straight into assembling the bottom end, making the call to run a mix of H and HX ACL big end bearings to achieve the most consistent clearances I could without needing to linish the journals or bearings. The mains were no trouble at all with a single size yielding very consistent results across the board and I was very pleased to feel it rotate smoothly by hand for the first time. Final clearances were 0.063 – 0.064mm on the mains and 0.0425 to 0.046mm on the big ends – nicely within the factory specs.
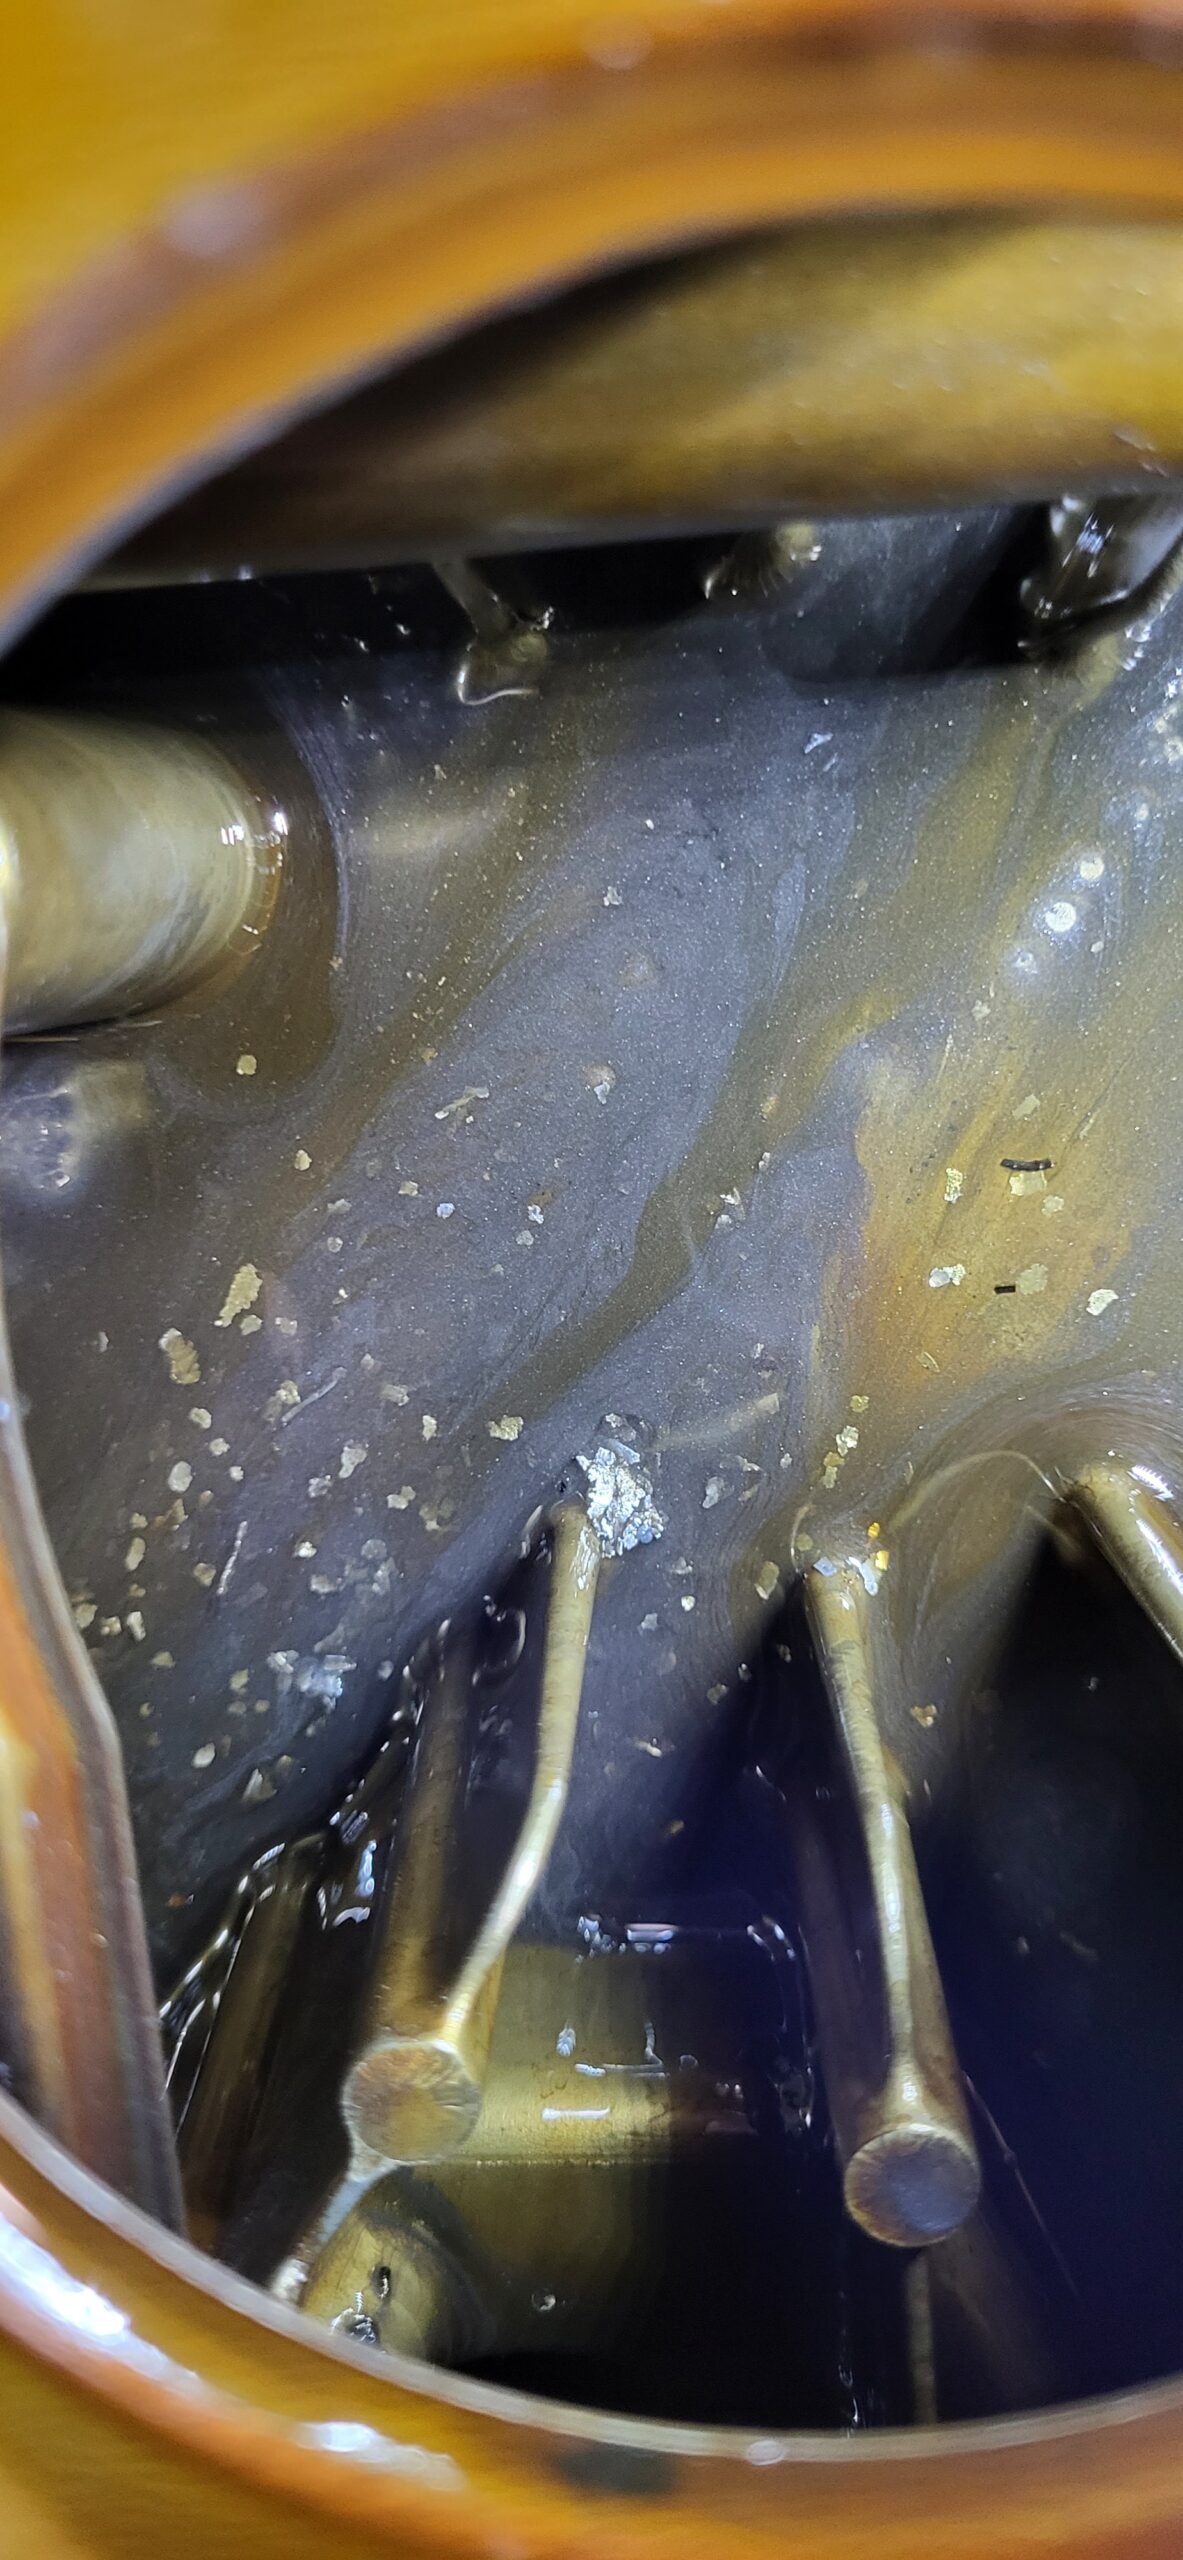
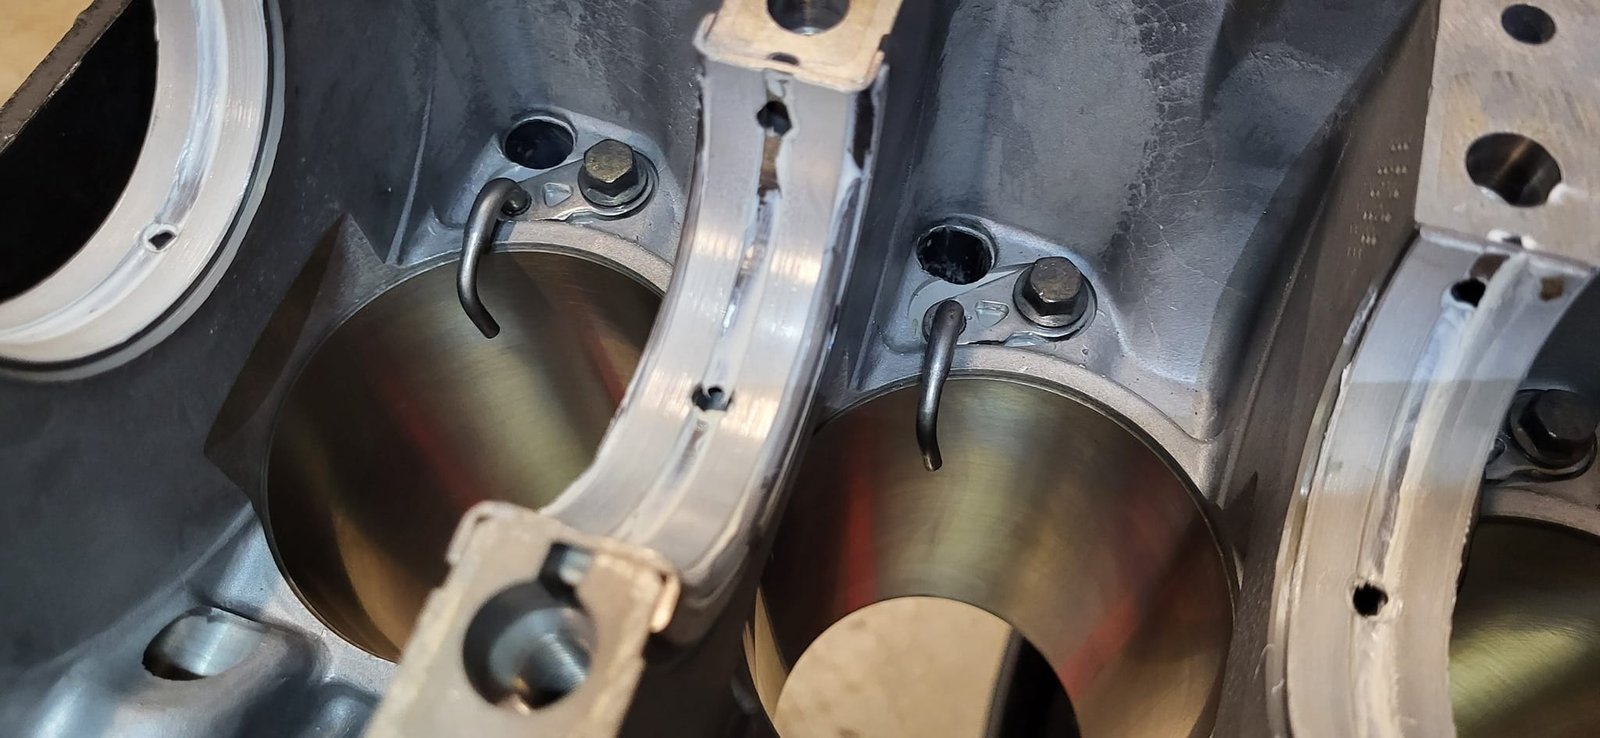
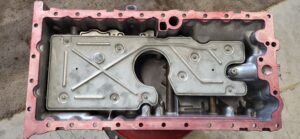
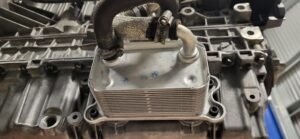
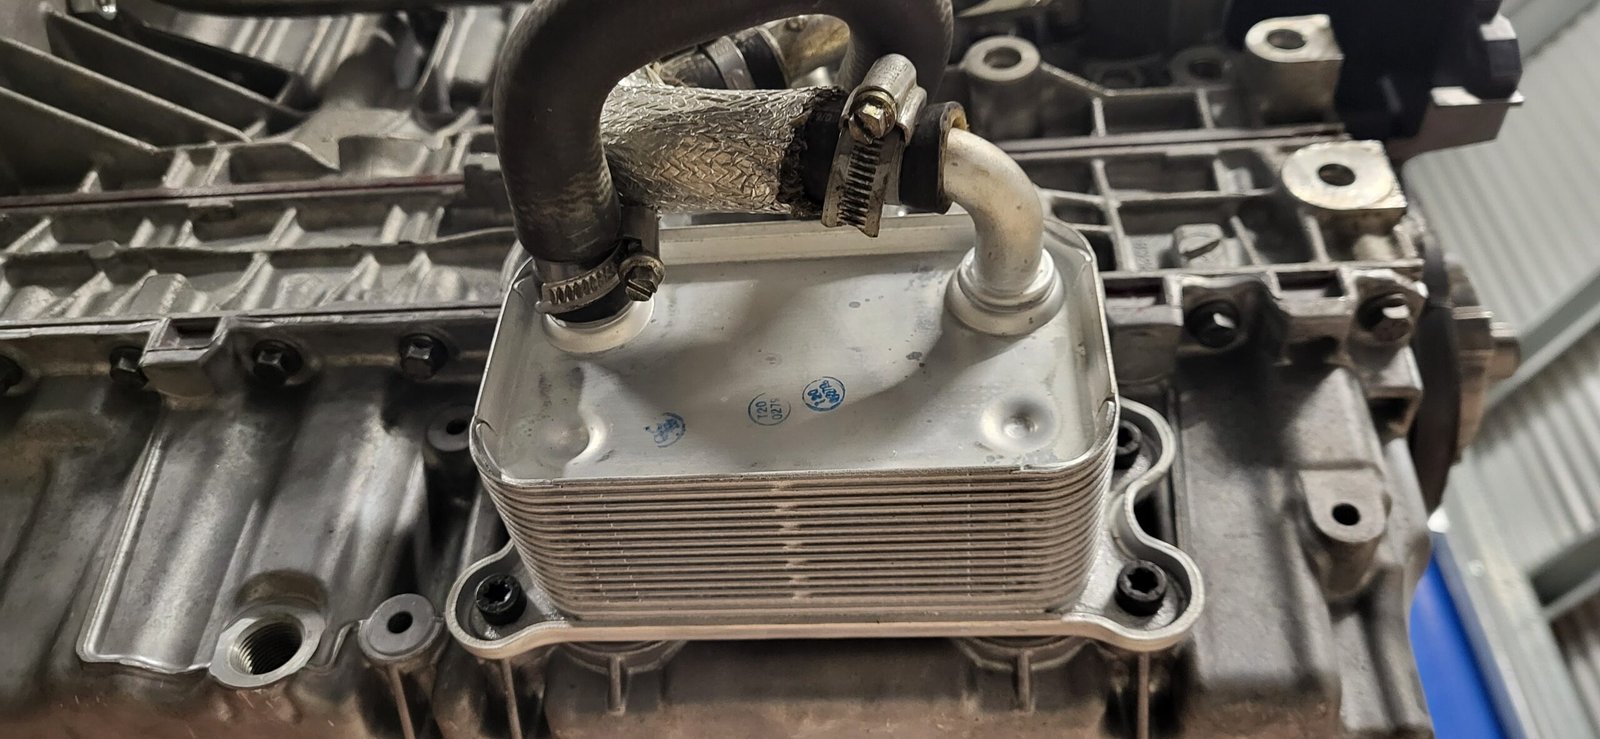
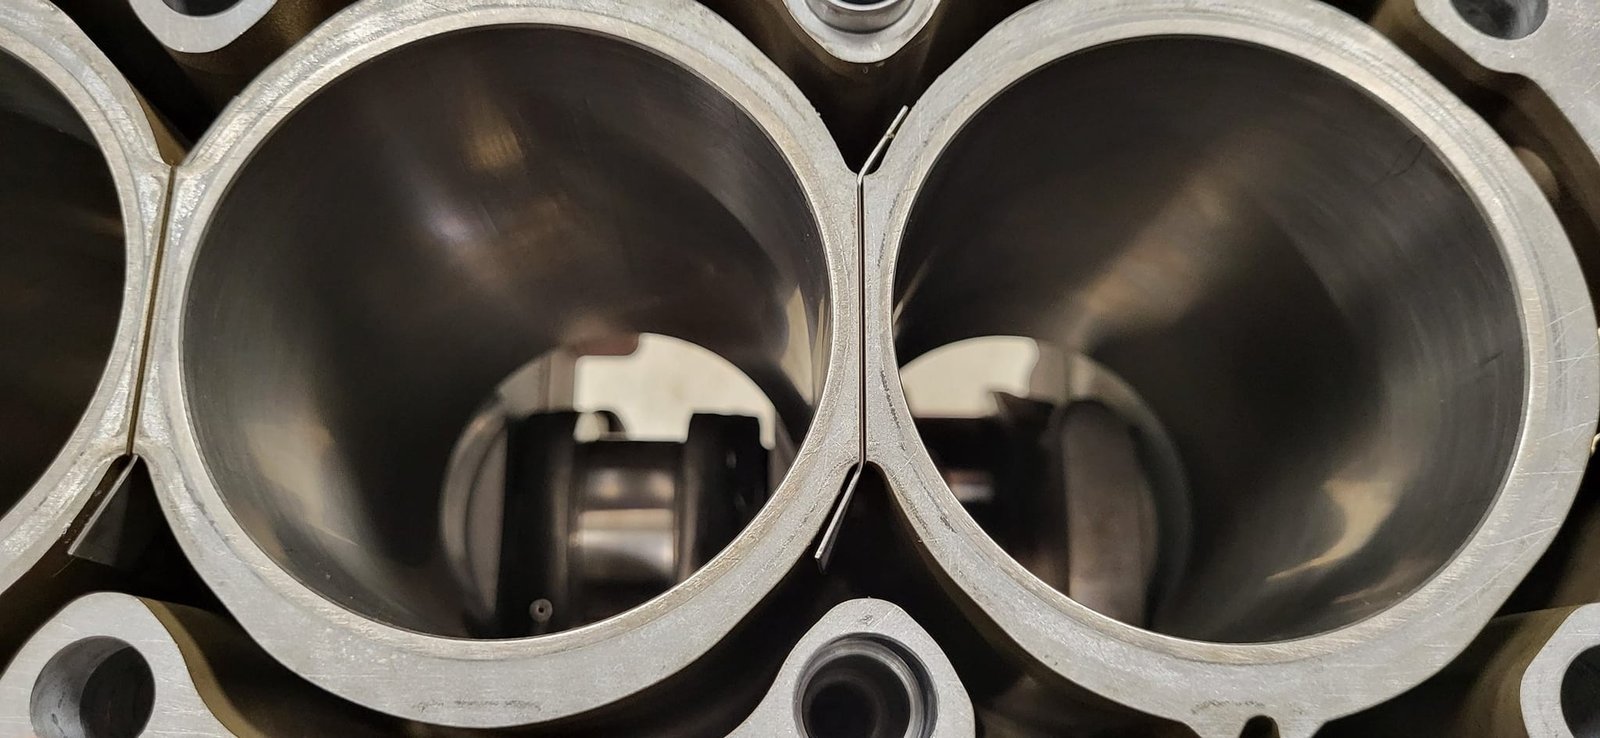
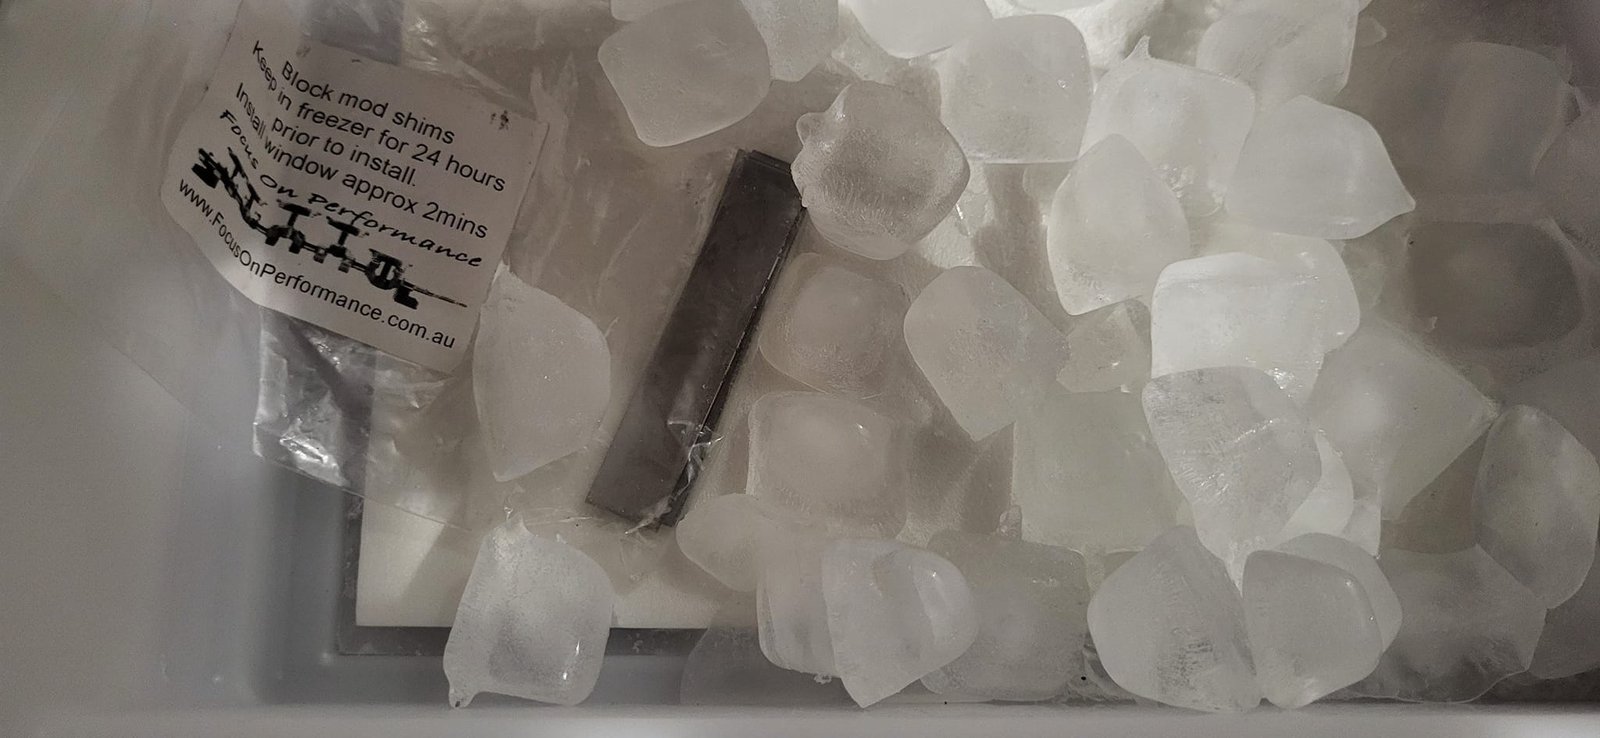
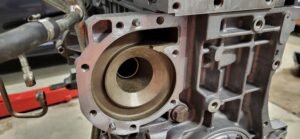
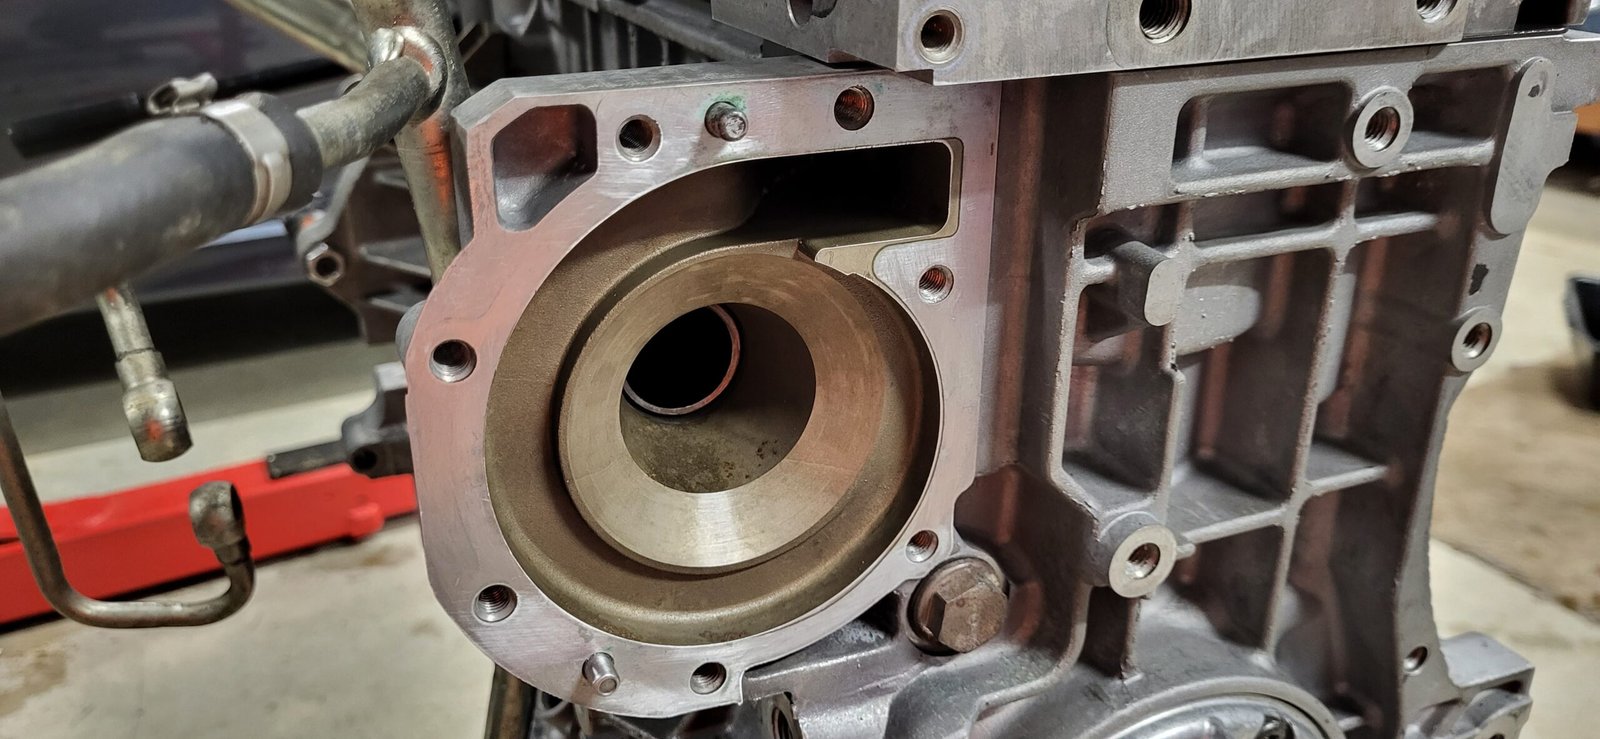
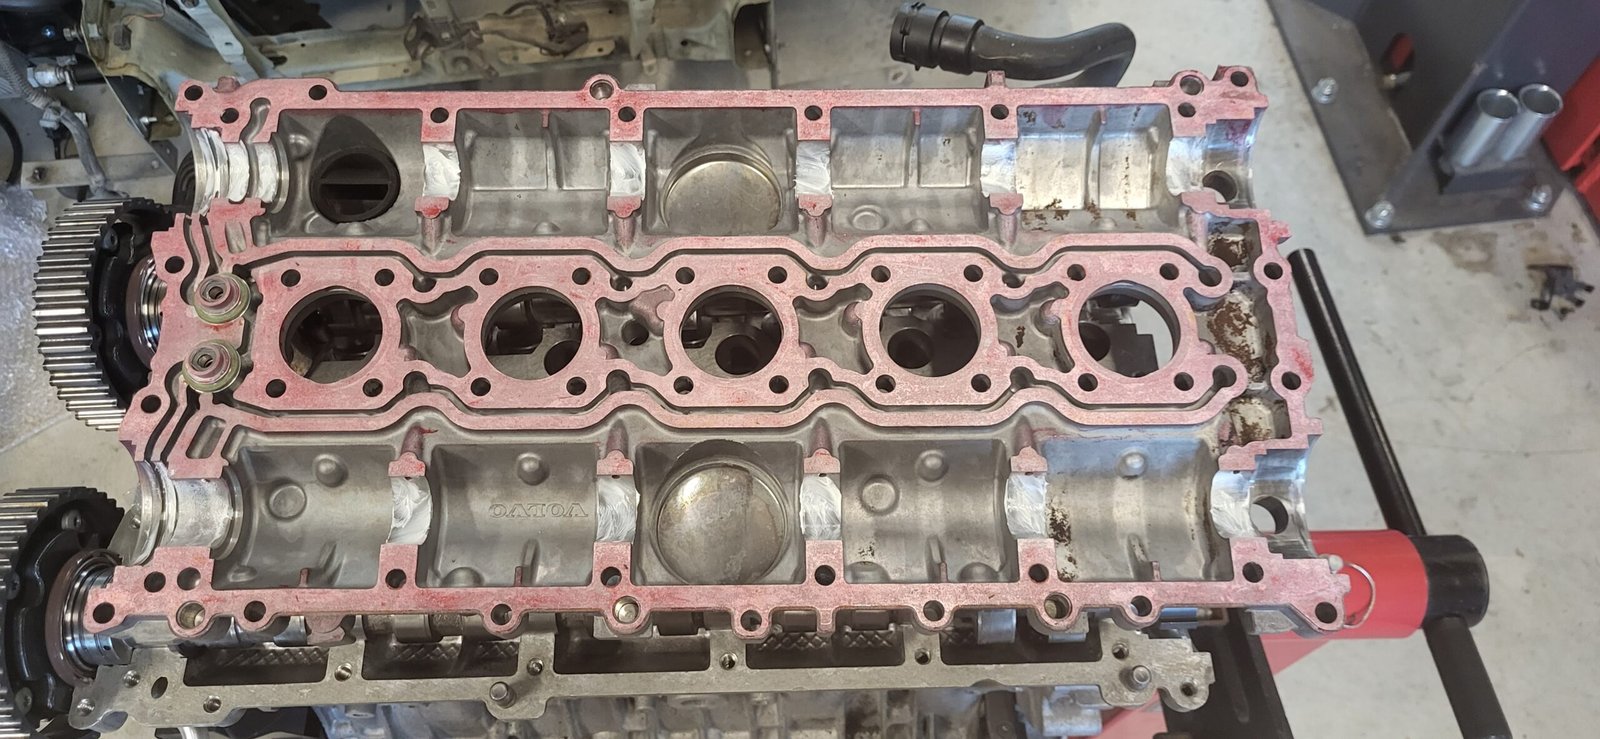
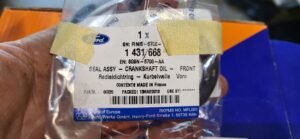
The build continued at a decent pace as the bottom end was soon buttoned up with everything measuring up nicely. I went a step further by adding shims between the liners, a strengthening mod, and by opting for a new RS oil cooler for the extra headroom and also to ensure no debris from the old oil cooler would cause us any issues. I had my first experience with Volvo’s anerobic sealant as I popped the last few seals in place and fitted the sump, not a fan.
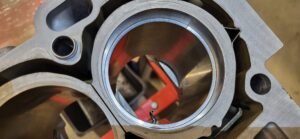
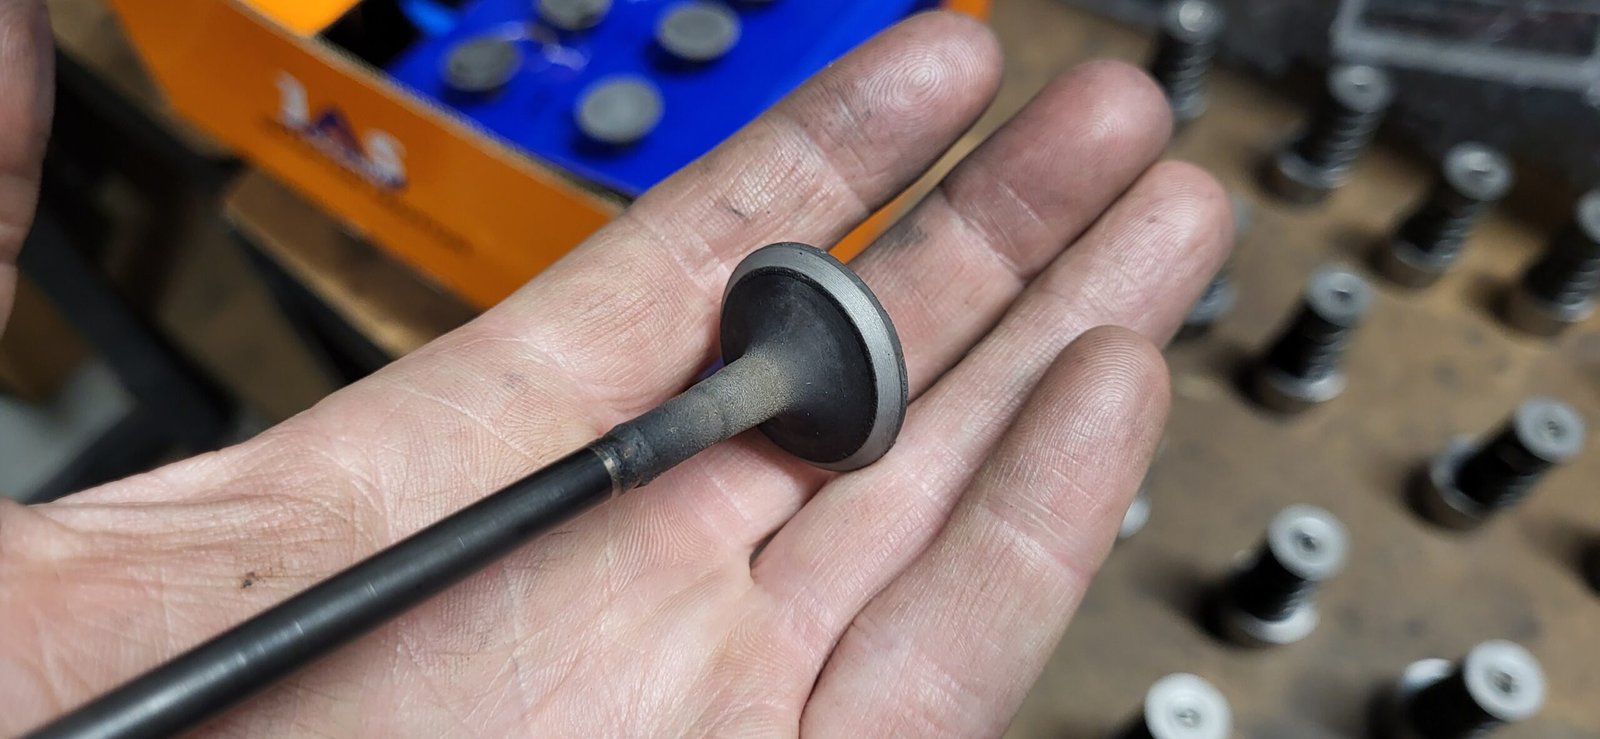
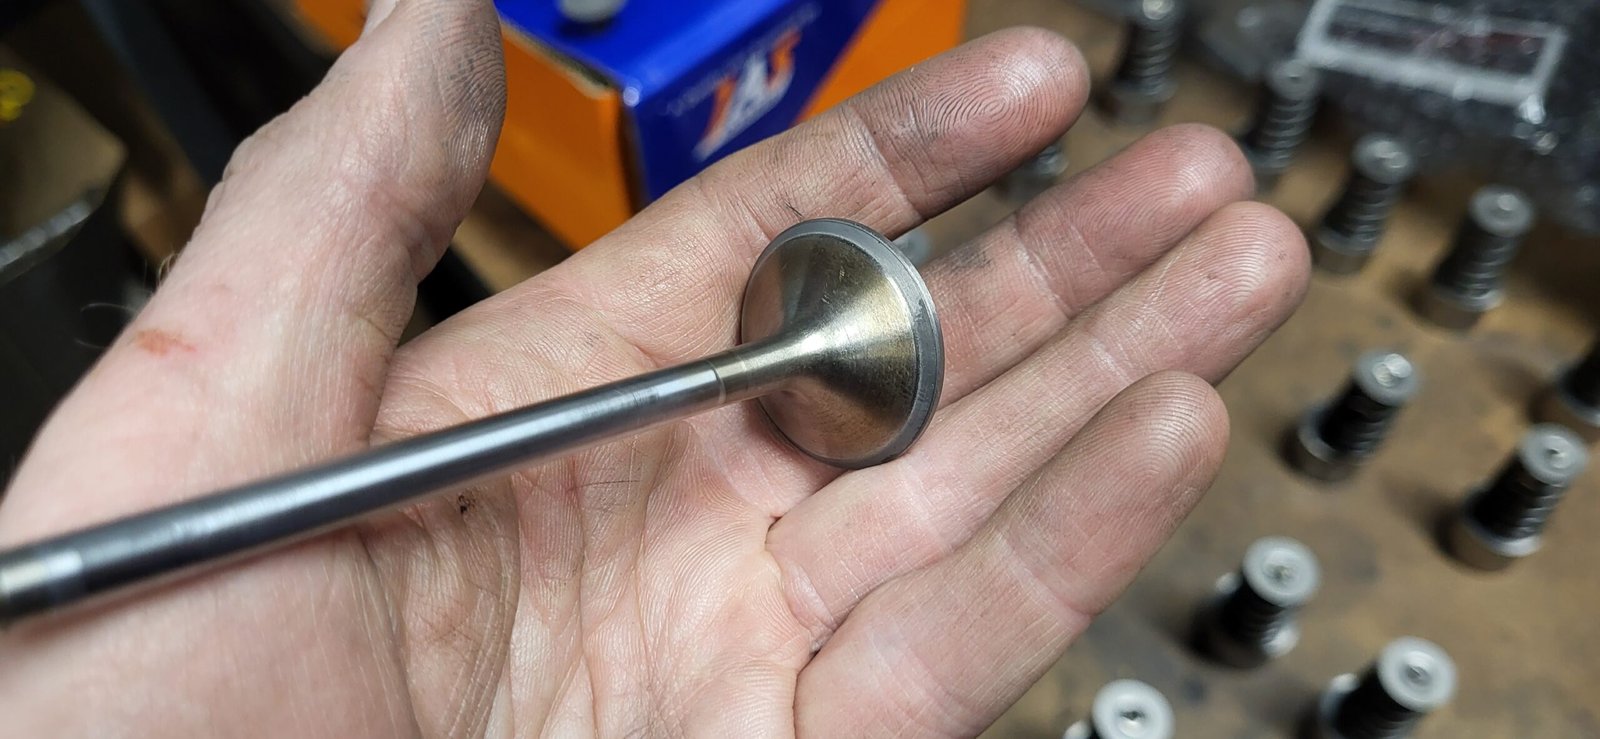
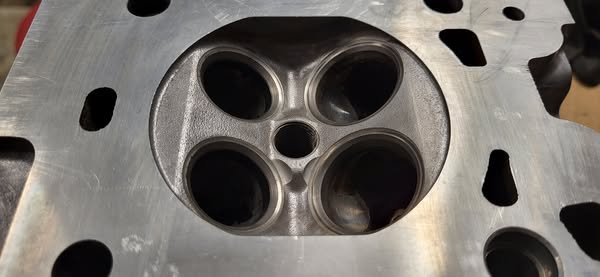
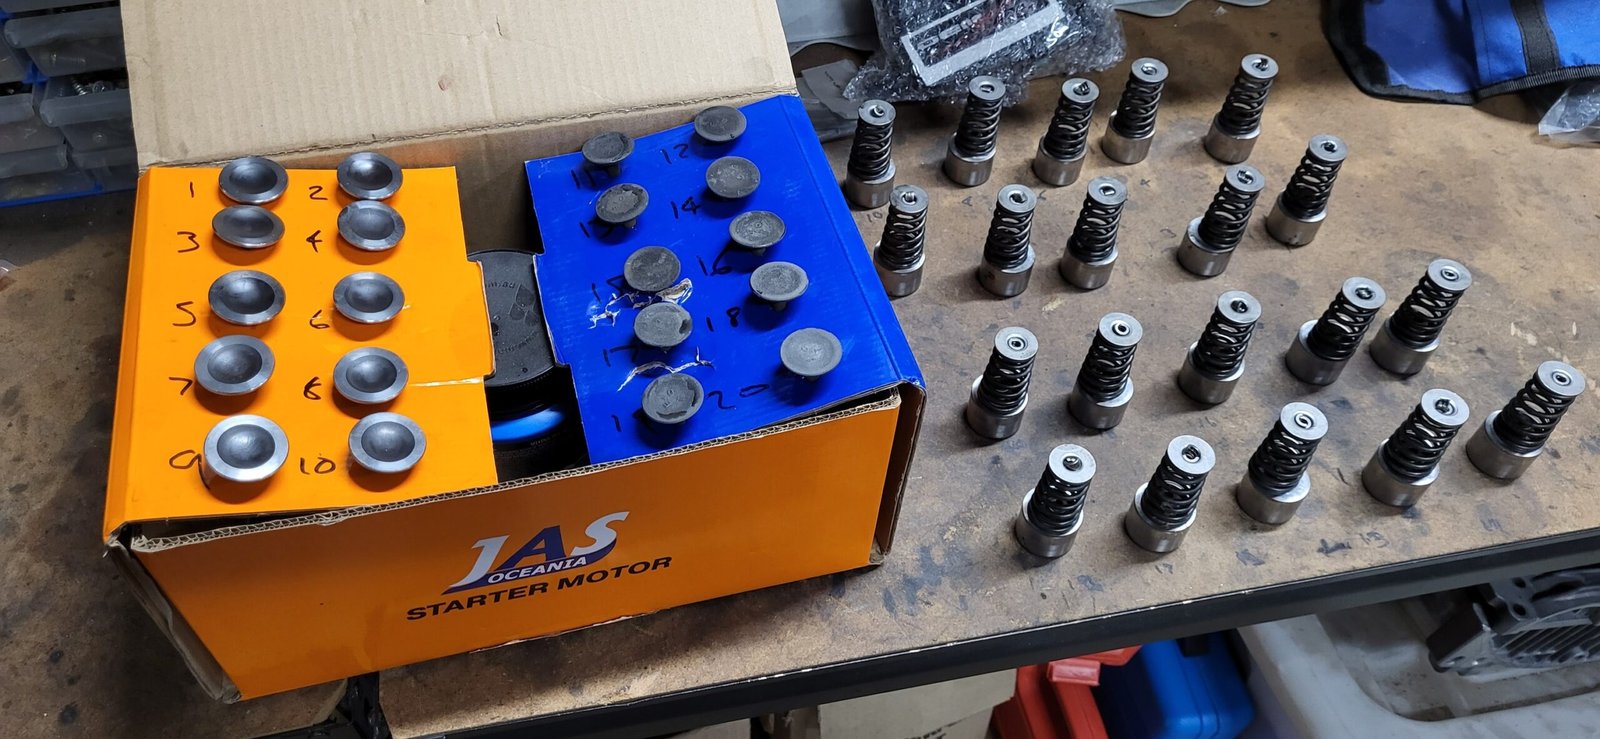
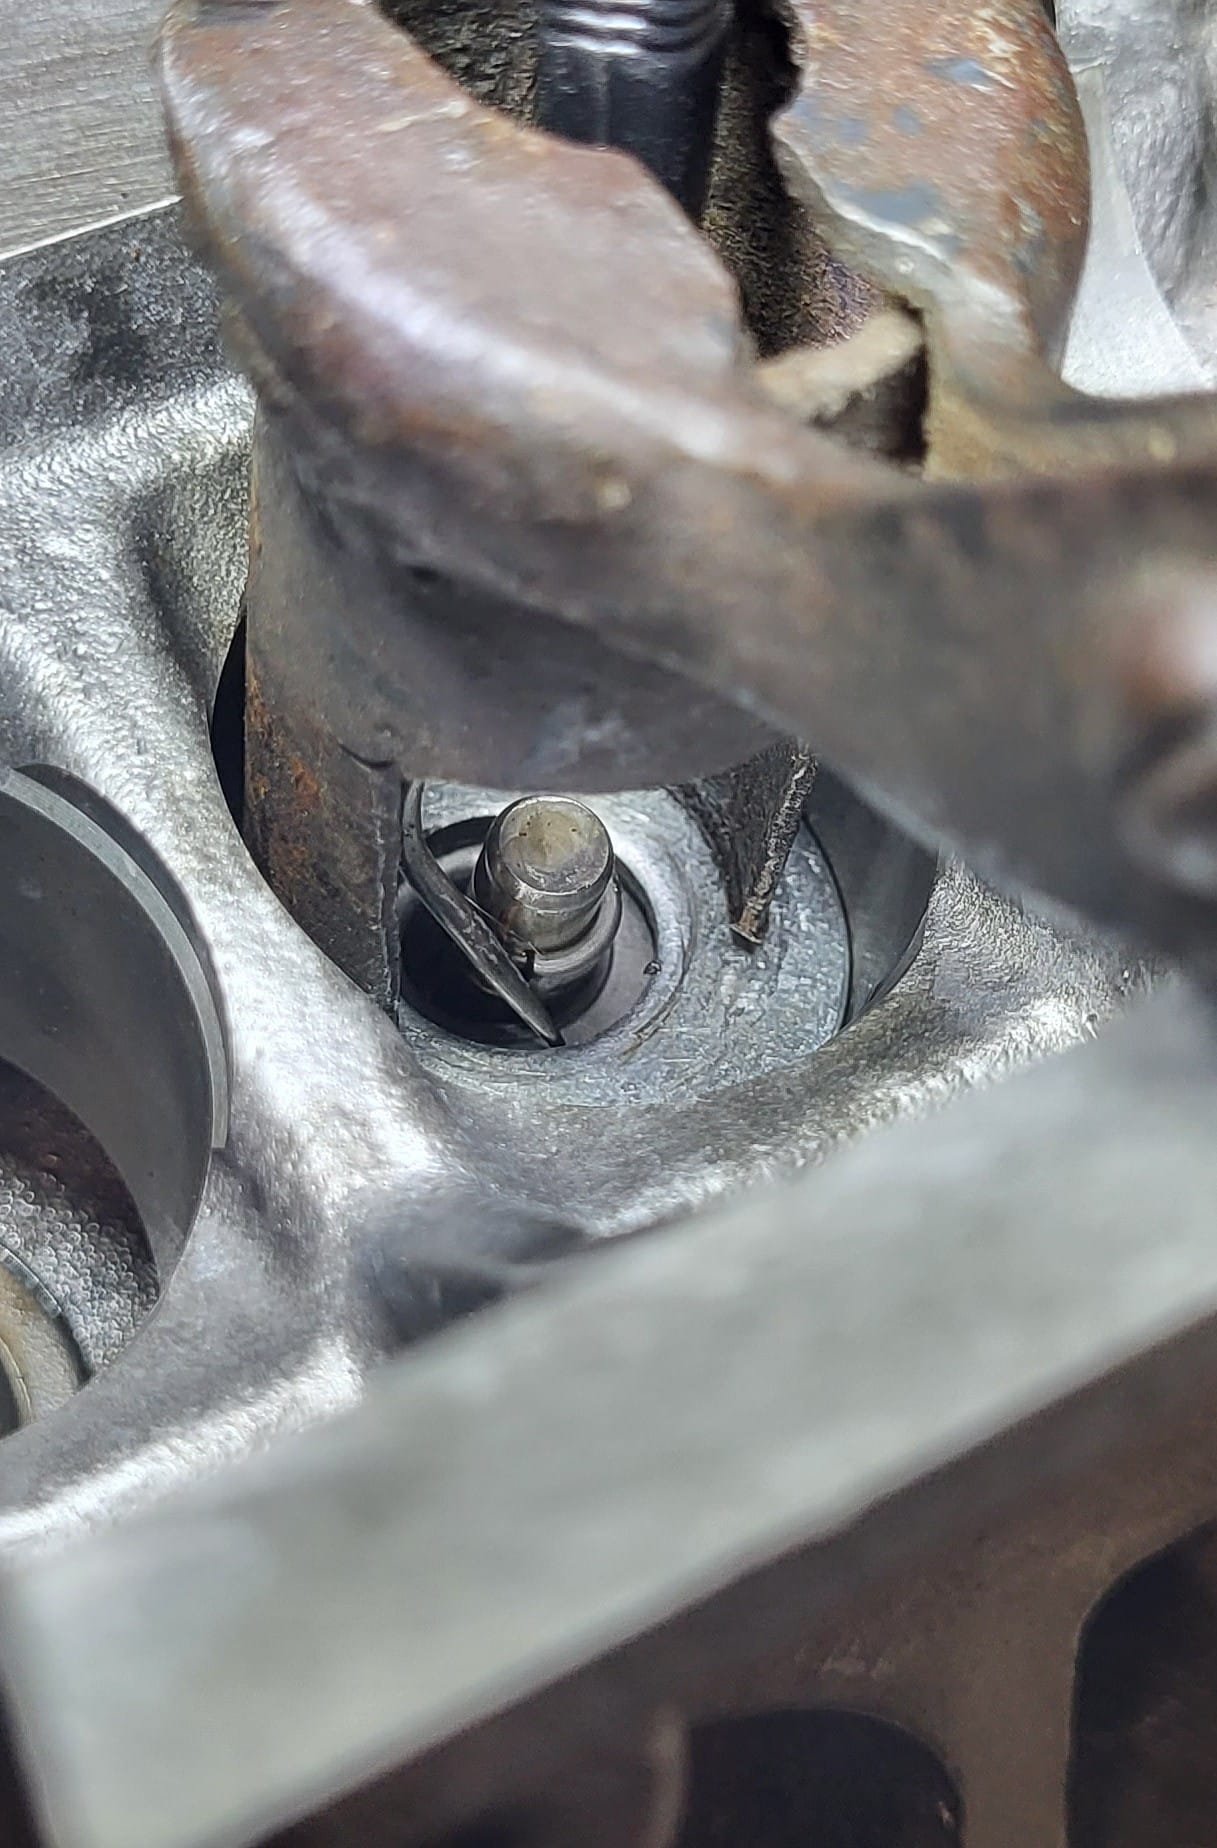
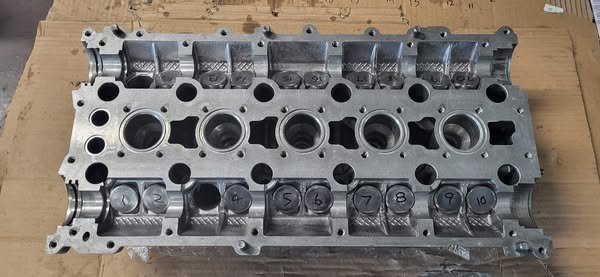
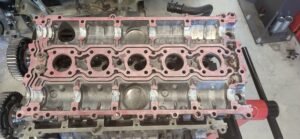
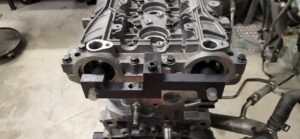
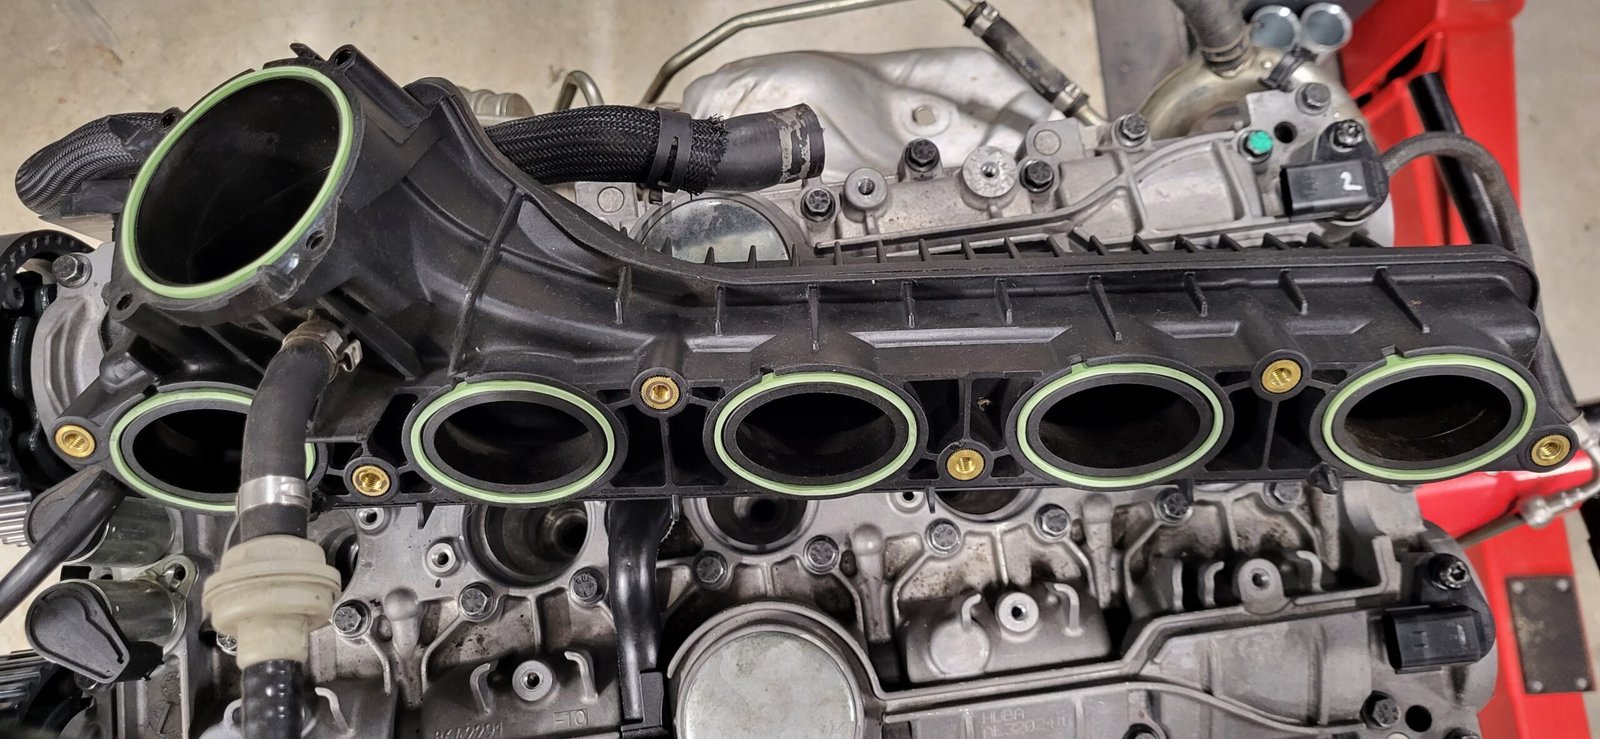
The next major hurdle appeared when it was time to install the head. I had intended to fit new manifold studs, pop some new valve stem seals in, check the lash, and run it as it had been given the all clear by the workshop when it was being cleaned and machined. However, it was very quickly apparent that lash was well outside of spec, with the head having likely never been off the car in its 236ks of life.
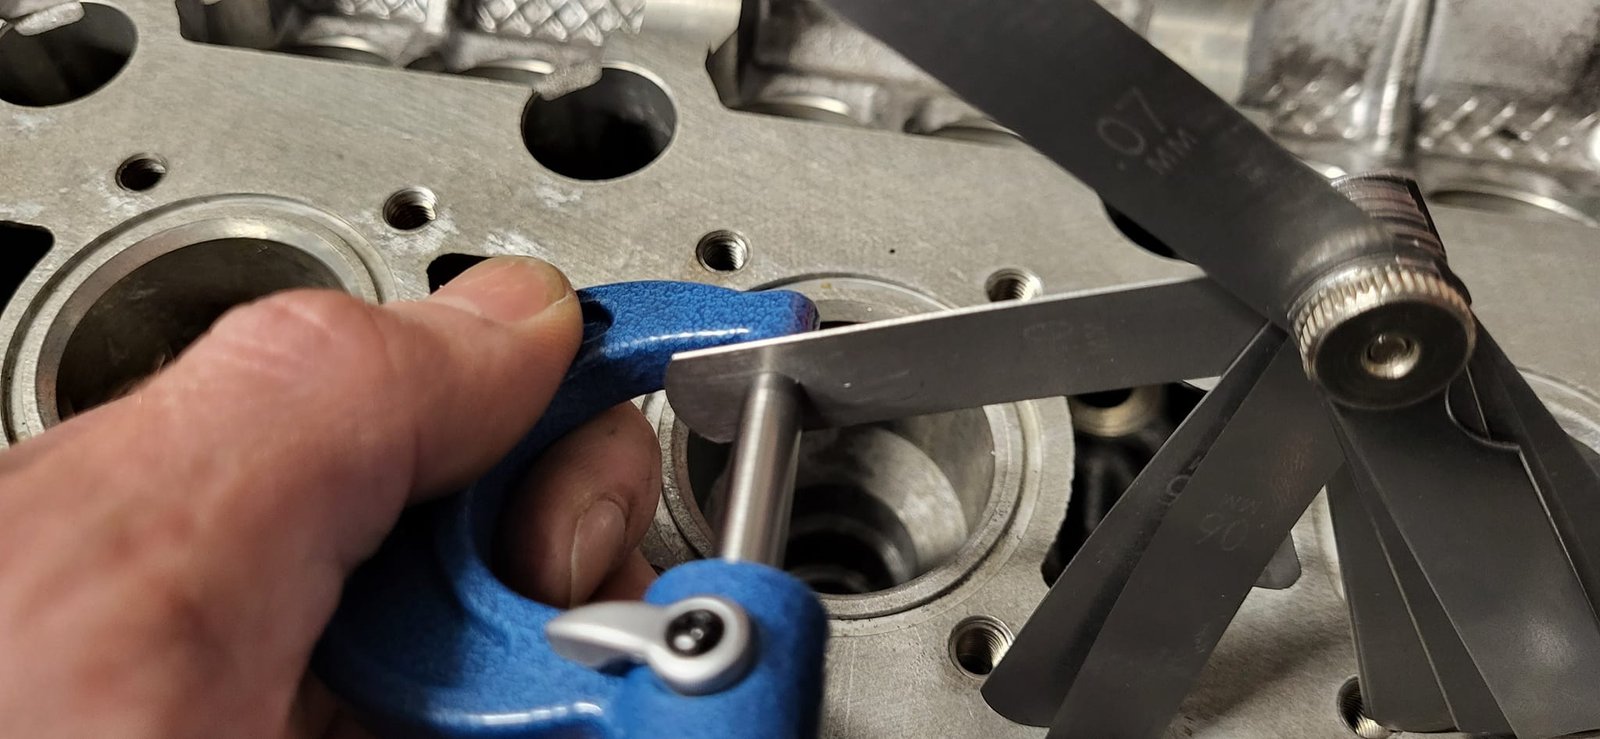
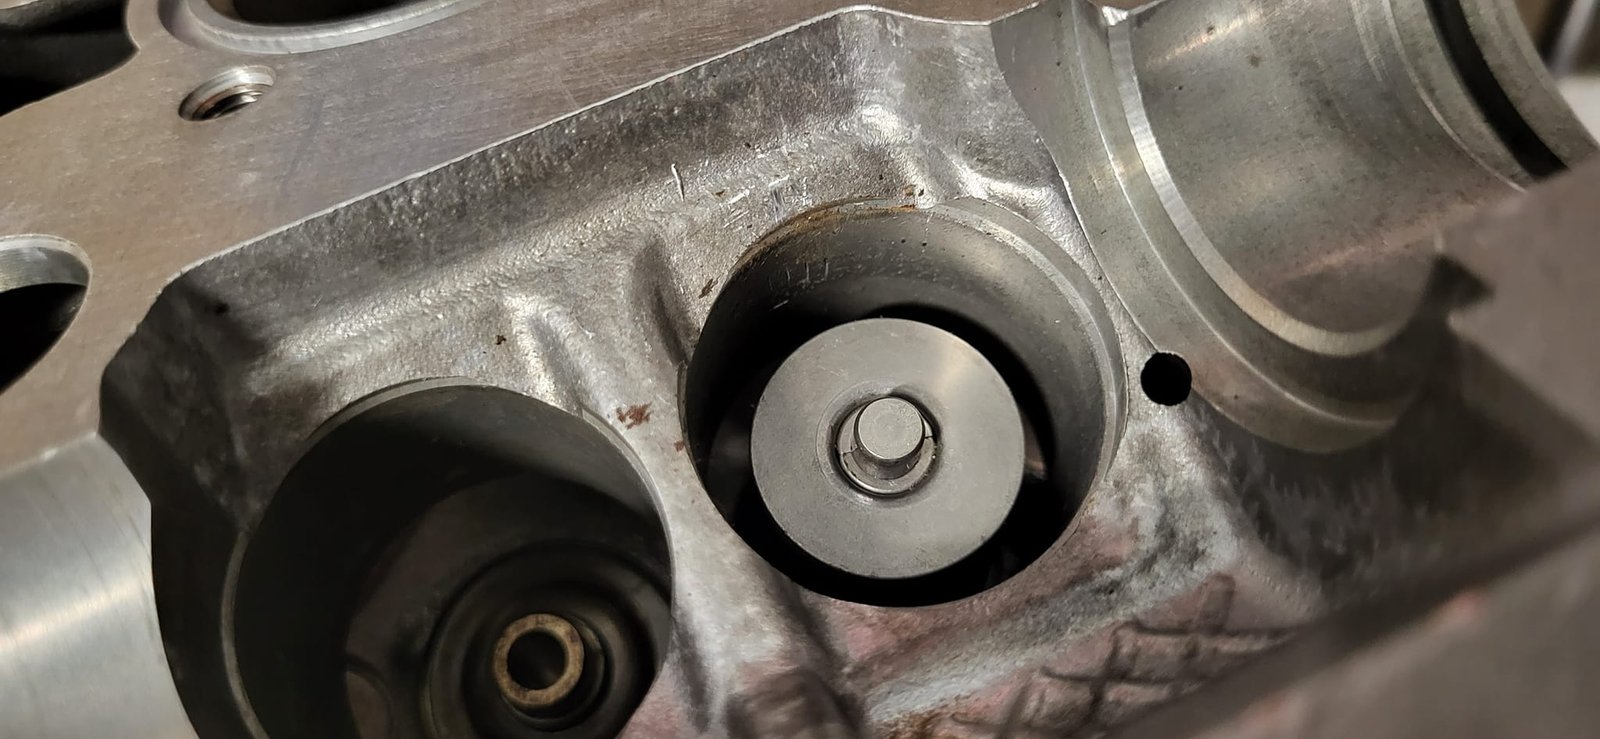
No matter, I thought, I’ll just pop some different shims in and go from there, nope, it’s a solid bucket design and those buckets are near on impossible to get without buying multiple used heads. I was here to learn, so learn I did, as I set about lapping in the valves by hand to achieve the desired clearances.
Even using the drill/rubber hose method, it was slow going, but eventually I had the lash dead centre of the factory range, new valve stem seals installed, and the valves reinstalled in the head ready to fit to the block. Fitting the head was fairly straight forward, pop in some new OEM head bolts, torque to spec and you’re done.

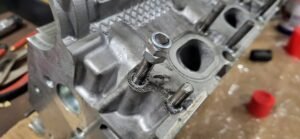


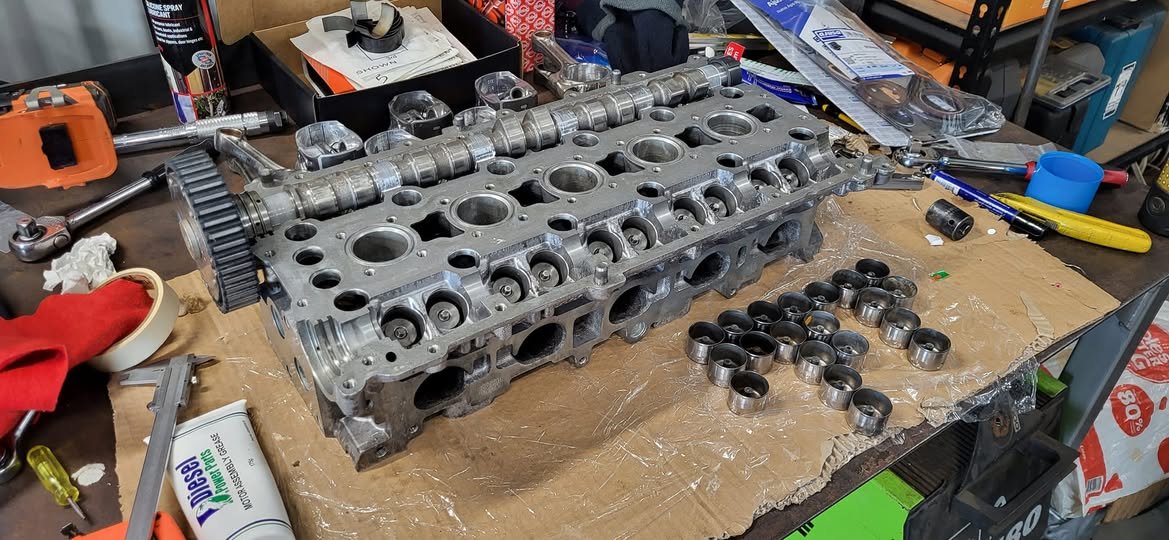


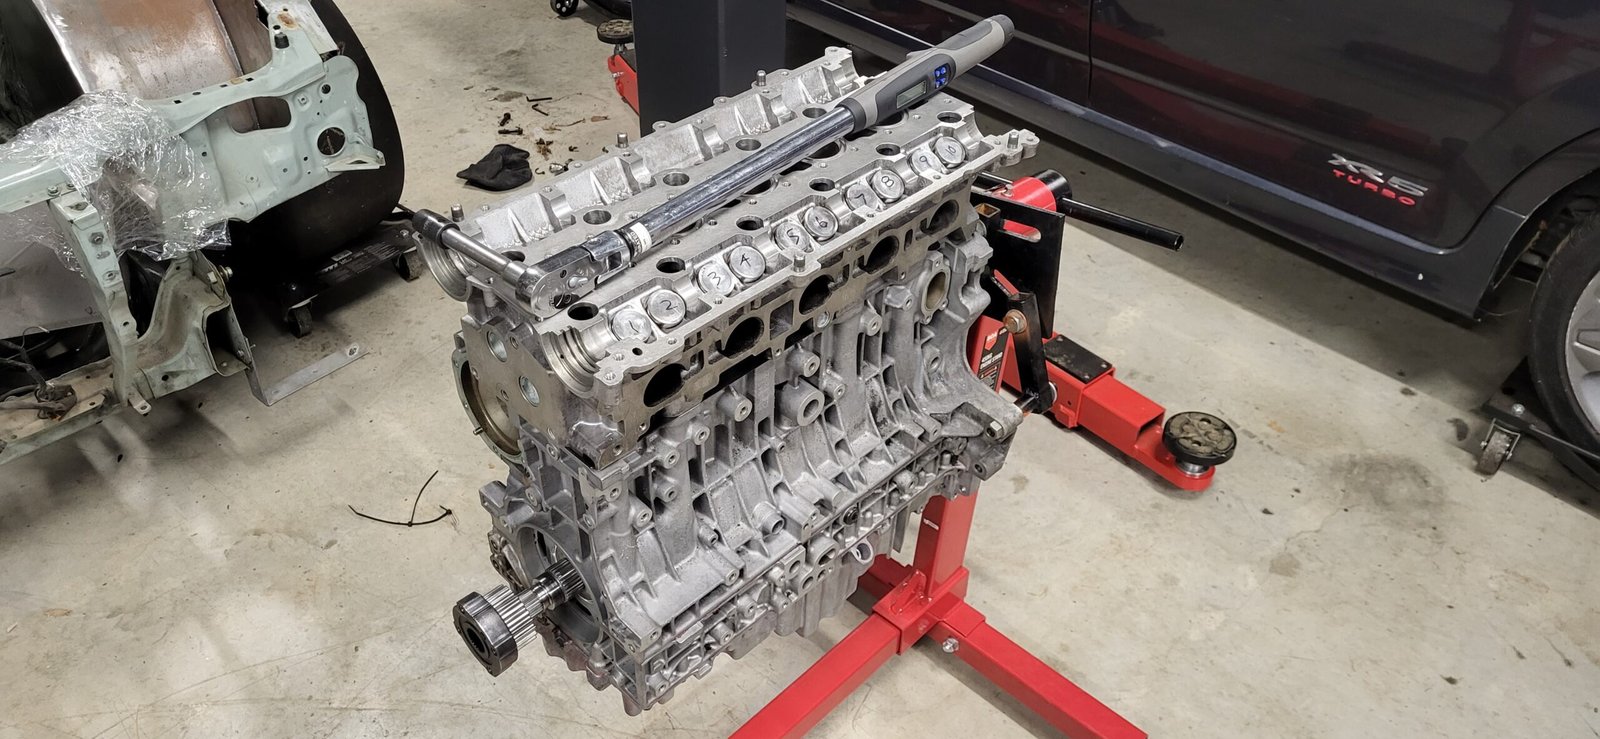
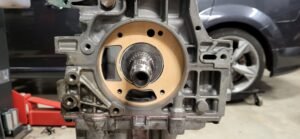
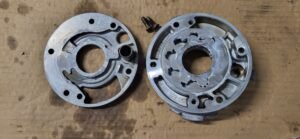
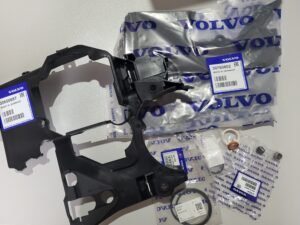
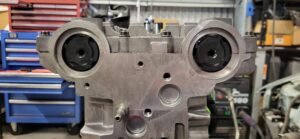
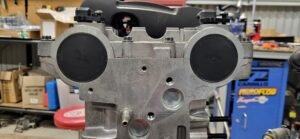
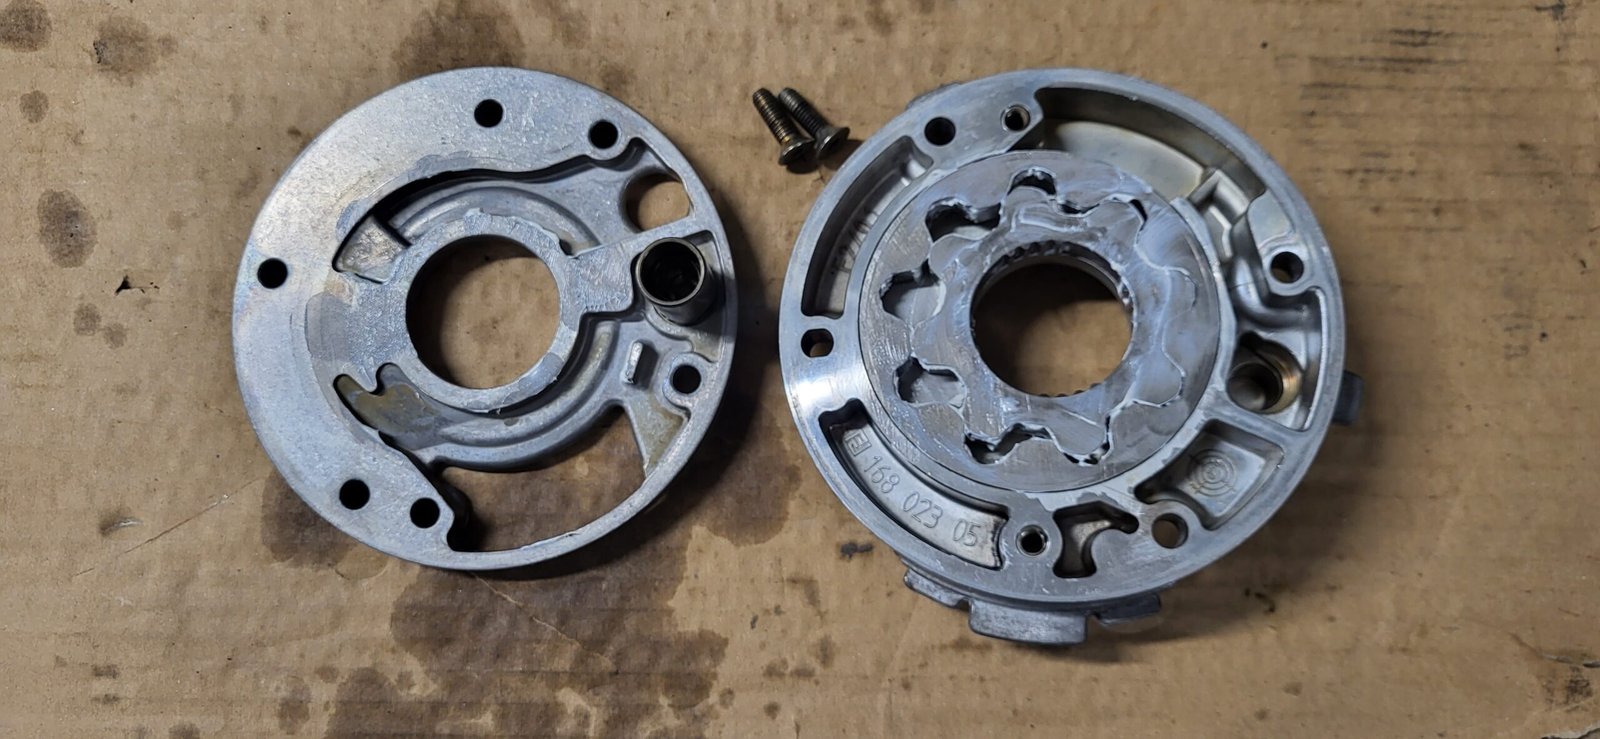
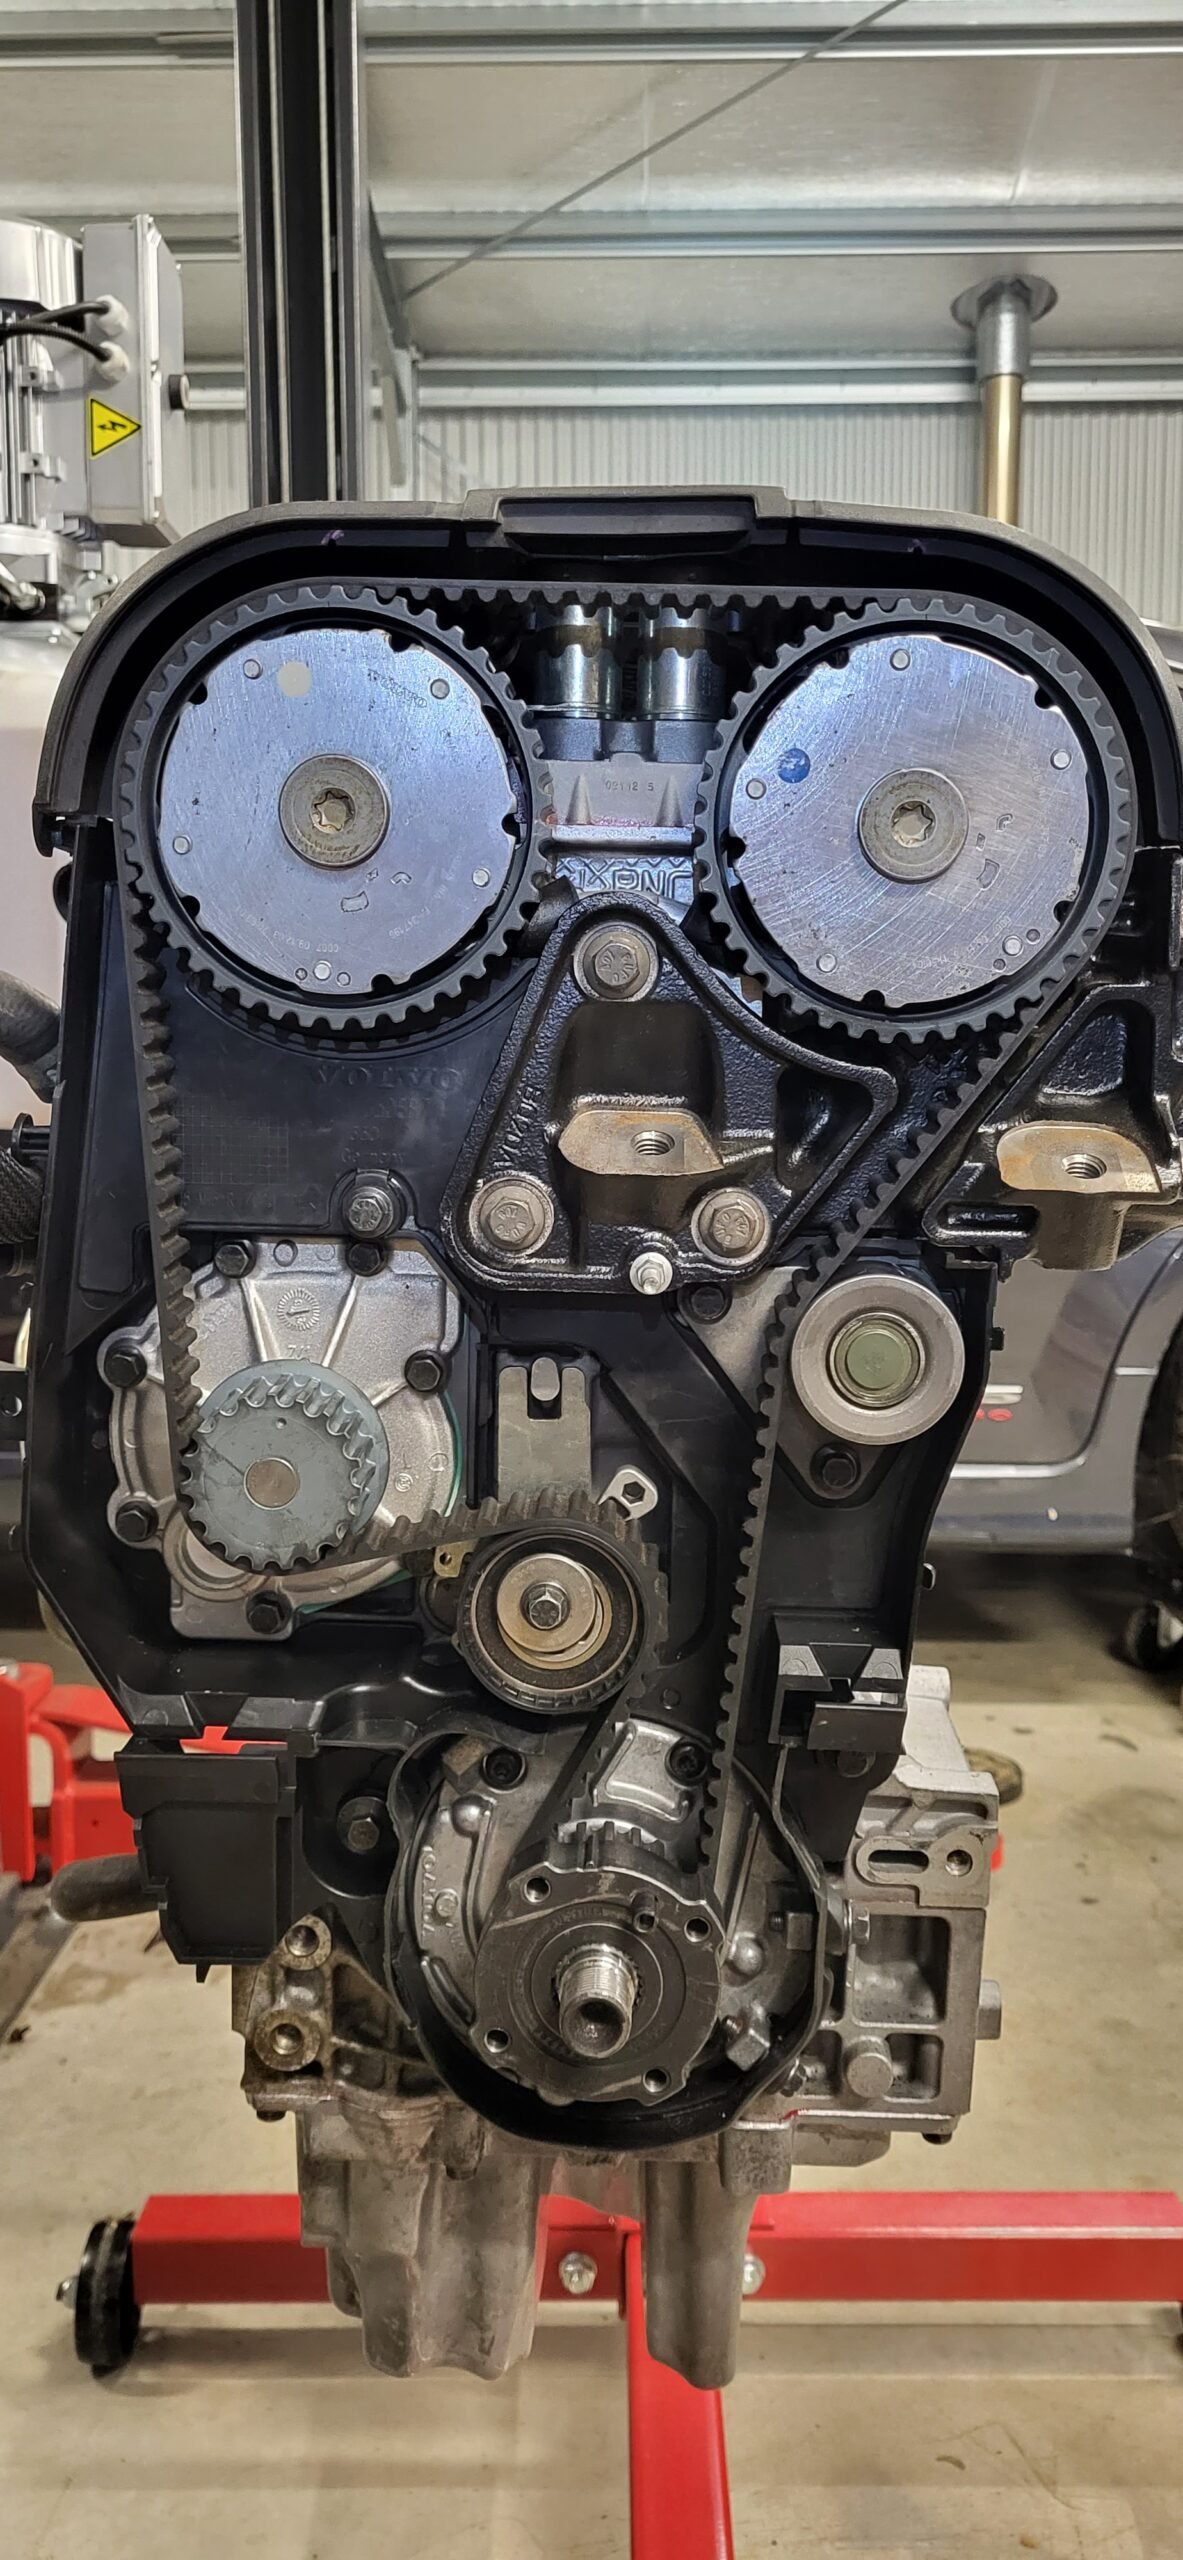
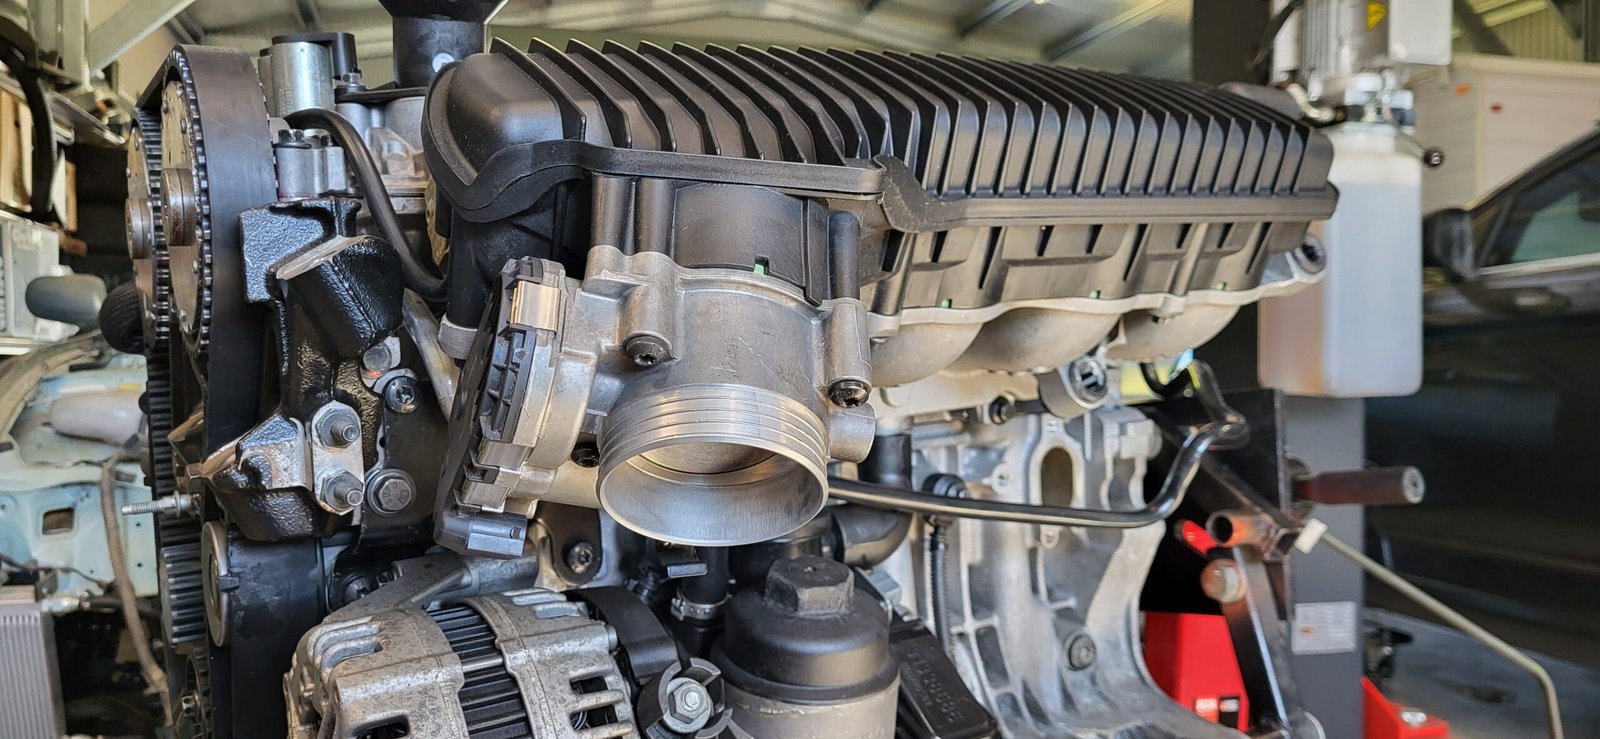
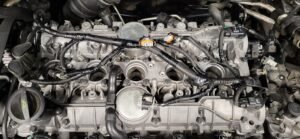
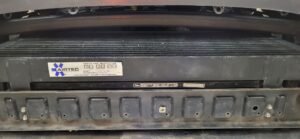
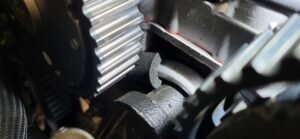
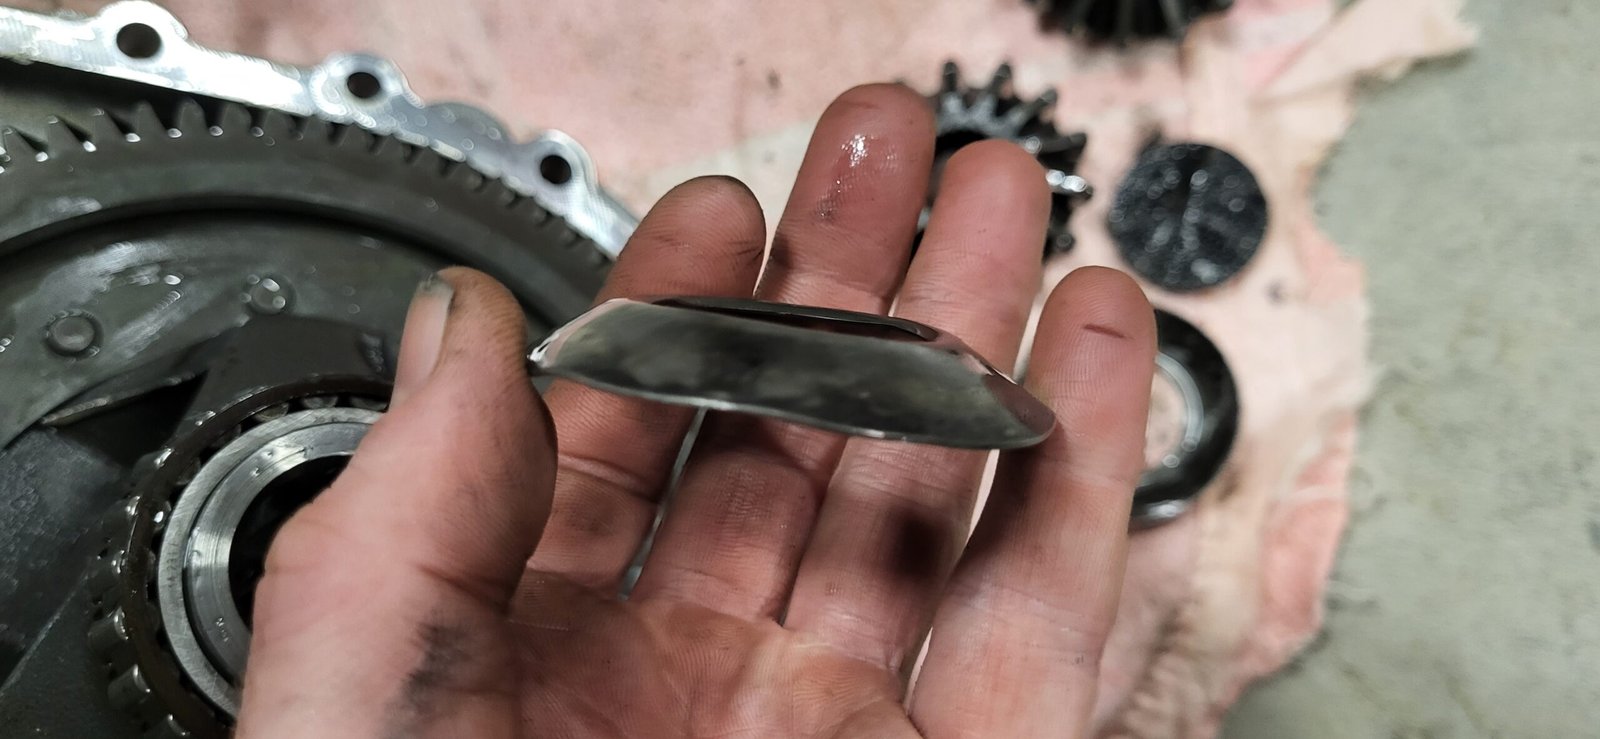
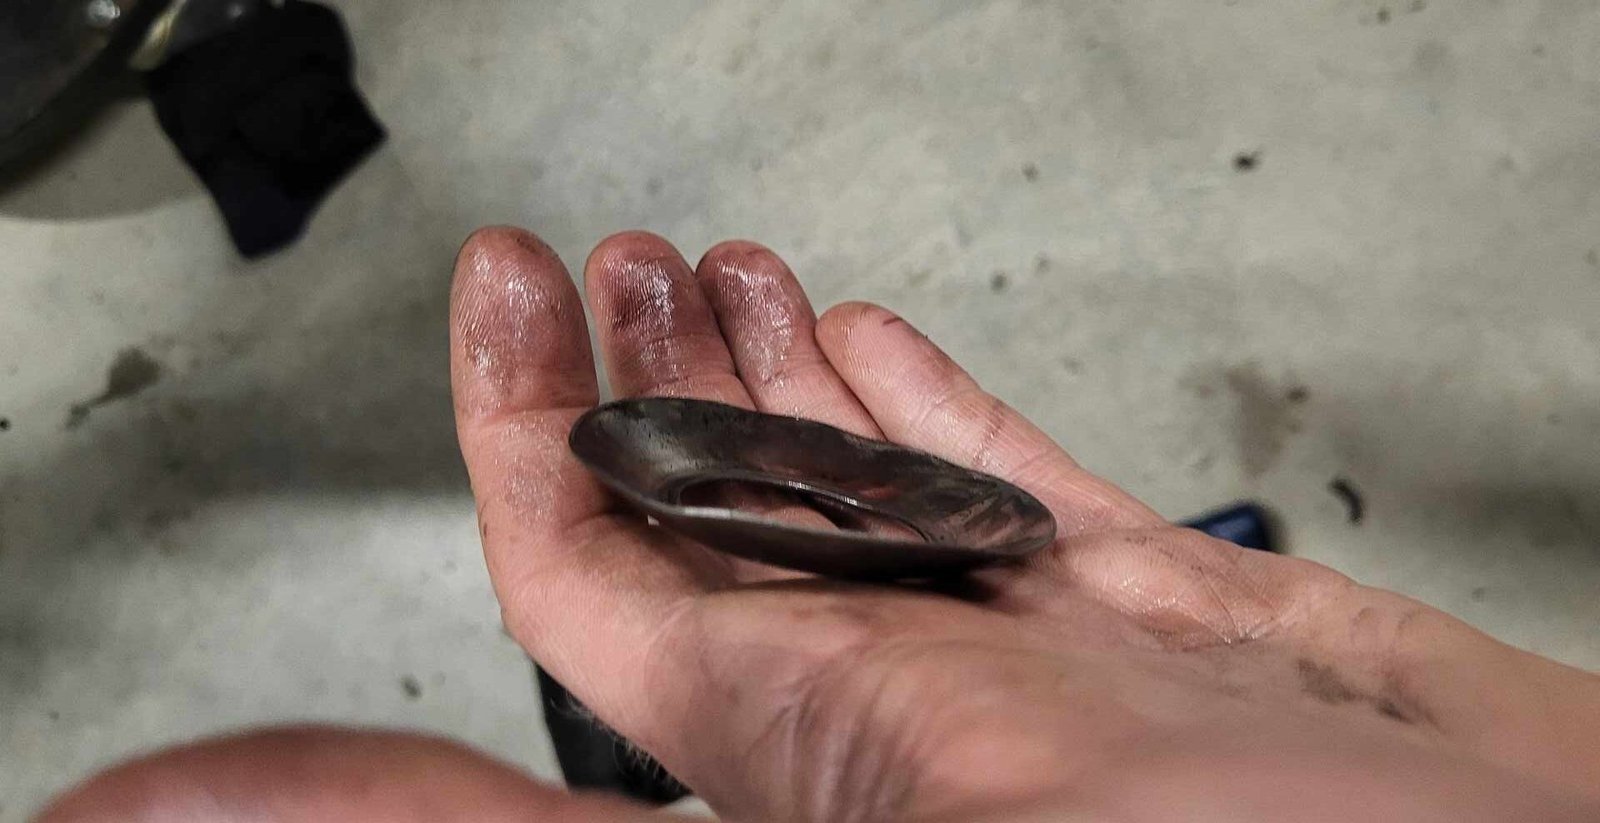
Next it was time for cams and the valve cover to go on, only the valve cover in a B5254 contains integrated cam caps and requires a special service tool to install correctly. I had noticed the valve cover had a lot of bolts, but I hadn’t removed it myself after noticing a few were stripped, choosing to leave that to the machine shop and asking they clean up the stripped threads in the process. One quick Ebay purchase later, I had myself a Volvo timing tool kit which contained all the things necessary to fit the valve cover and set the timing correctly.
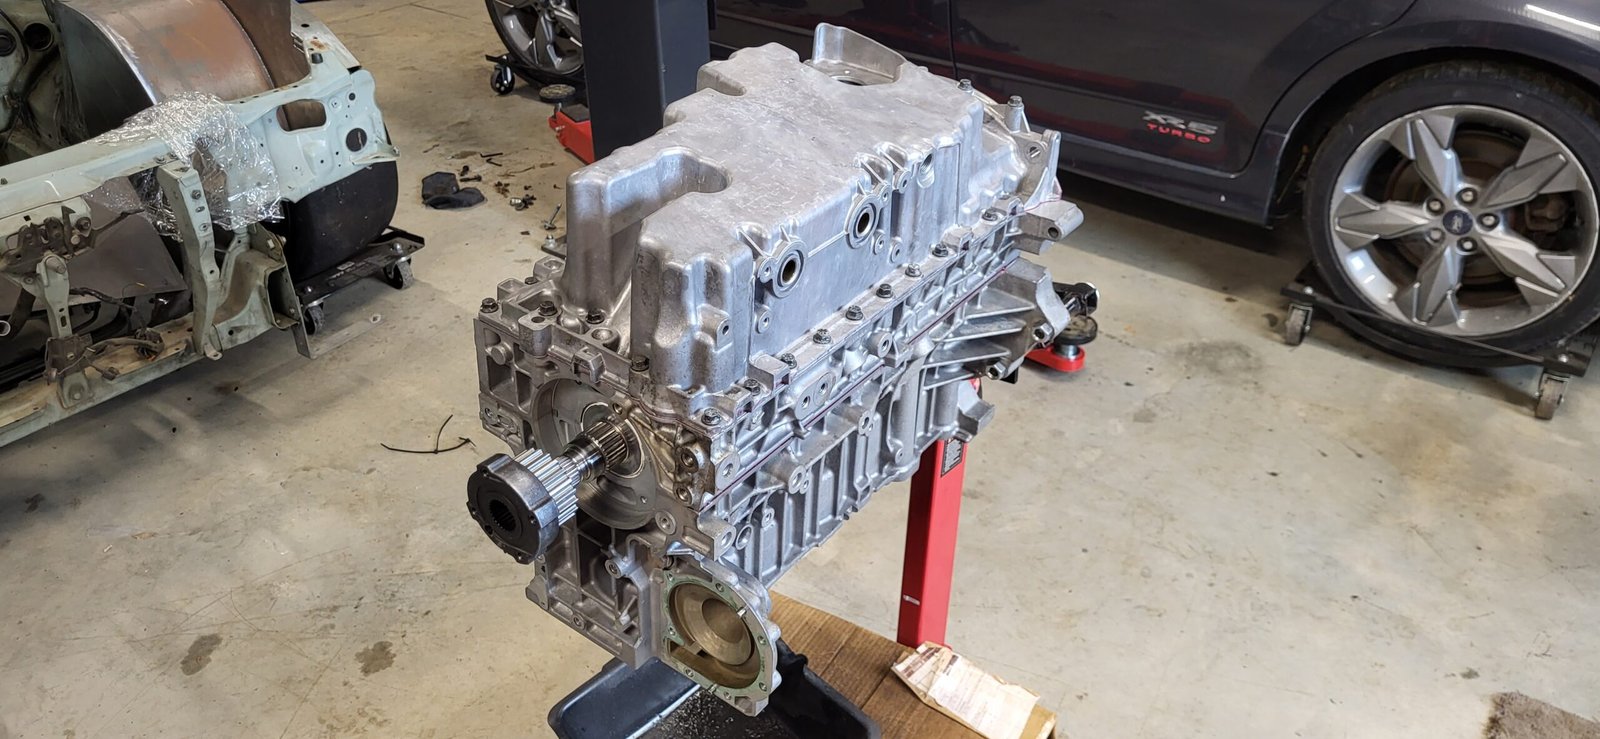
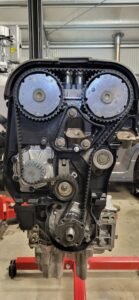
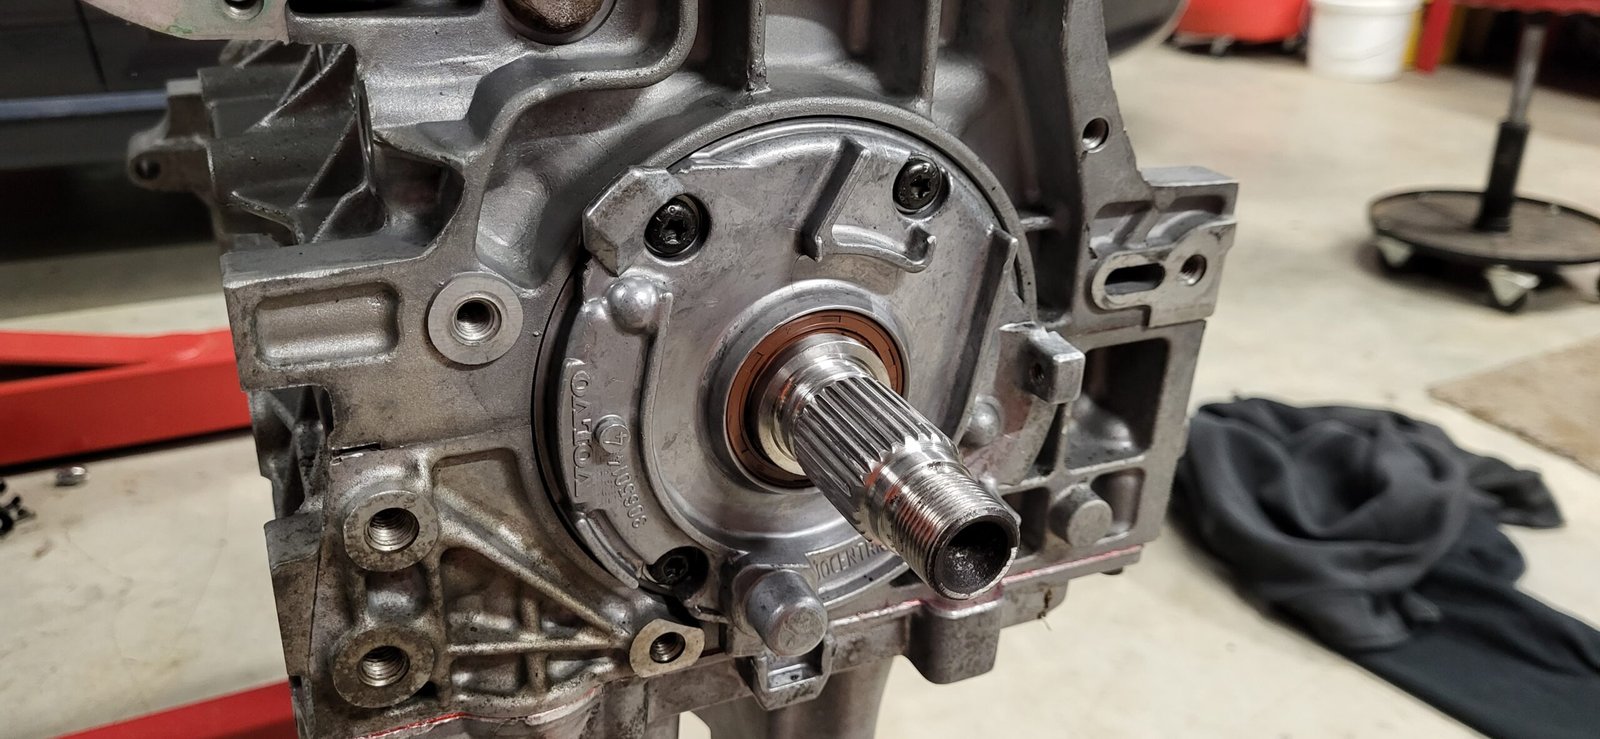
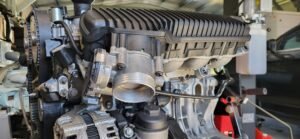
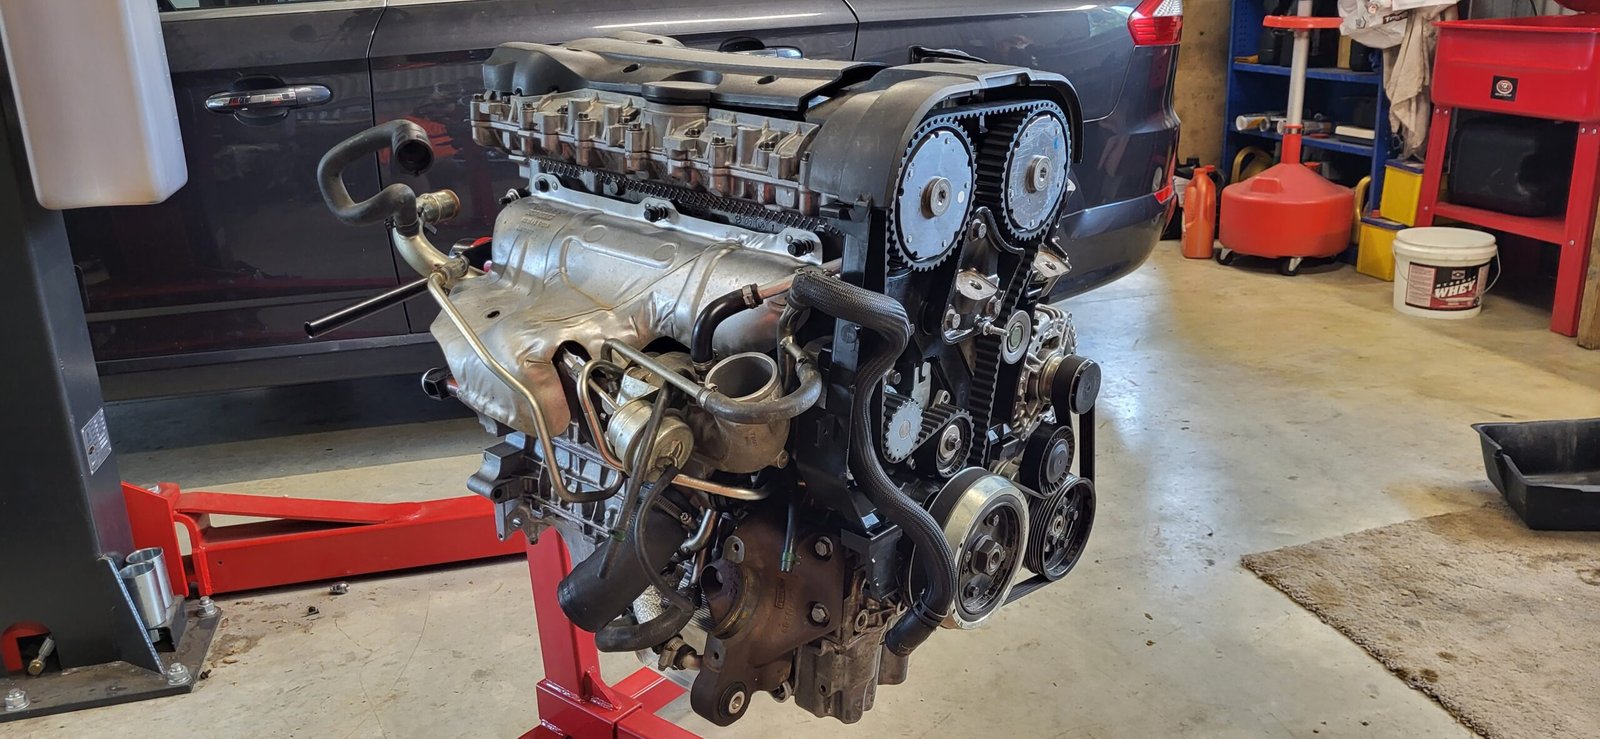
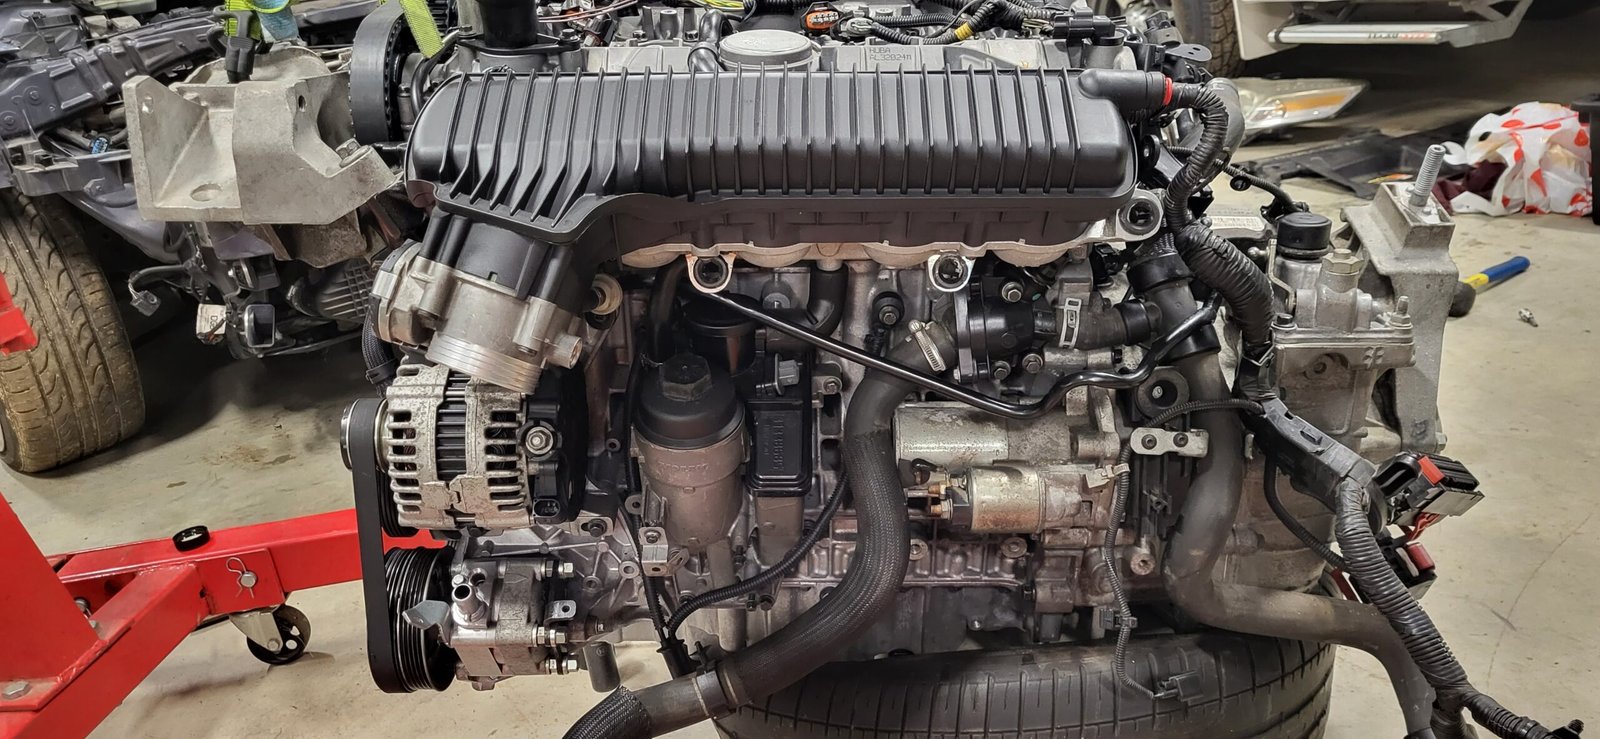
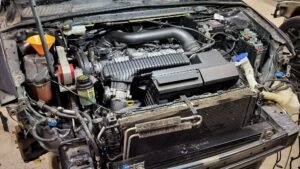
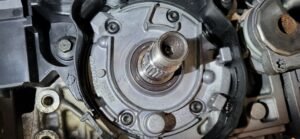
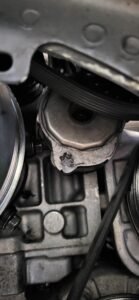
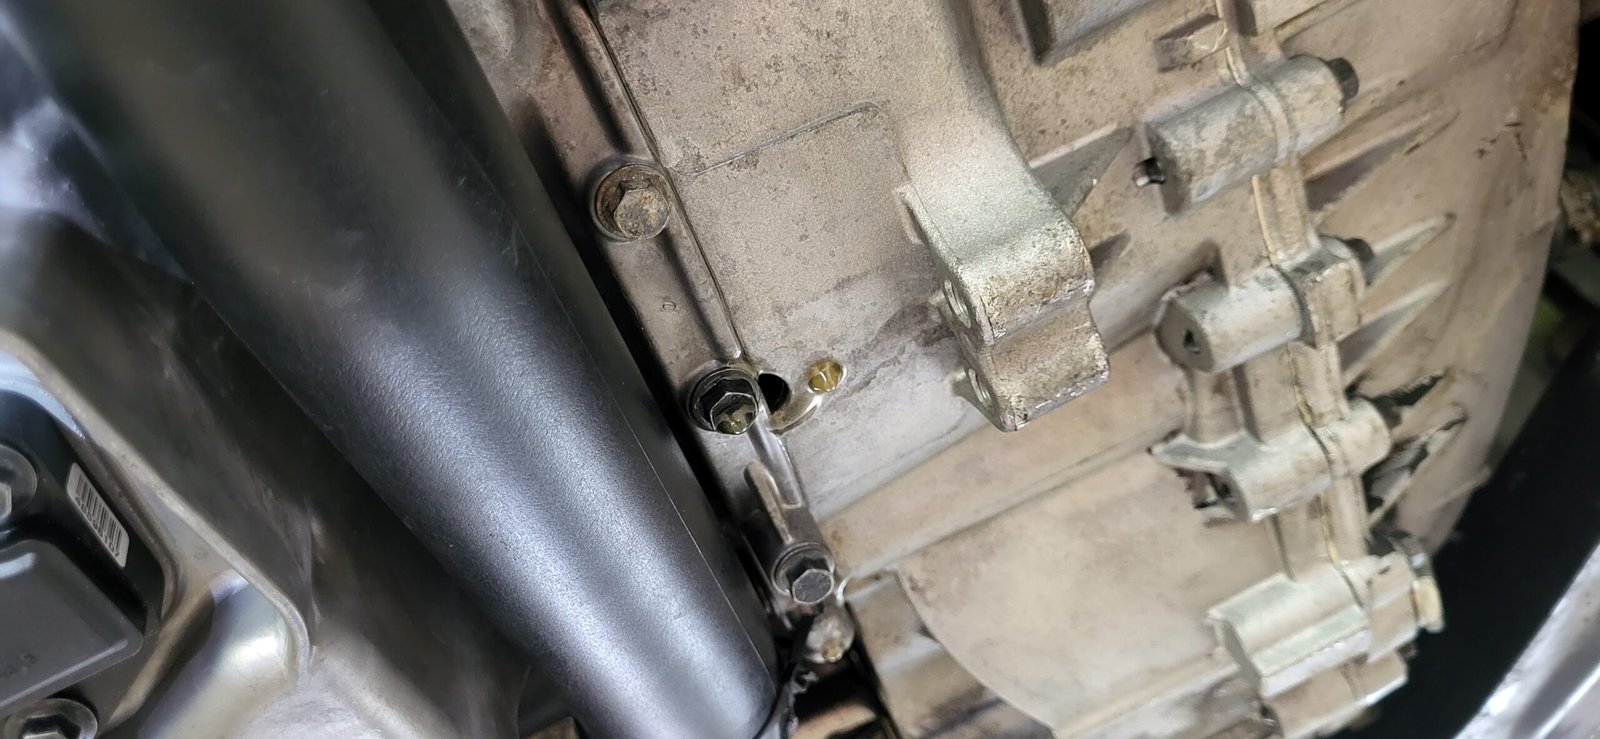
It was time to fit the cams and some new seals, after ensuring there’s no scoring on the hubs and cleaning the VVT gears, before popping in some spark plug seals, applying a generous coating of anerobic sealant, attaching a few more items and finally the valve cover before calling the long block done. On went a new water pump (Aisin), a replacement oil pump (original was scored), a few coolant lines that must be done at this point, new idler and tensioner, and lastly, some new timing covers. After using our timing tool once more, a new belt was fitted along with some new, single use rear cam caps and our long block was now complete.

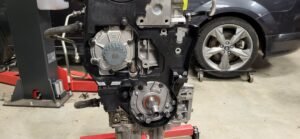


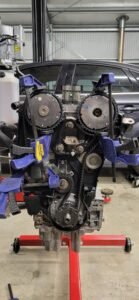

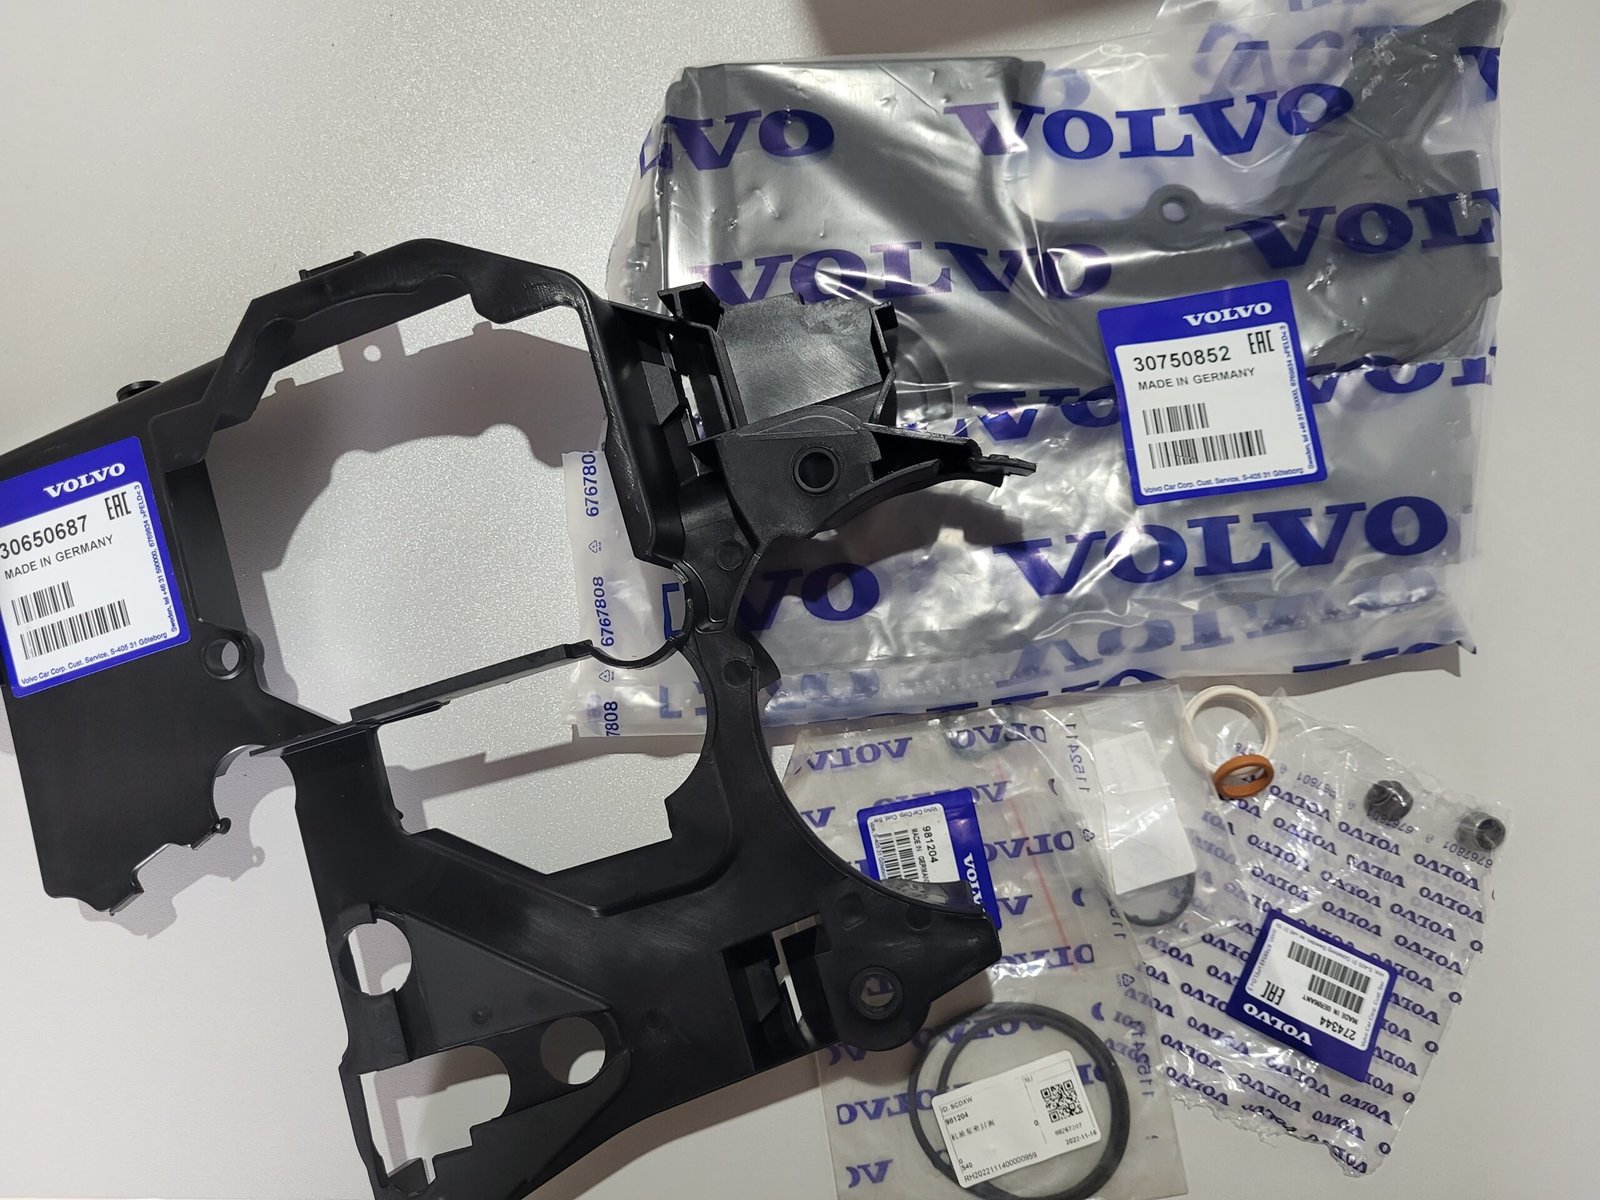

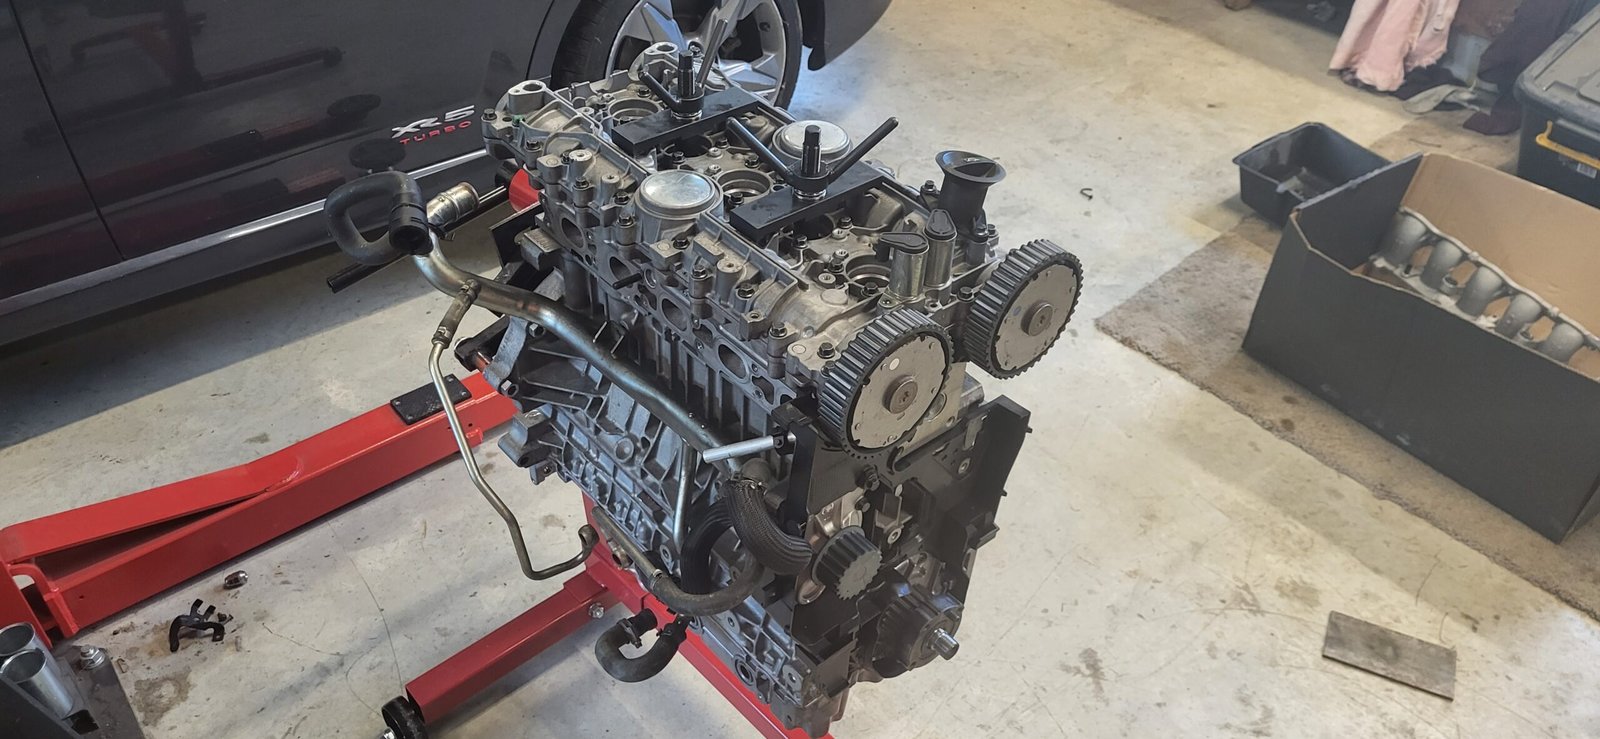


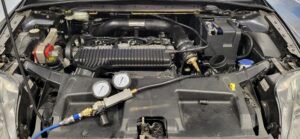
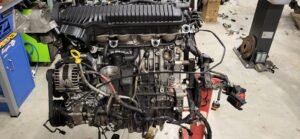
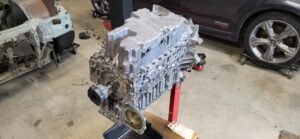
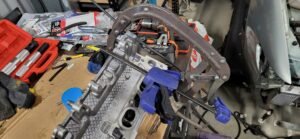
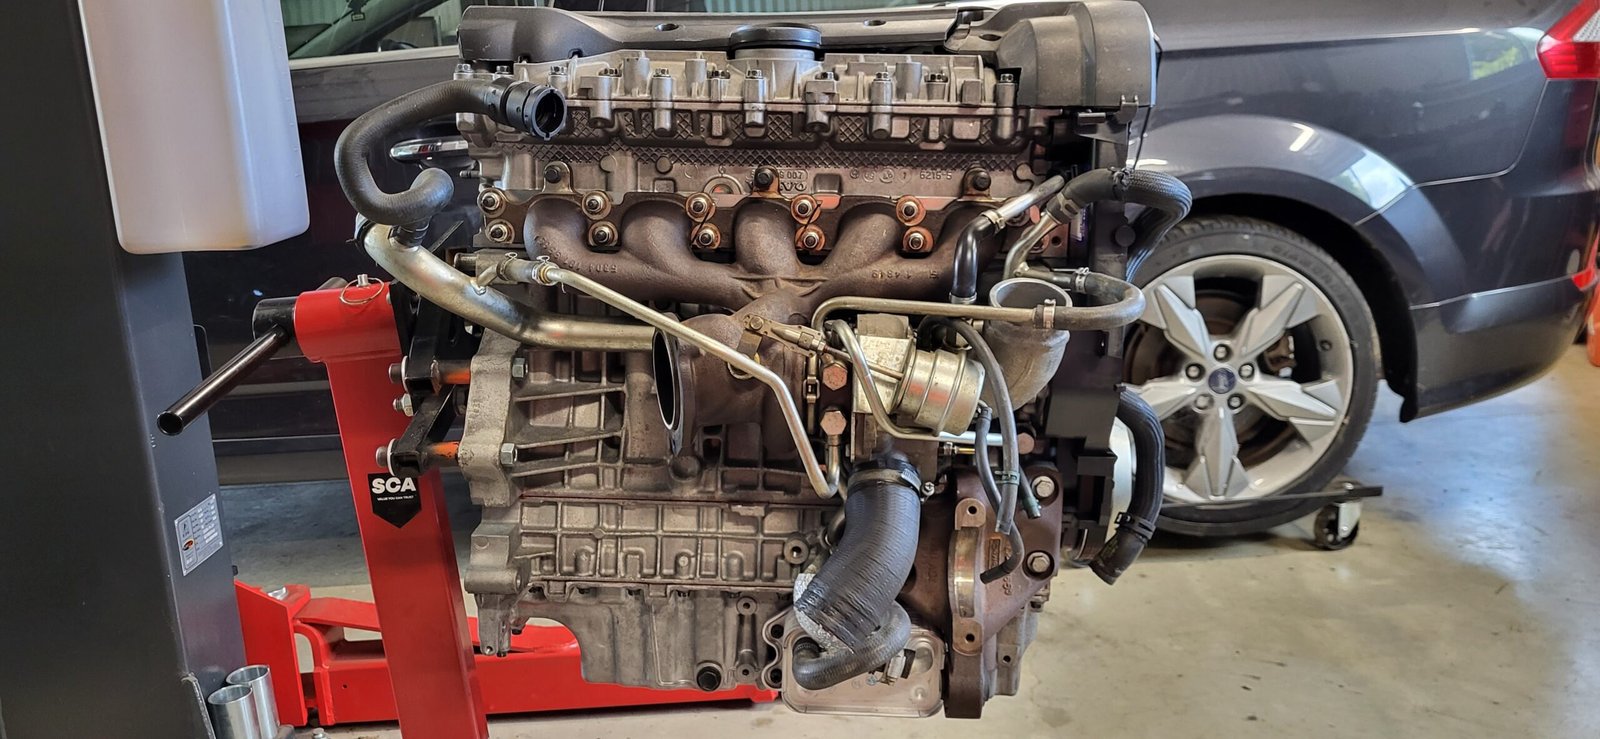
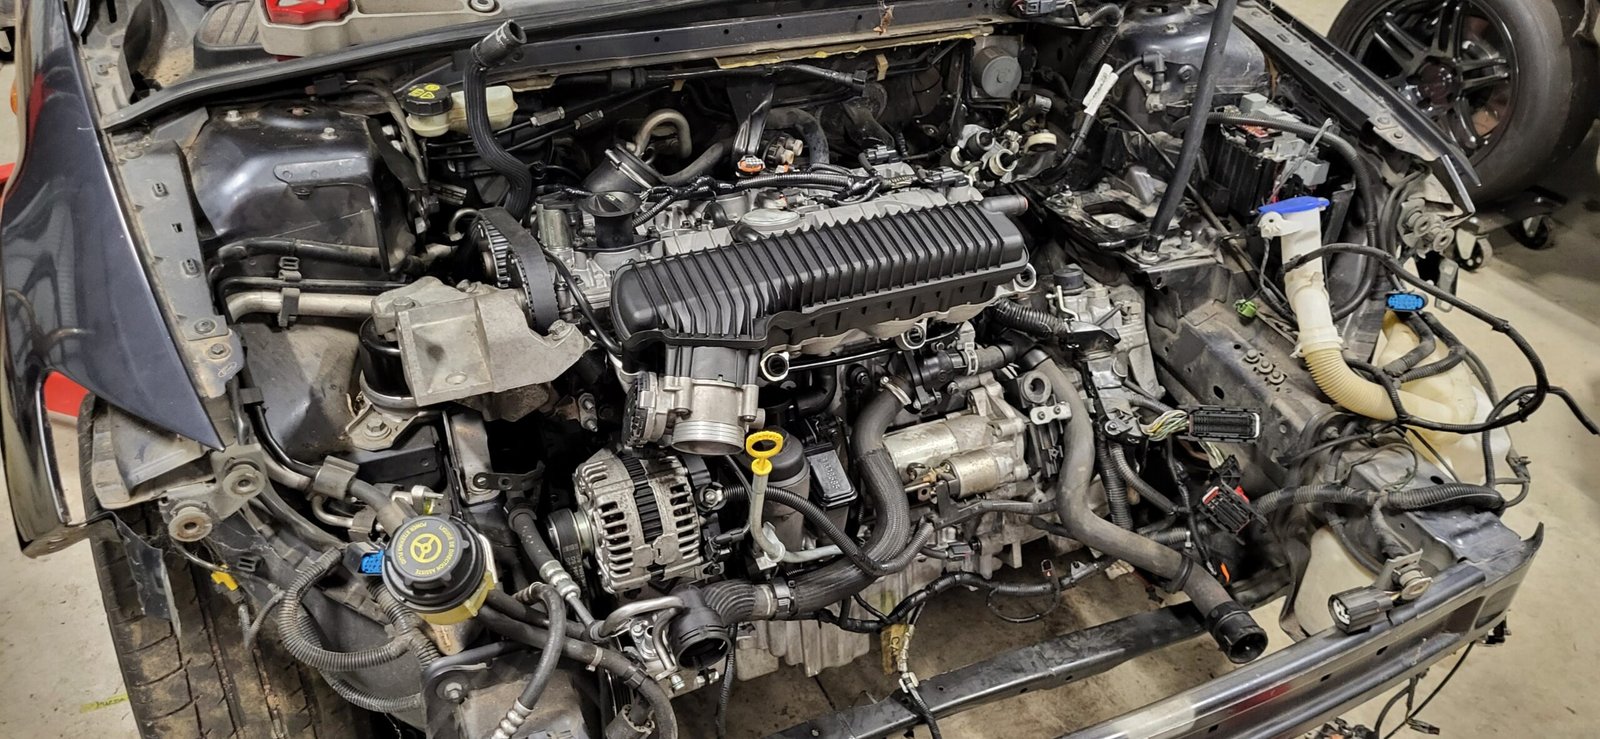
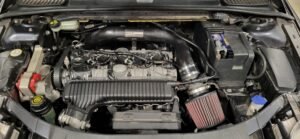
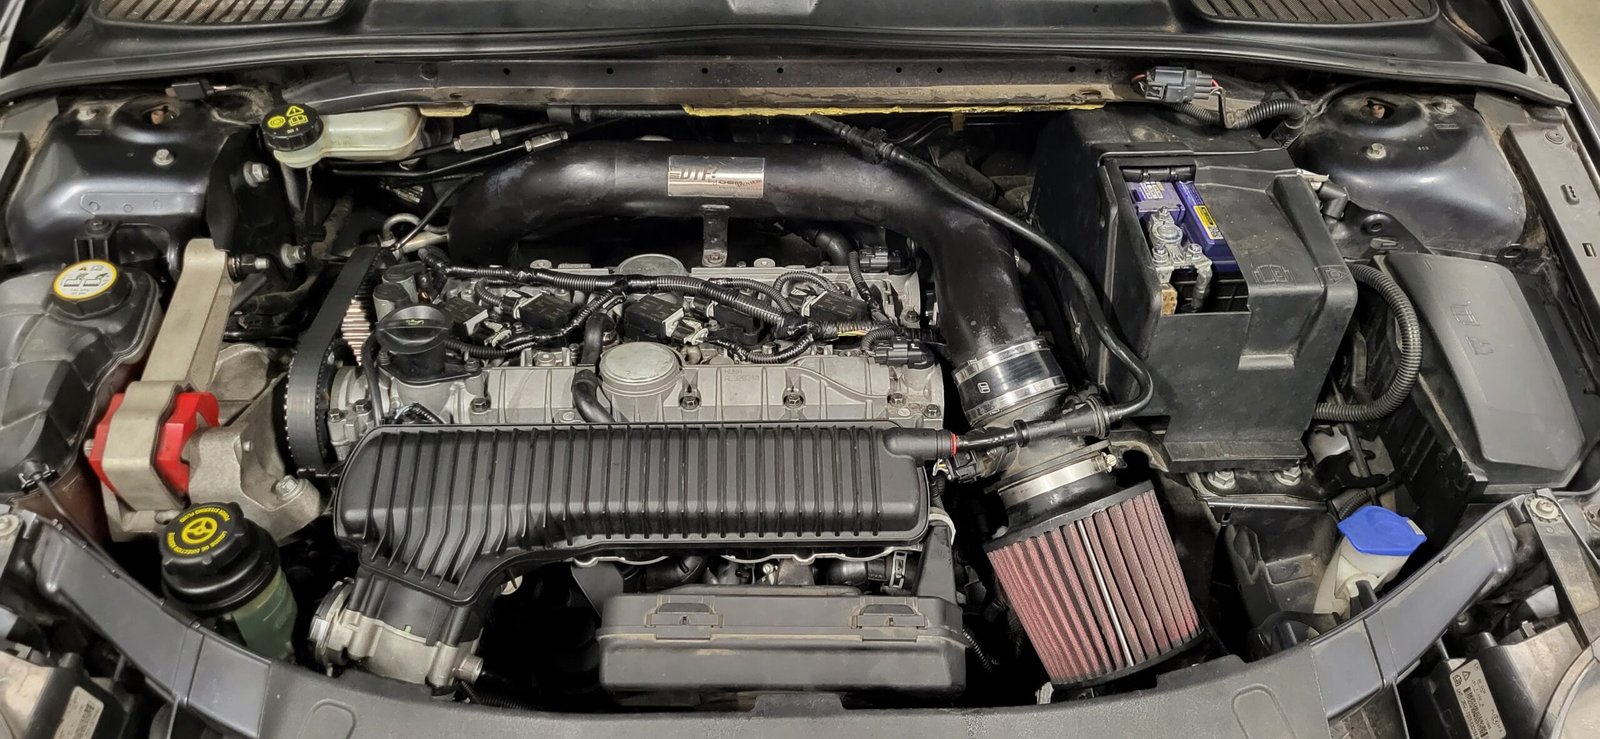
With the long block sorted it was time to dress the engine, so I got stuck straight into to fitting accessories, including a few bonus modifications. During the initial inspection and parts gathering phase, I’d realised the car would need a few items to bring it up to road worthy status, aside from the engine, including shocks, control arms, various trim pieces/plastics, an AC compressor, etc. Rather than buy these items separately, I made the call to buy an entire second running XR5 Mondeo with low k’s, but a poor exterior, knowing I’d have all the parts needed and a running engine, should my rebuild not be a success.
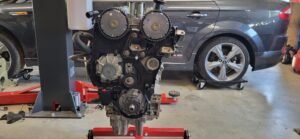
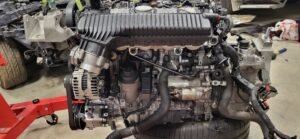
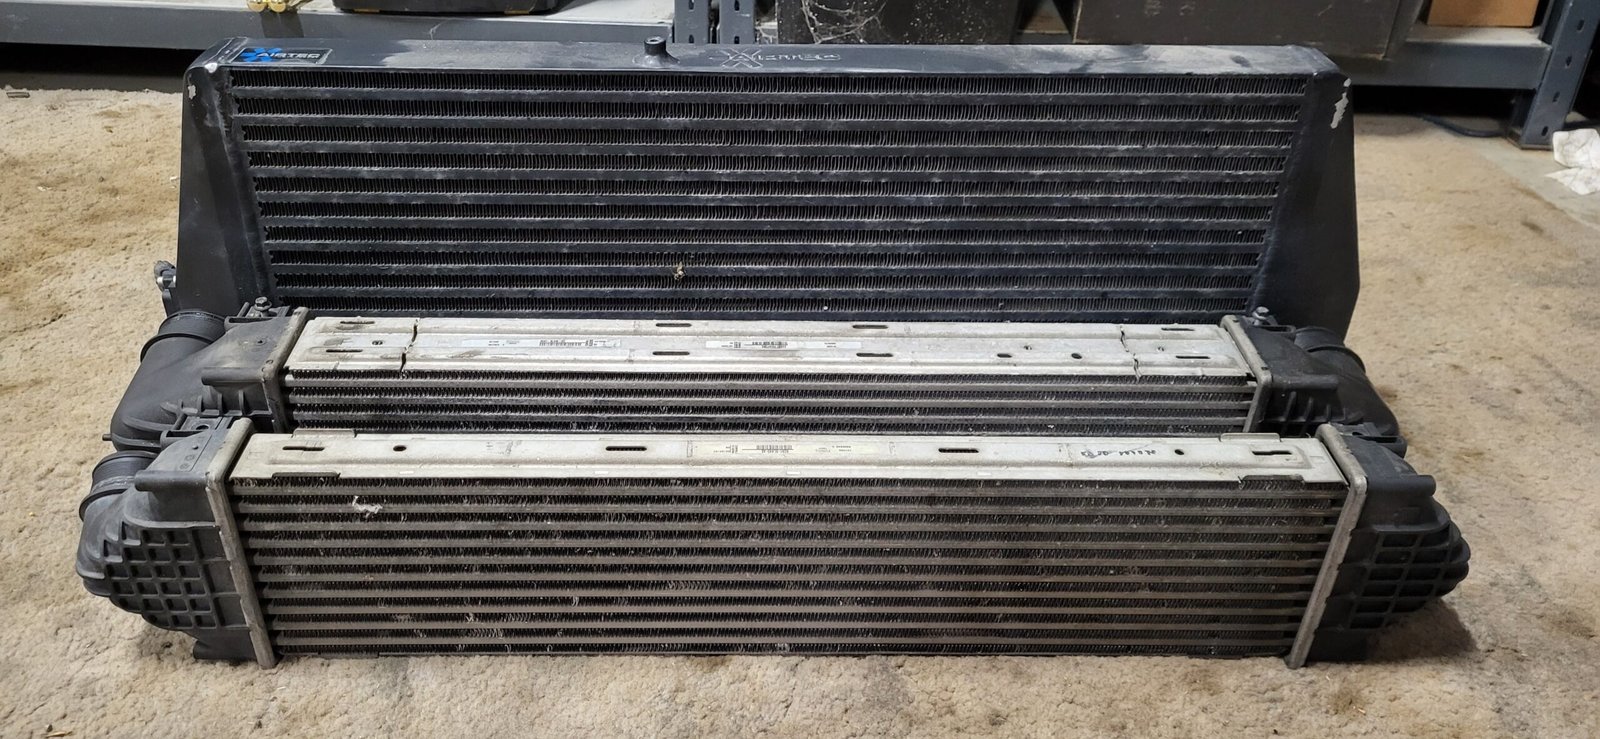
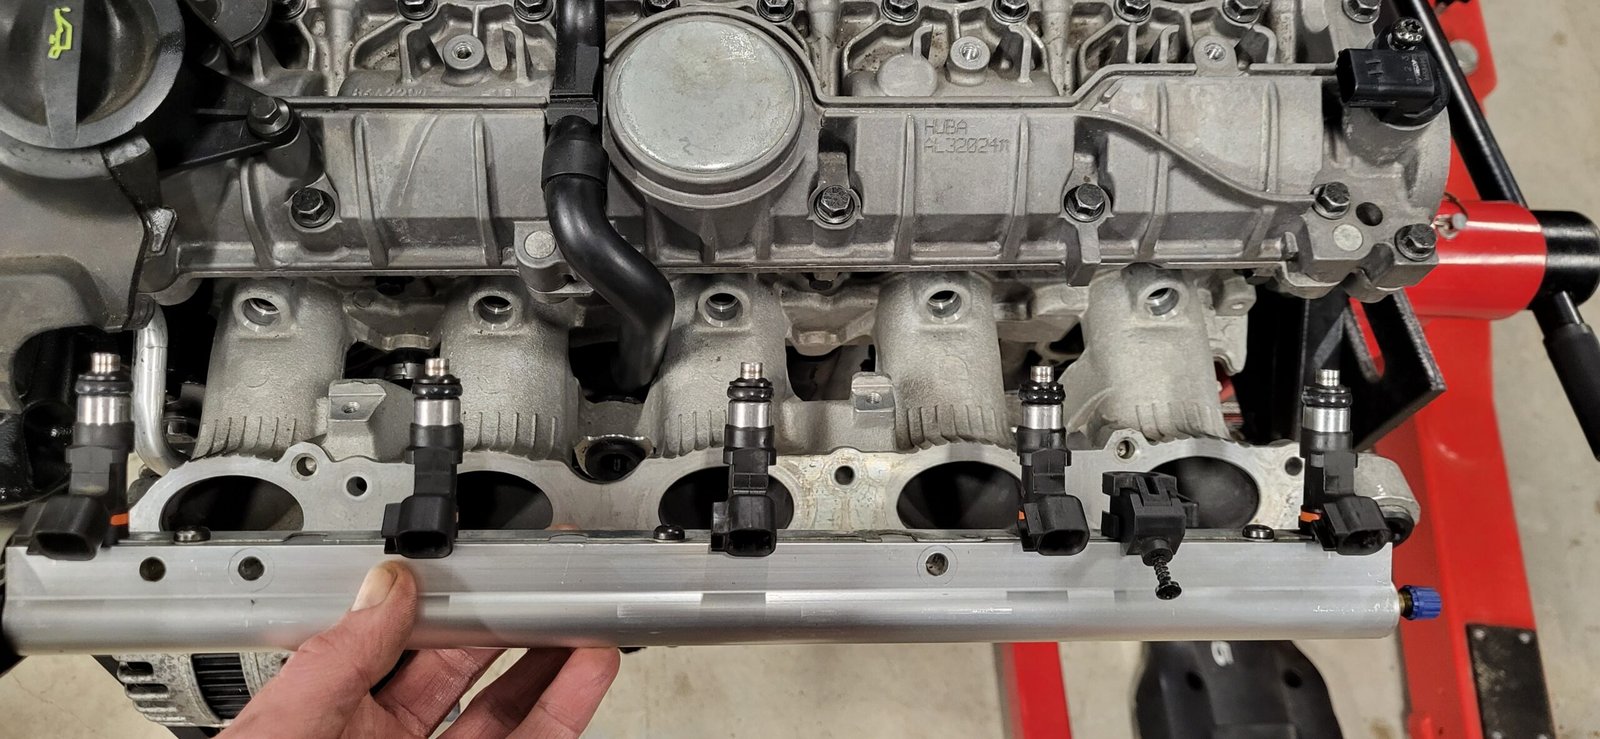
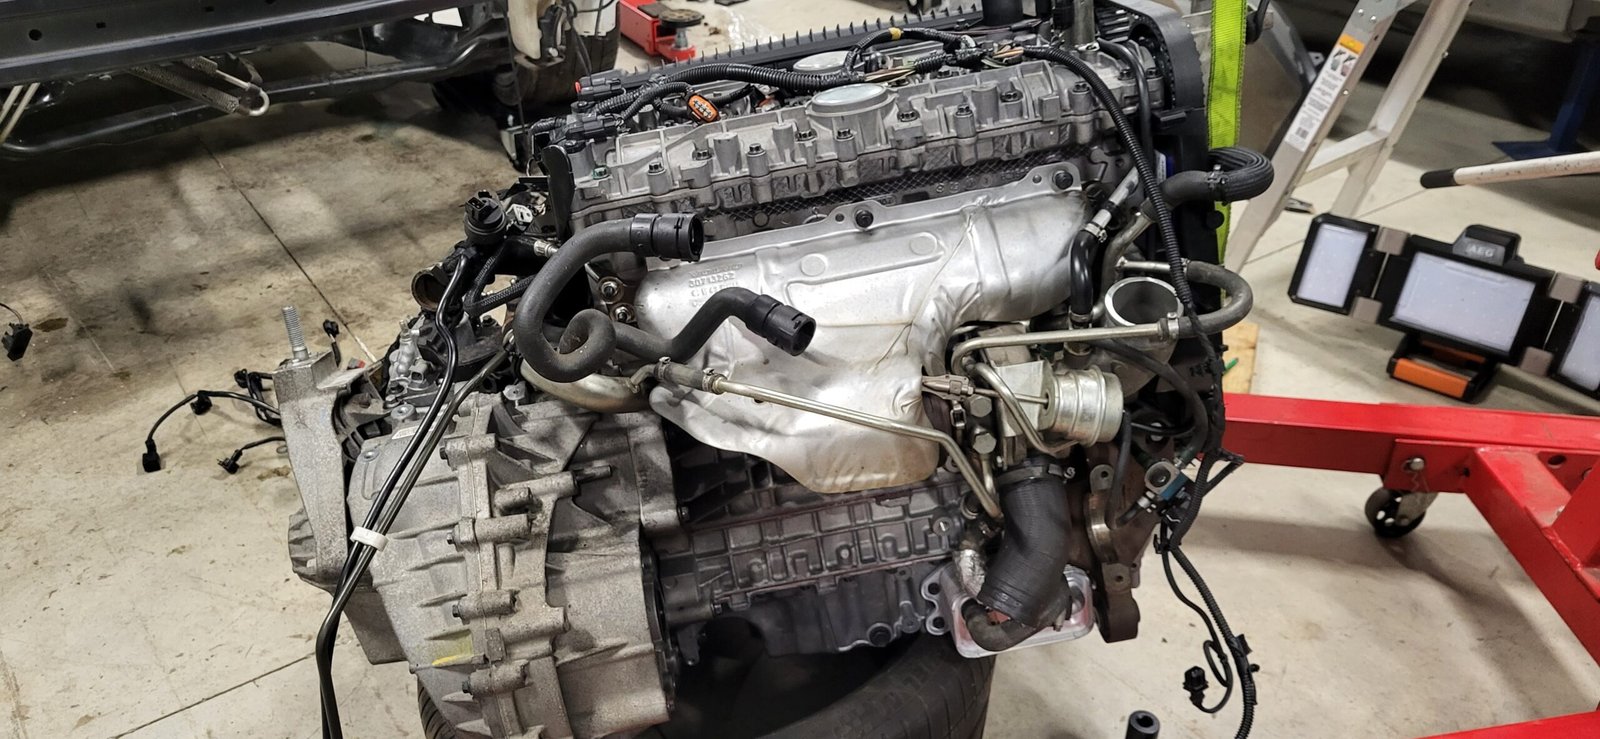
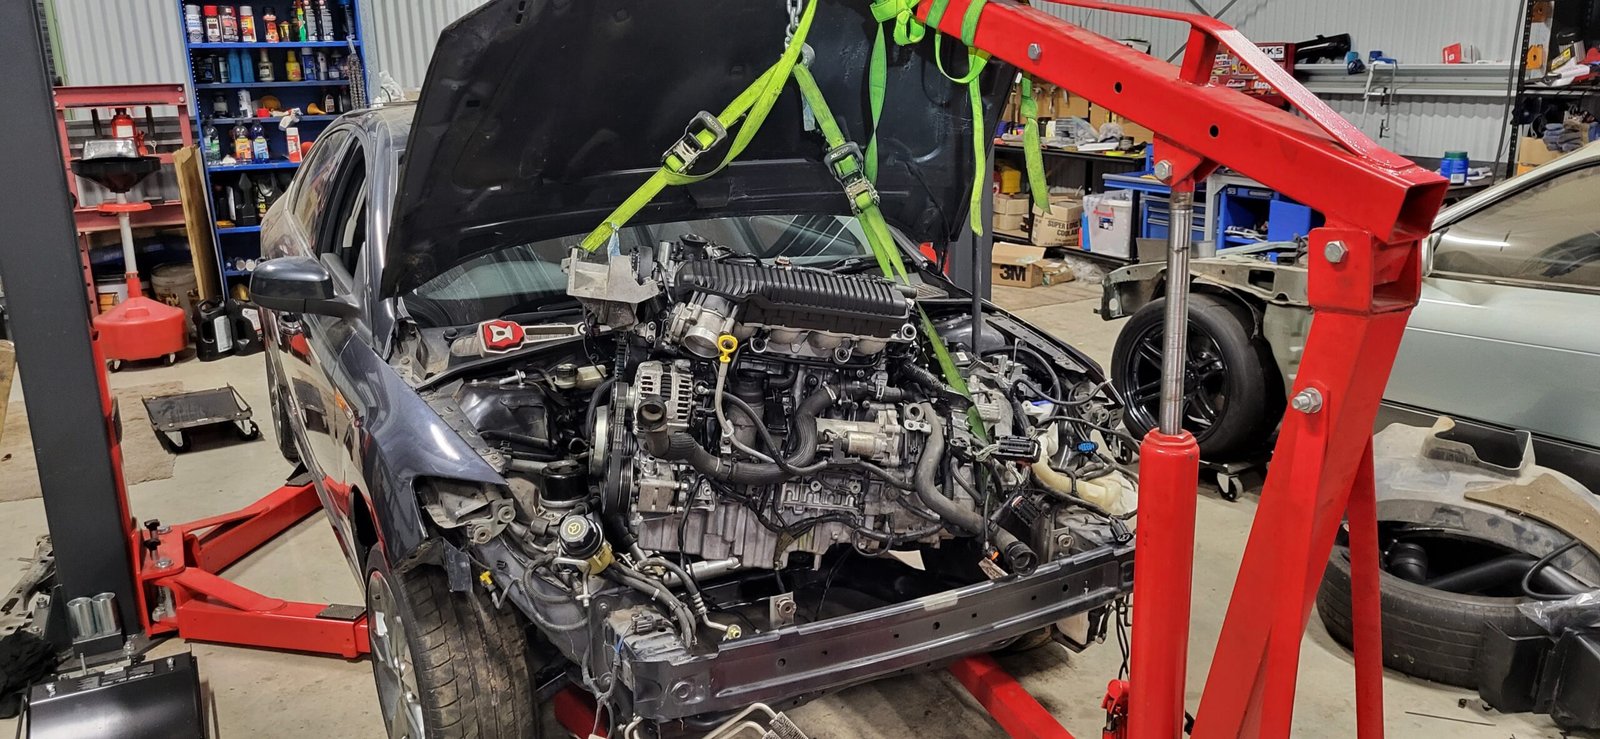
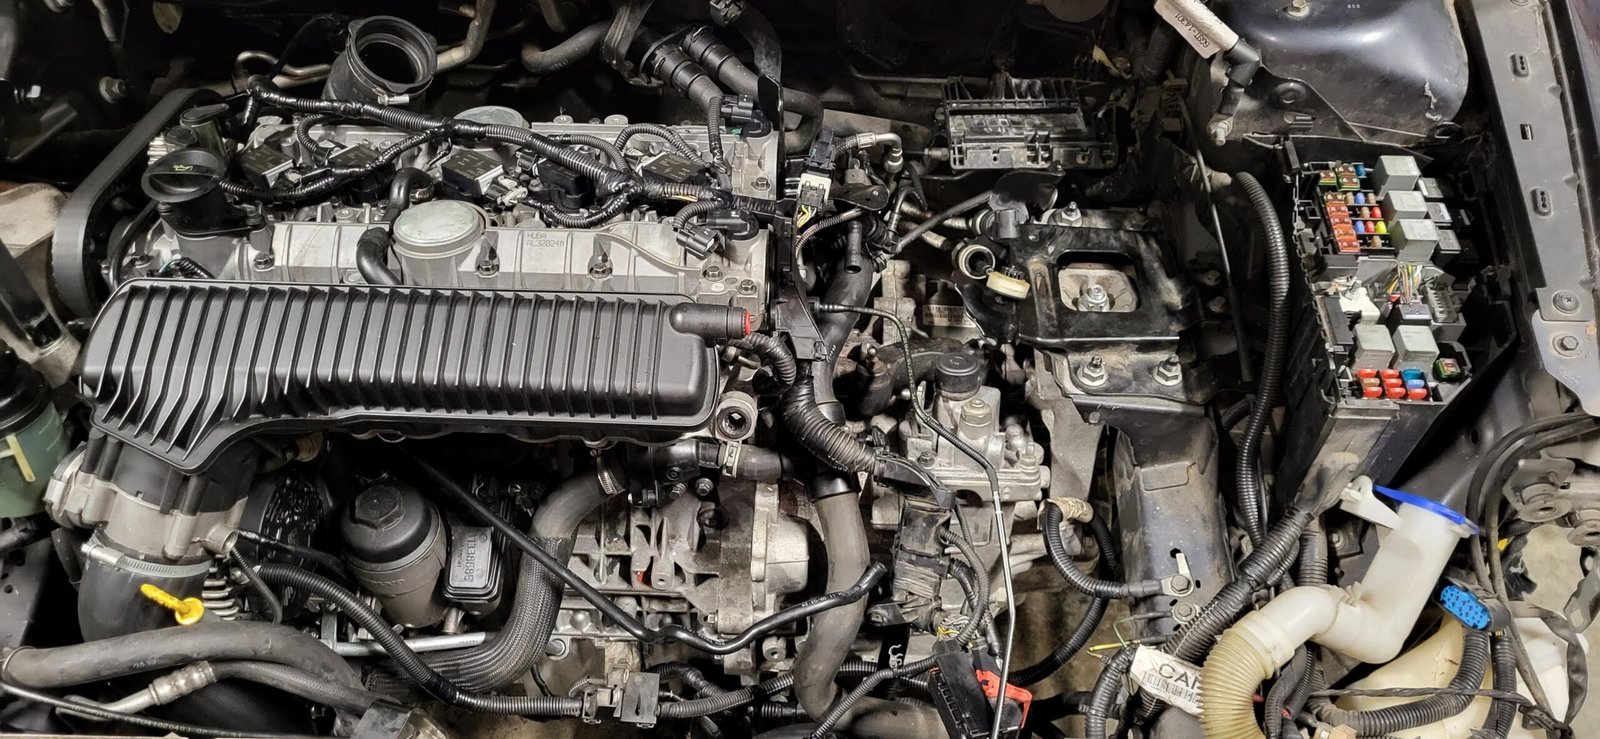
The added bonus was that this second car was modified with a full exhaust, injectors, intercooler, compressor bypass valve, wheels, RS ecu enclosure, intake, and came with various other spare parts. I already had full intention of doing a few basics mods and a tune to the project car so this was perfect timing and I worked through the donor car removing the bits I wanted and replacing with stock to keep it as a runner. Before long, I had a fully dressed engine sitting on the stand ready to install, a major milestone.
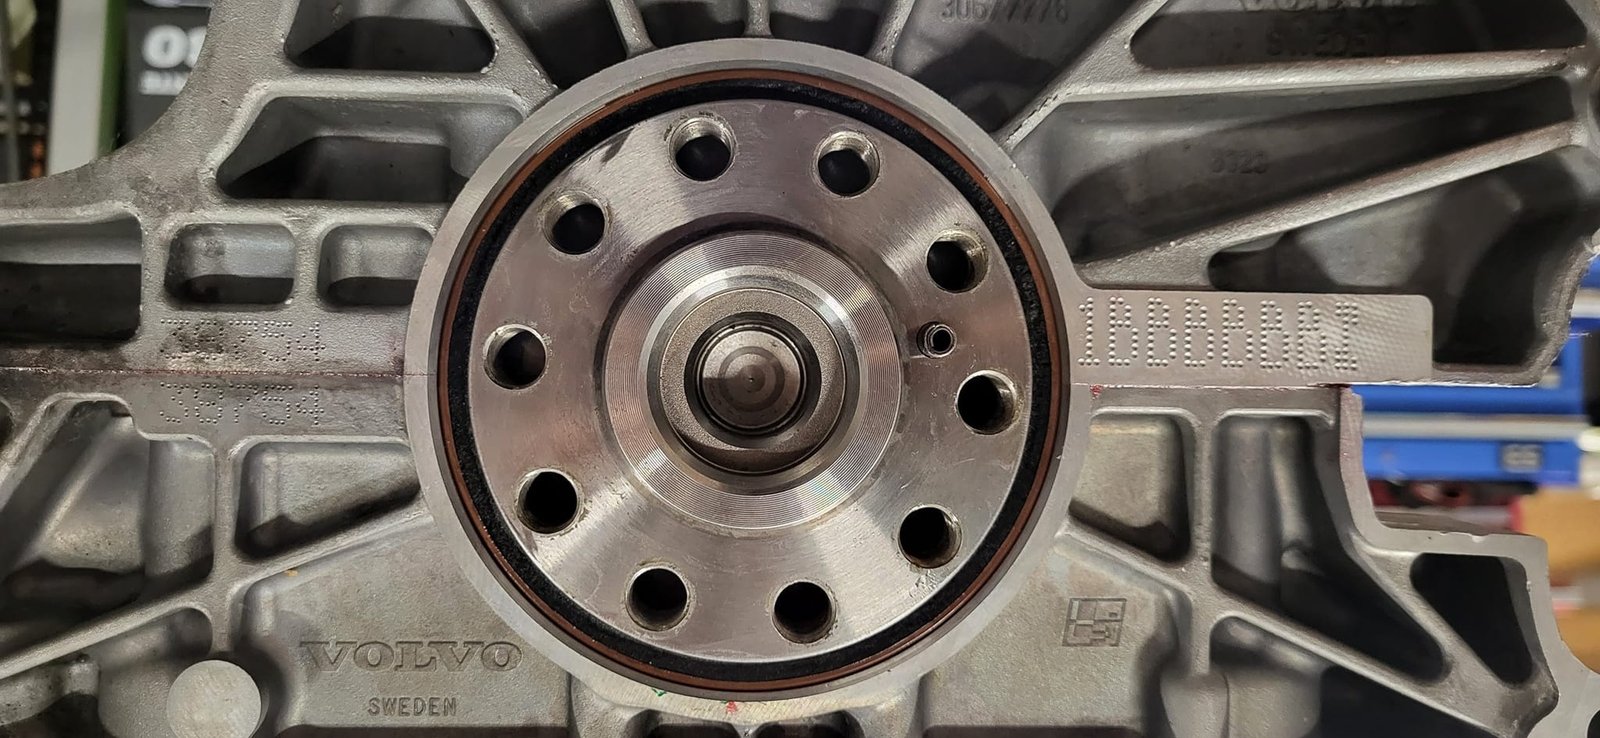
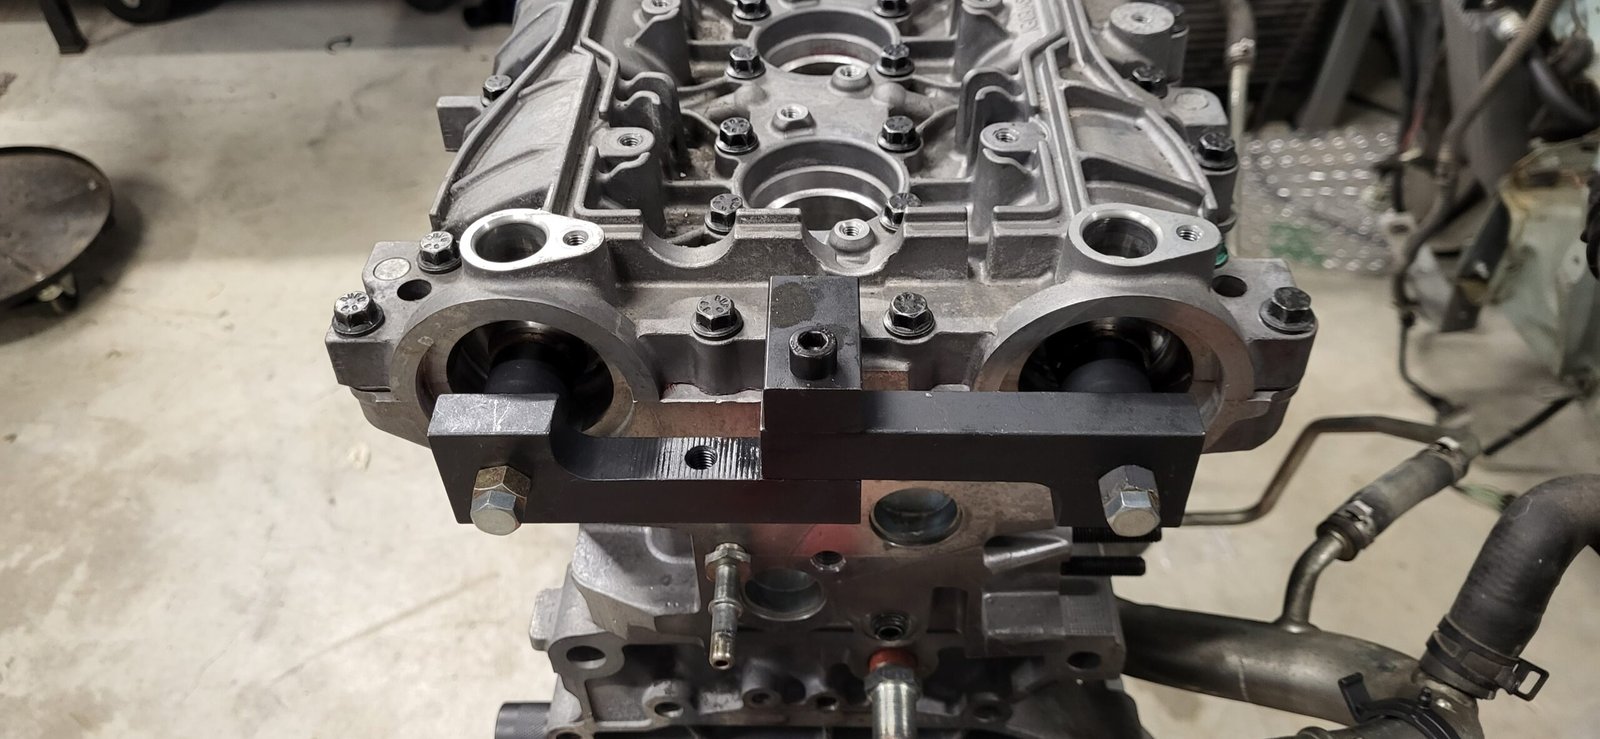
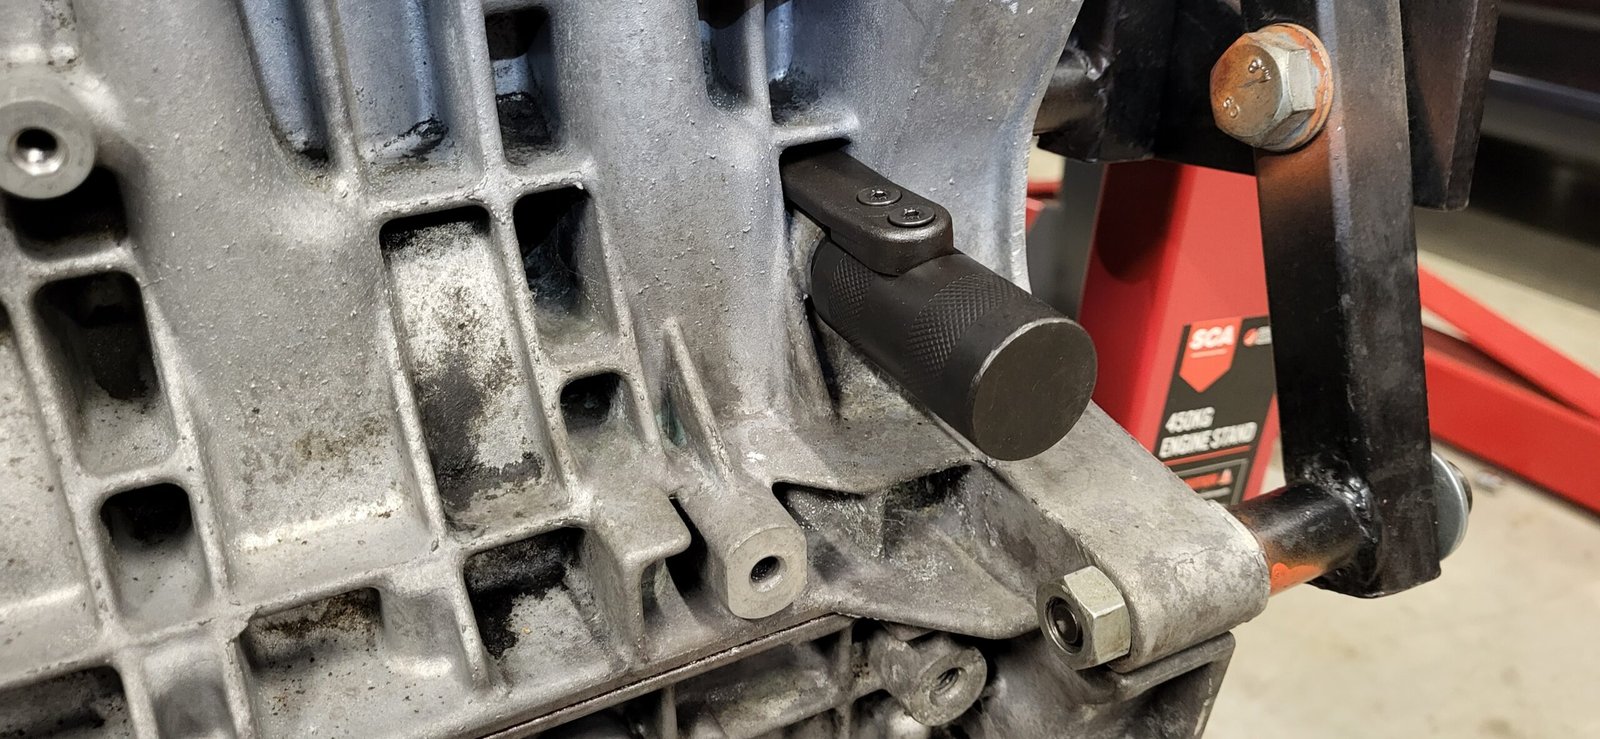
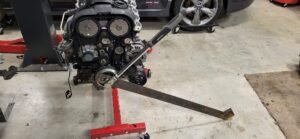
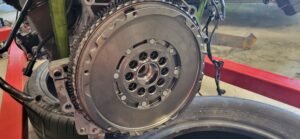
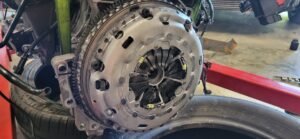
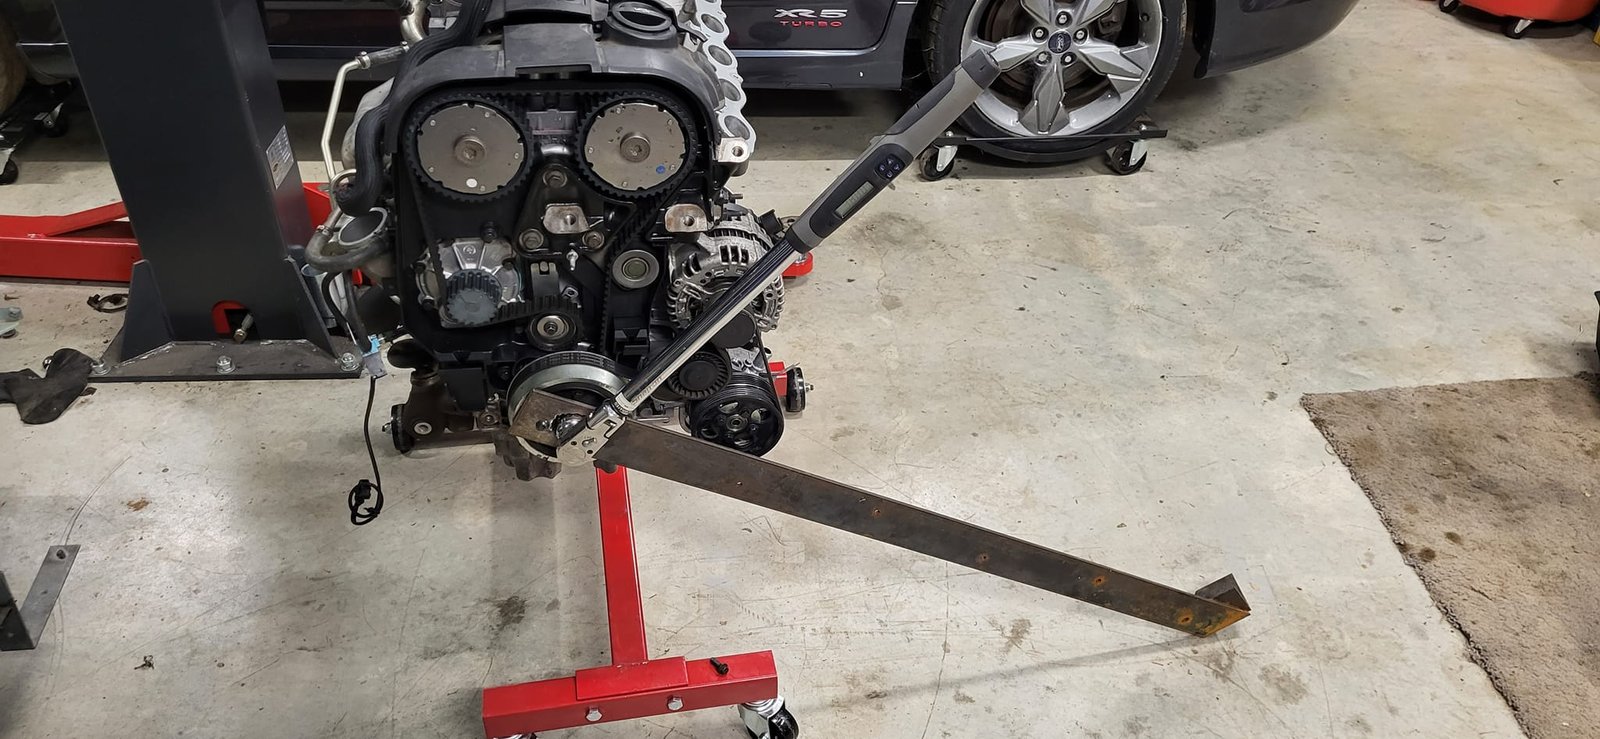
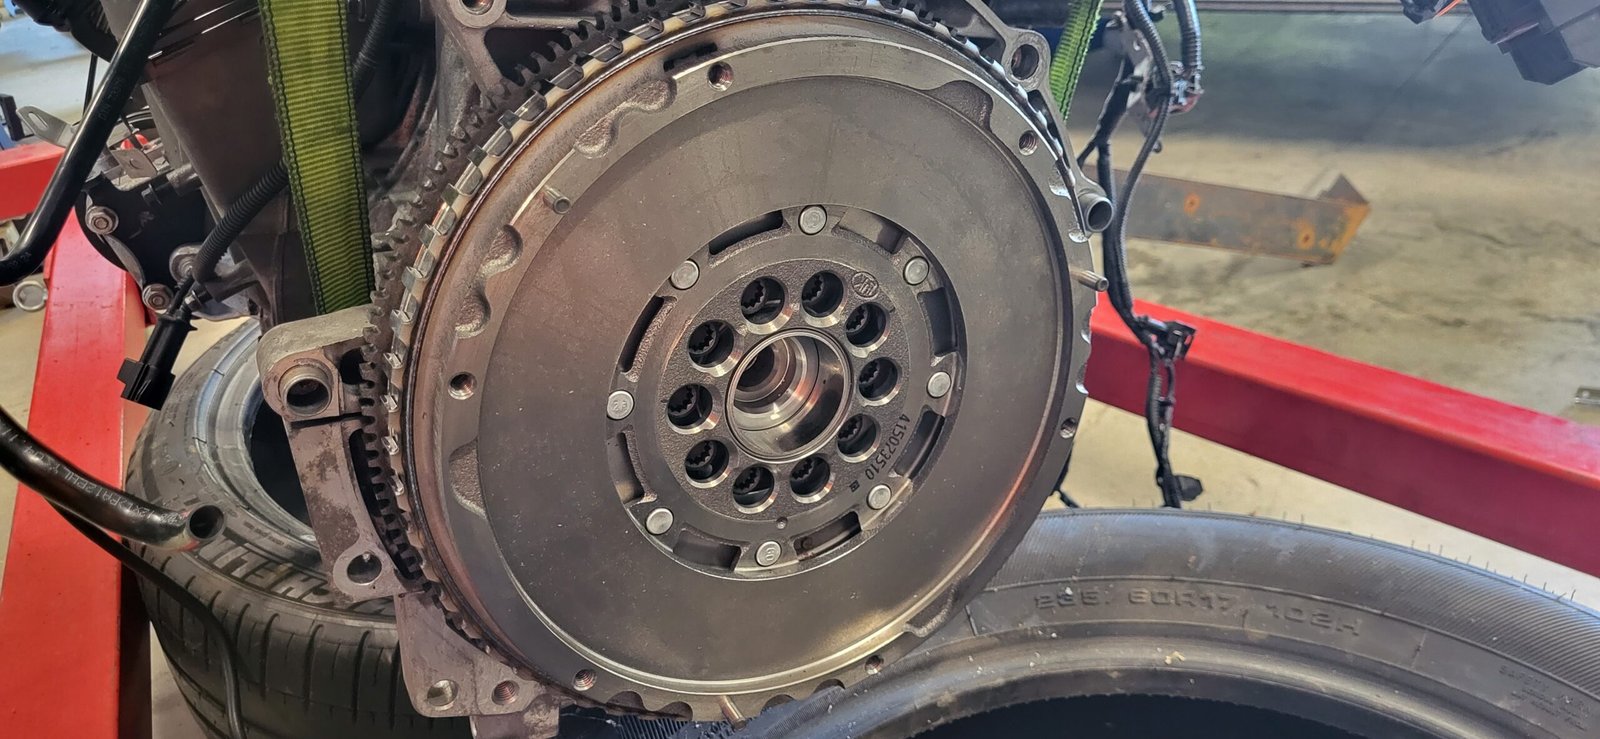
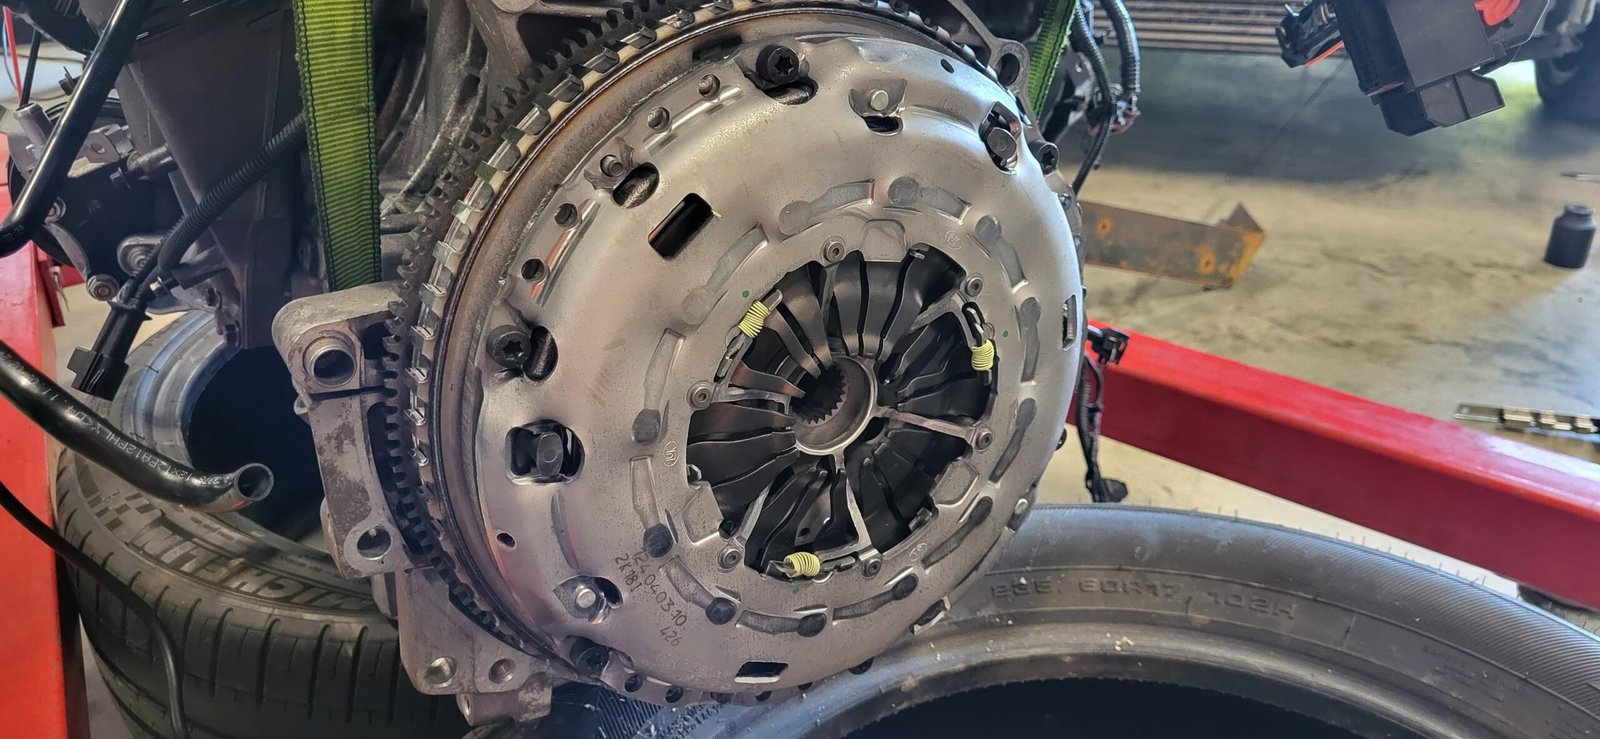
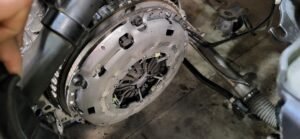
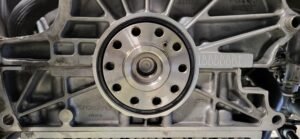
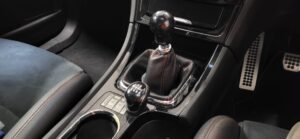
With the intention of running higher boost, I ordered a new RS clutch kit with a new dual mass flywheel, clutch slave, and genuine flywheel bolts to ensure I wouldn’t have to do things twice. As the build continued, I tapped into the advice of the various Facebook groups, replacing hard to reach items and making small improvements as I went. With all necessary parts, including the transmission, now fitted and new seal/bolts etc throughout, the engine and box assembly was now complete and ready for reinstallation – don’t mind the custom service tool I made to torque the balancer bolt…


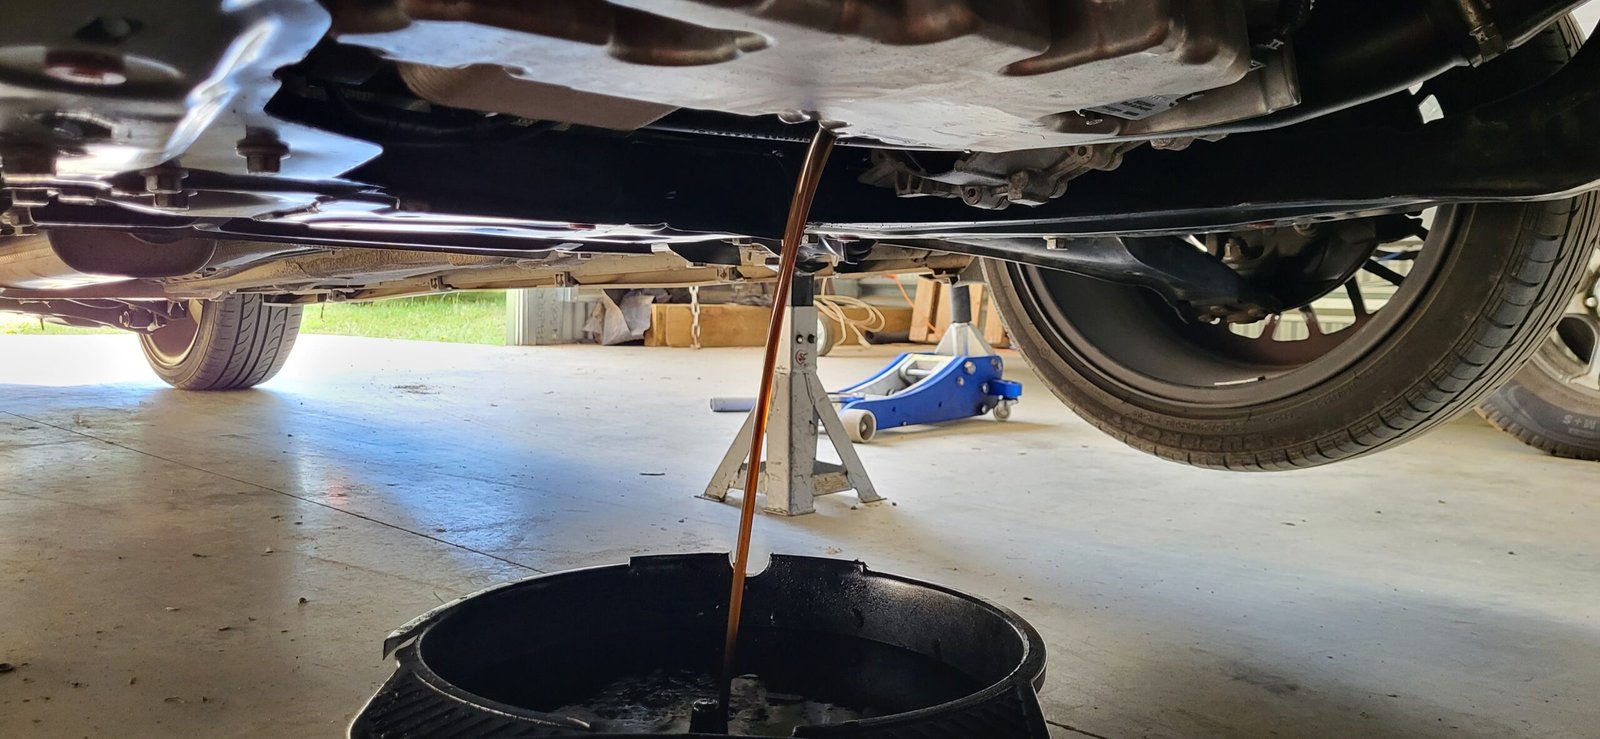
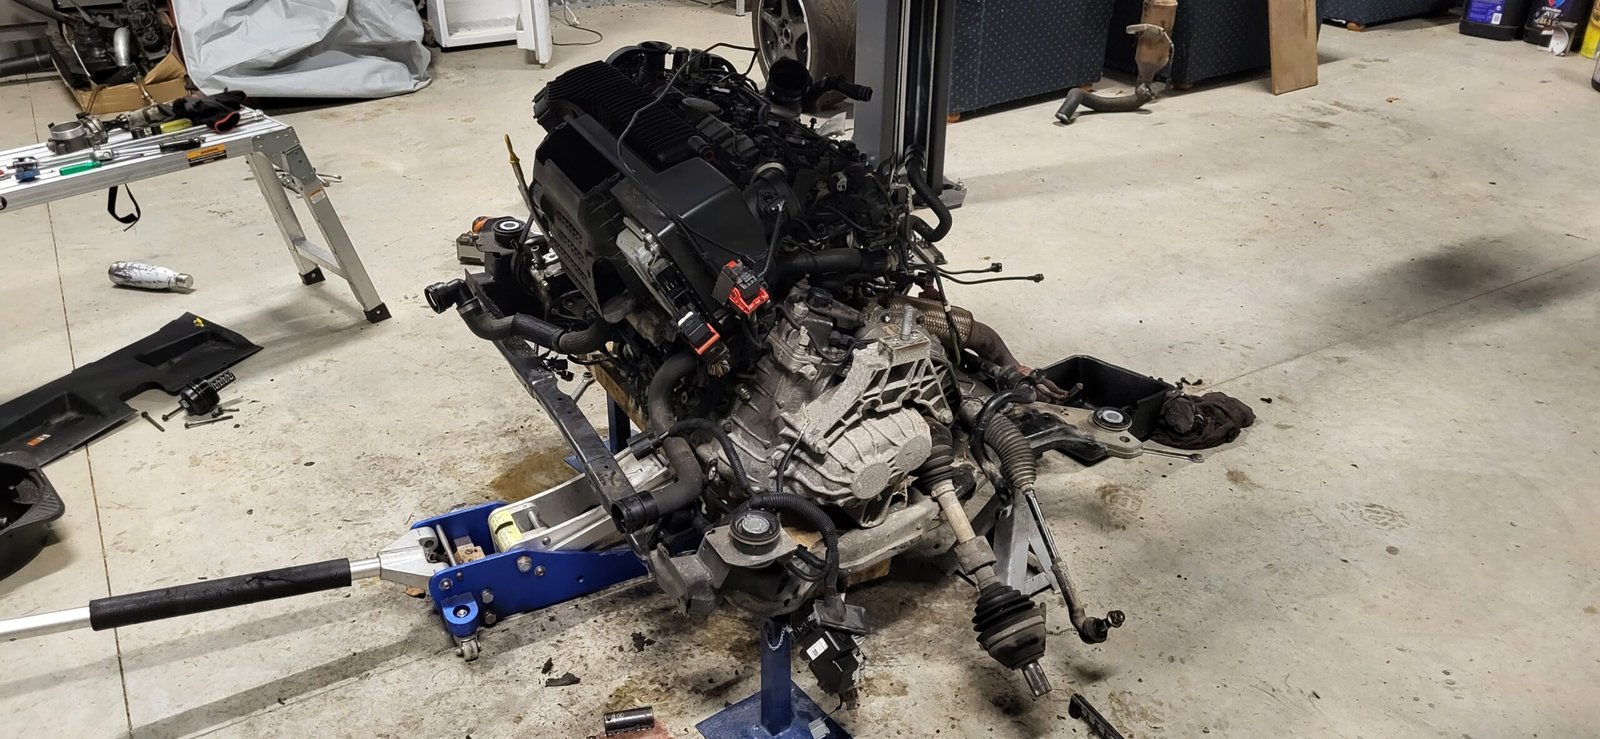
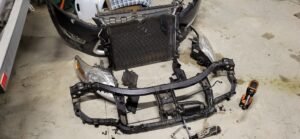
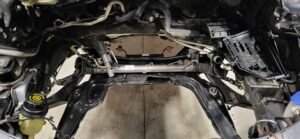
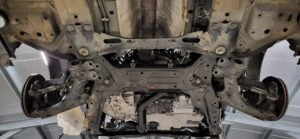
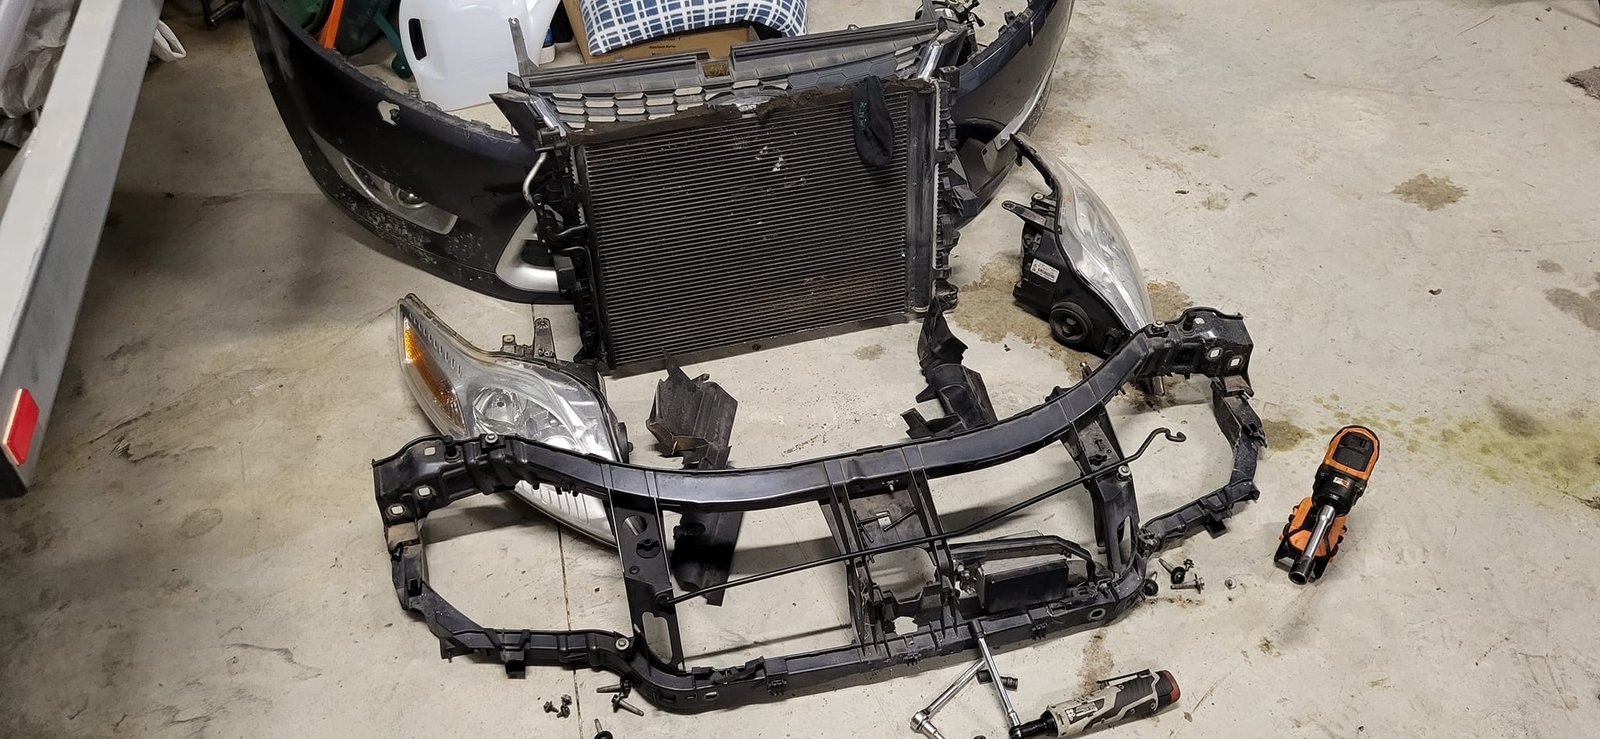
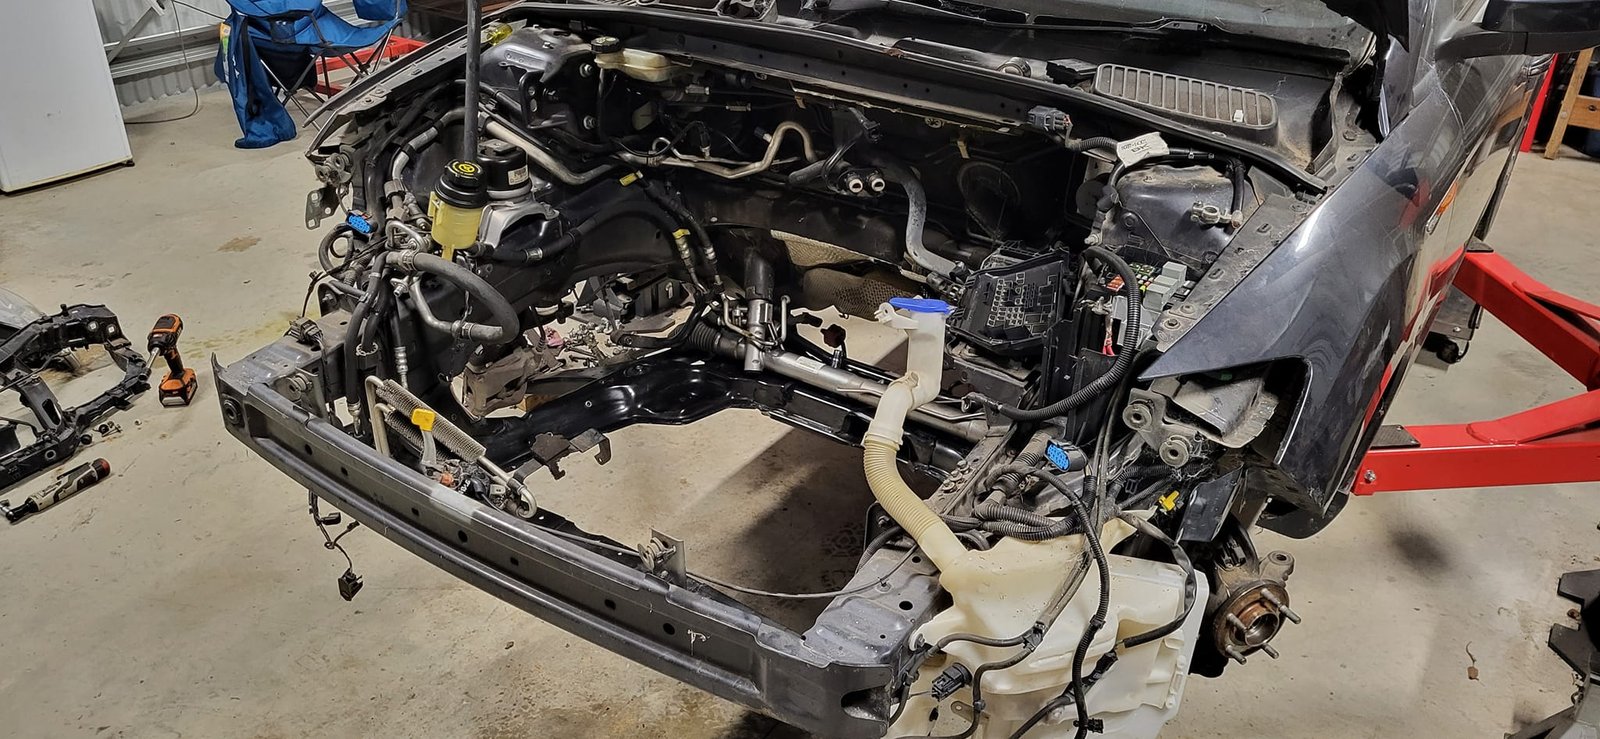
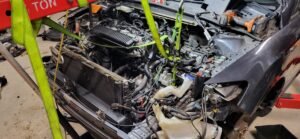
Righto, time to get this lump back in the car. After the hassle of removal and various struggles replacing LCA’s (ratchet straps required) I decided not to remove the subframe again and pulled the front of the car apart to go in that way instead, whilst not “easy” this was certainly the better of the two options, even accounting for the need to re-gas the AC later.
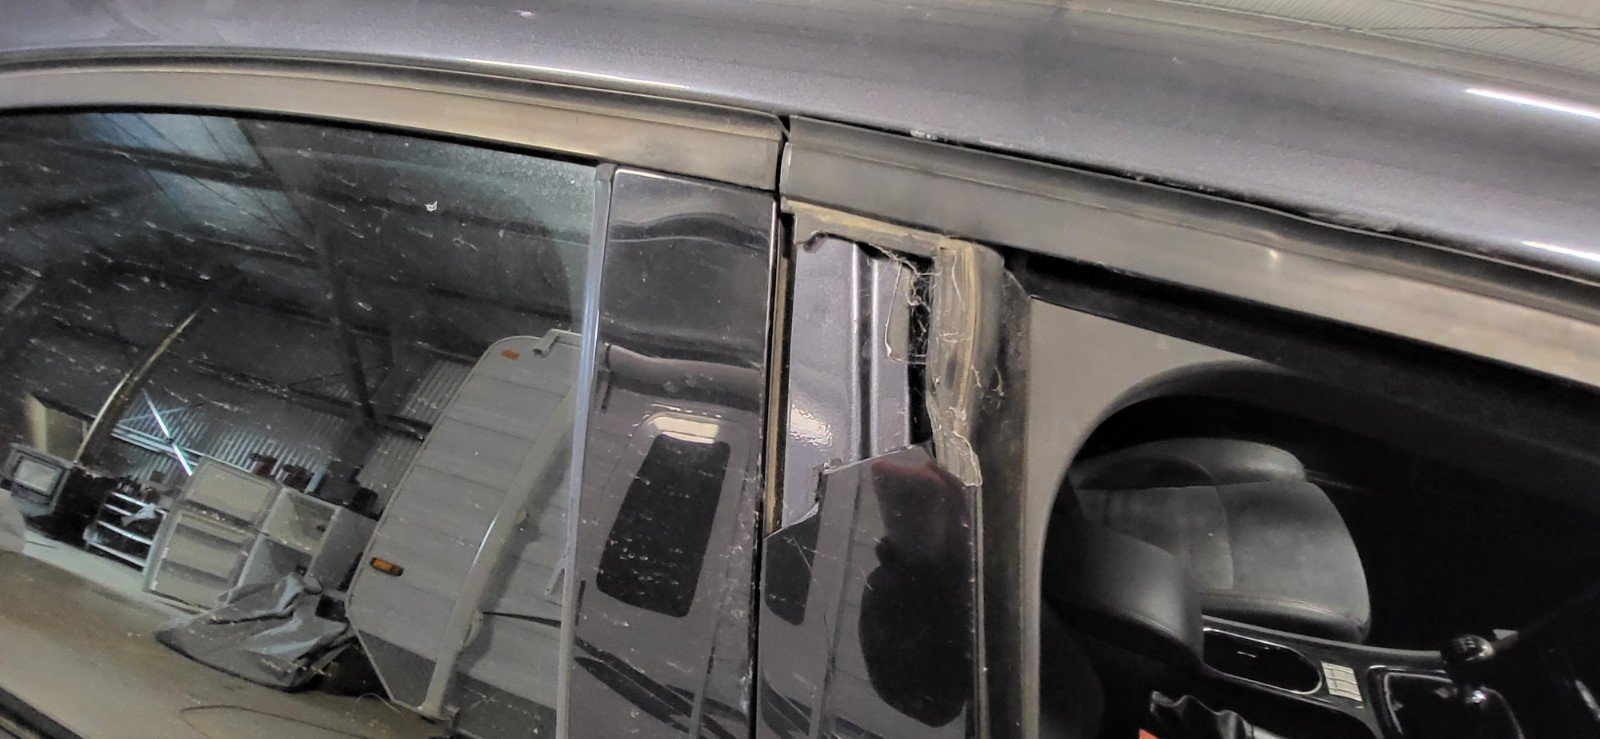
It was a slow and delicate process to get entire assembly angled and positioned correctly to clear everything else in the engine bay, and a small coolant line was damaged in the process, but after calling in an extra set of hands to help me position it, the engine and gearbox were now back in the car ready to be reconnected/plumbed etc.
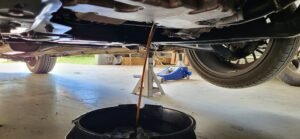
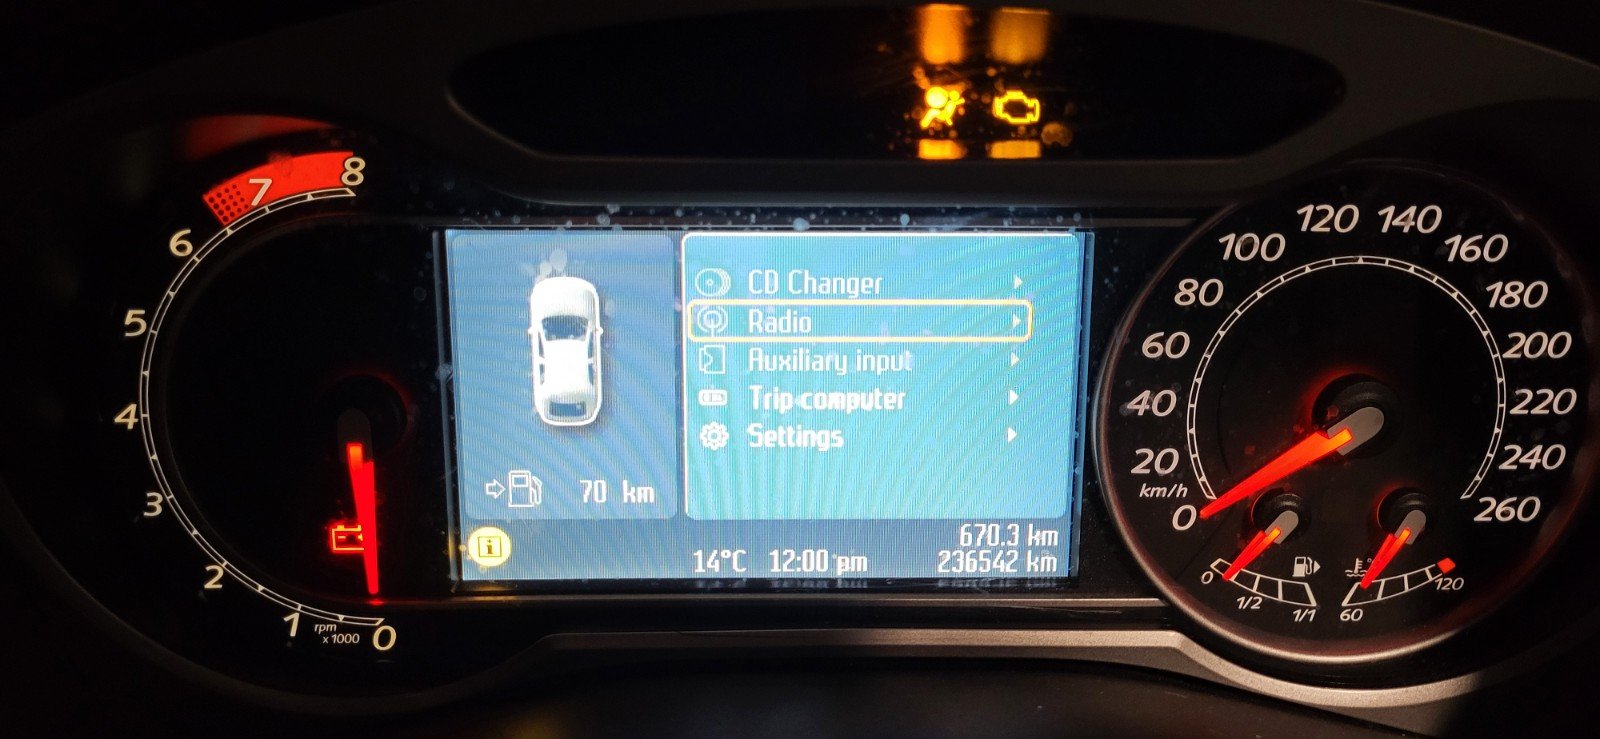
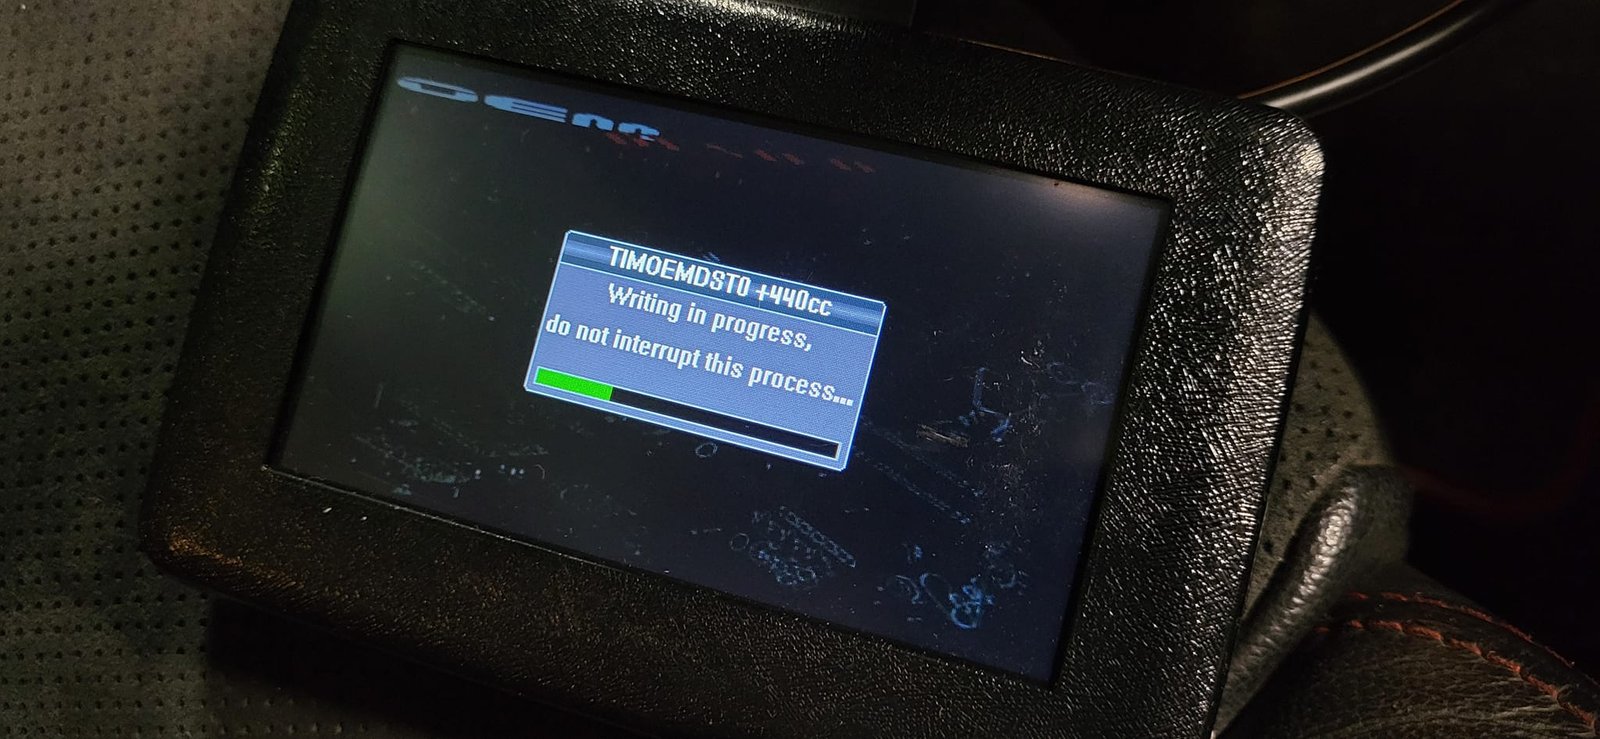
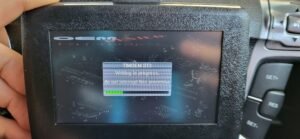
It was mostly smooth sailing at this point, albeit it a little slow due to challenges with access, and bolt by bolt I got closer to the first start. I’d brought a large fire extinguisher over from the house in preparation, just in case. With the sump full of Penrite running in oil, the fuel system primed, coolant checked and ready to bleed and a base tune flashed, it was time to push the button.


I was nervous, and for good reason, I’d never gone this far with other modifications or repairs, this was uncharted waters with a lot of room for error. I’d read about and discussed a lot of do’s and don’ts for first starts, but ultimately none of that would matter if I hadn’t torqued something critical or mismeasured or miscalculated my clearances – stakes were high.
Clutch in, start button pressed, and the engine fired to life surprisingly quickly, I had a camera setup ready to catch whatever the outcome might be and you can see me rapidly checking fittings for leaks, and it’s not long before the trouble starts. Thankfully the engine doesn’t immediately spin a bearing or smash valves into cylinders, and it’s certainly firing on all 5, but there’s a horrible squeal coming from down low, smoke from up top. and there’s very clearly oil weeping from both ends – oh dear.
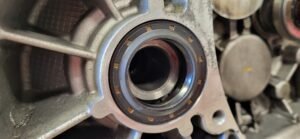
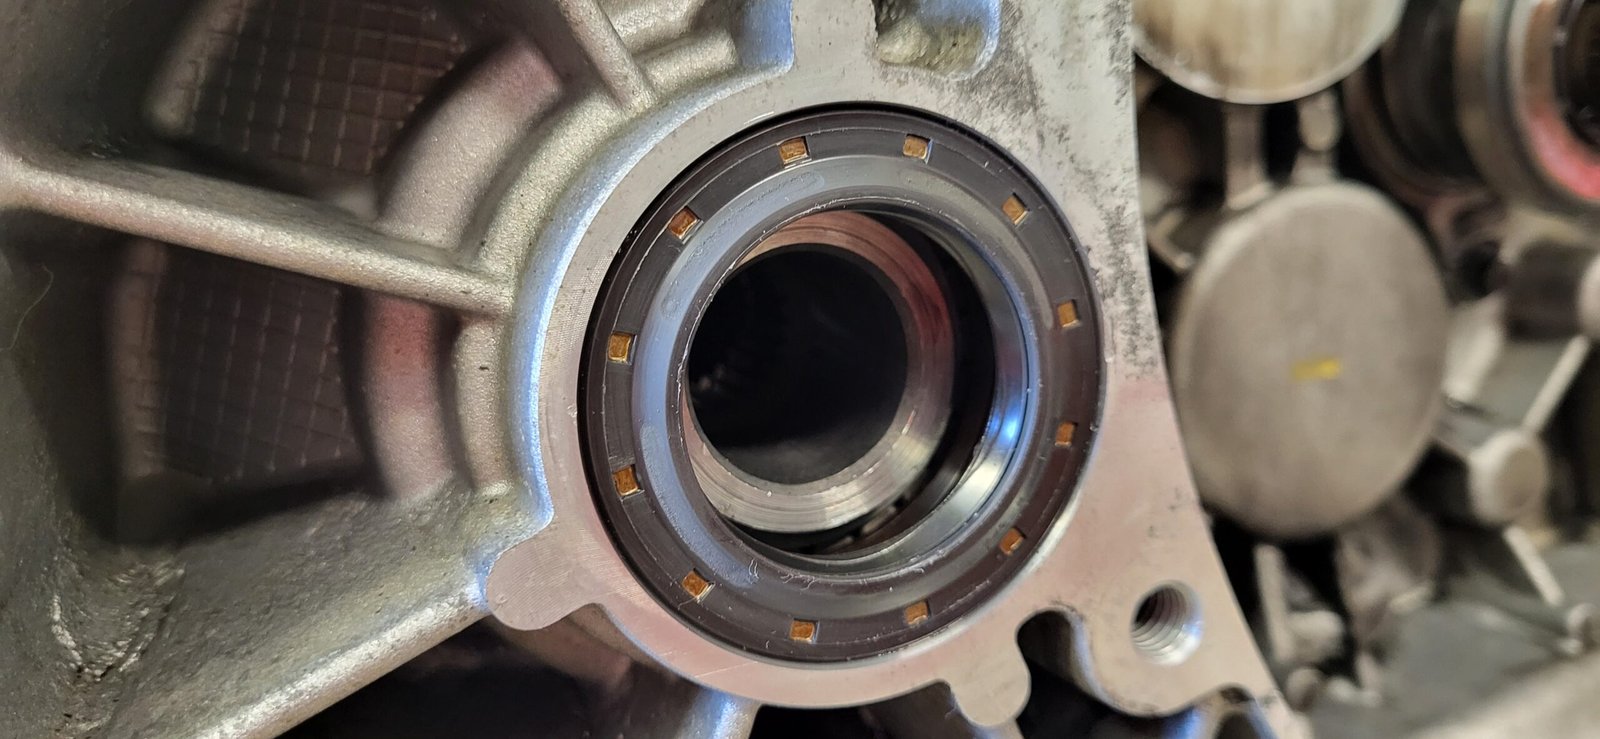
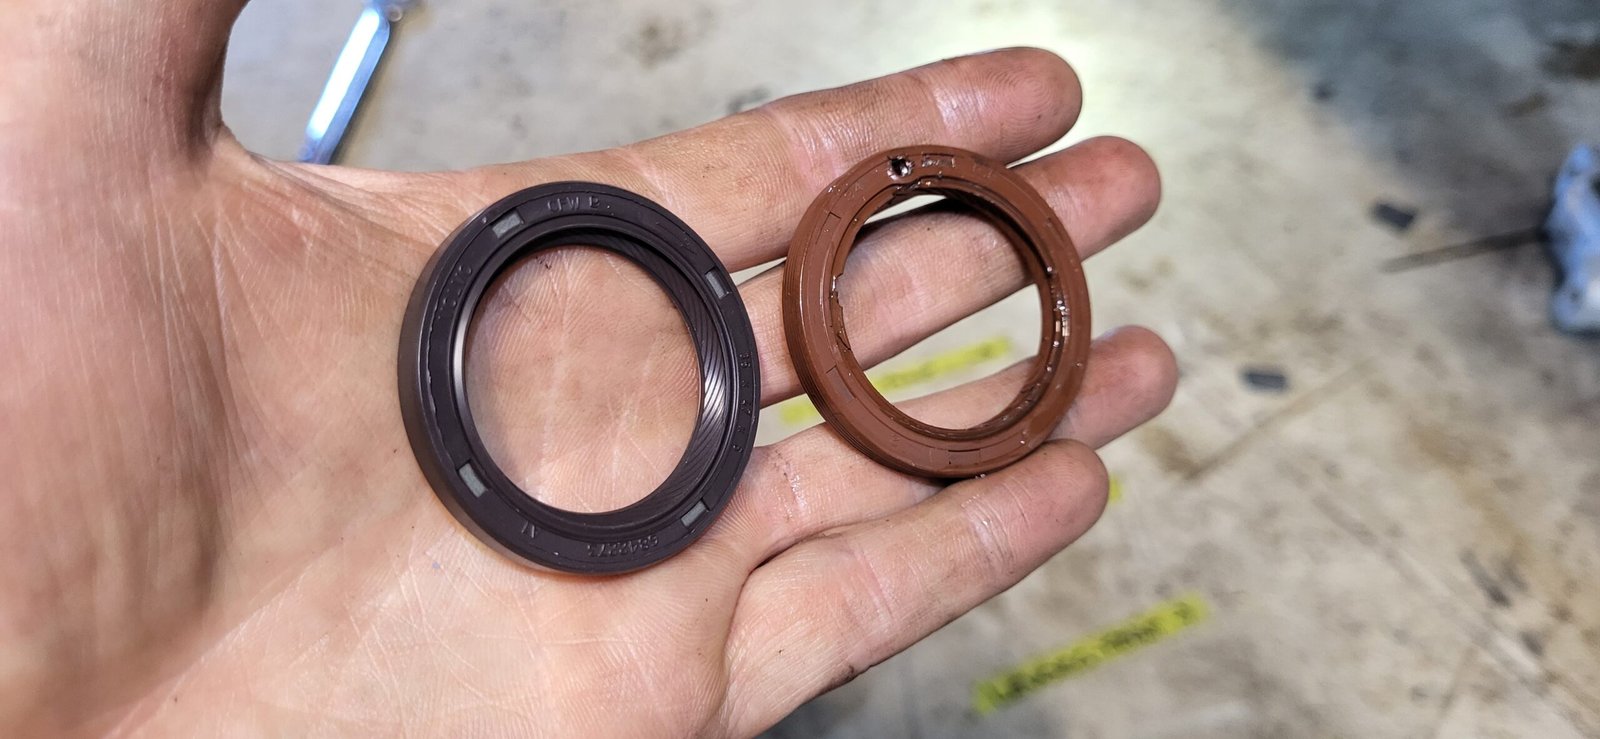
I shut it down and assess the situation, it seems both the front main and rear mains are weeping, not good, and it’s only after a few more starts that I’m able to ascertain the squeal, and thankfully it’s only the bottom timing cover rubbing on the balancer, a quick and easy fix. The smoke is traced to a small piece of coolant hose insulation rubbing on the back of the cam gears, another easy fix. The front and rear mains will not be so simple, I’d used the seals that came in the kit, but these aftermarket seals were just no good. The weeping is not too bad so I take the opportunity to run the engine up through the RPMs and do some basic run in, I can already feel the crankcase pressure changing as the rings are sealing, all good signs. A few blips into the middle of the RPM band and all the important pieces are still inside the engine where they should be.
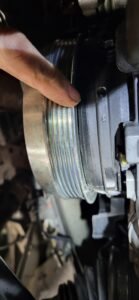
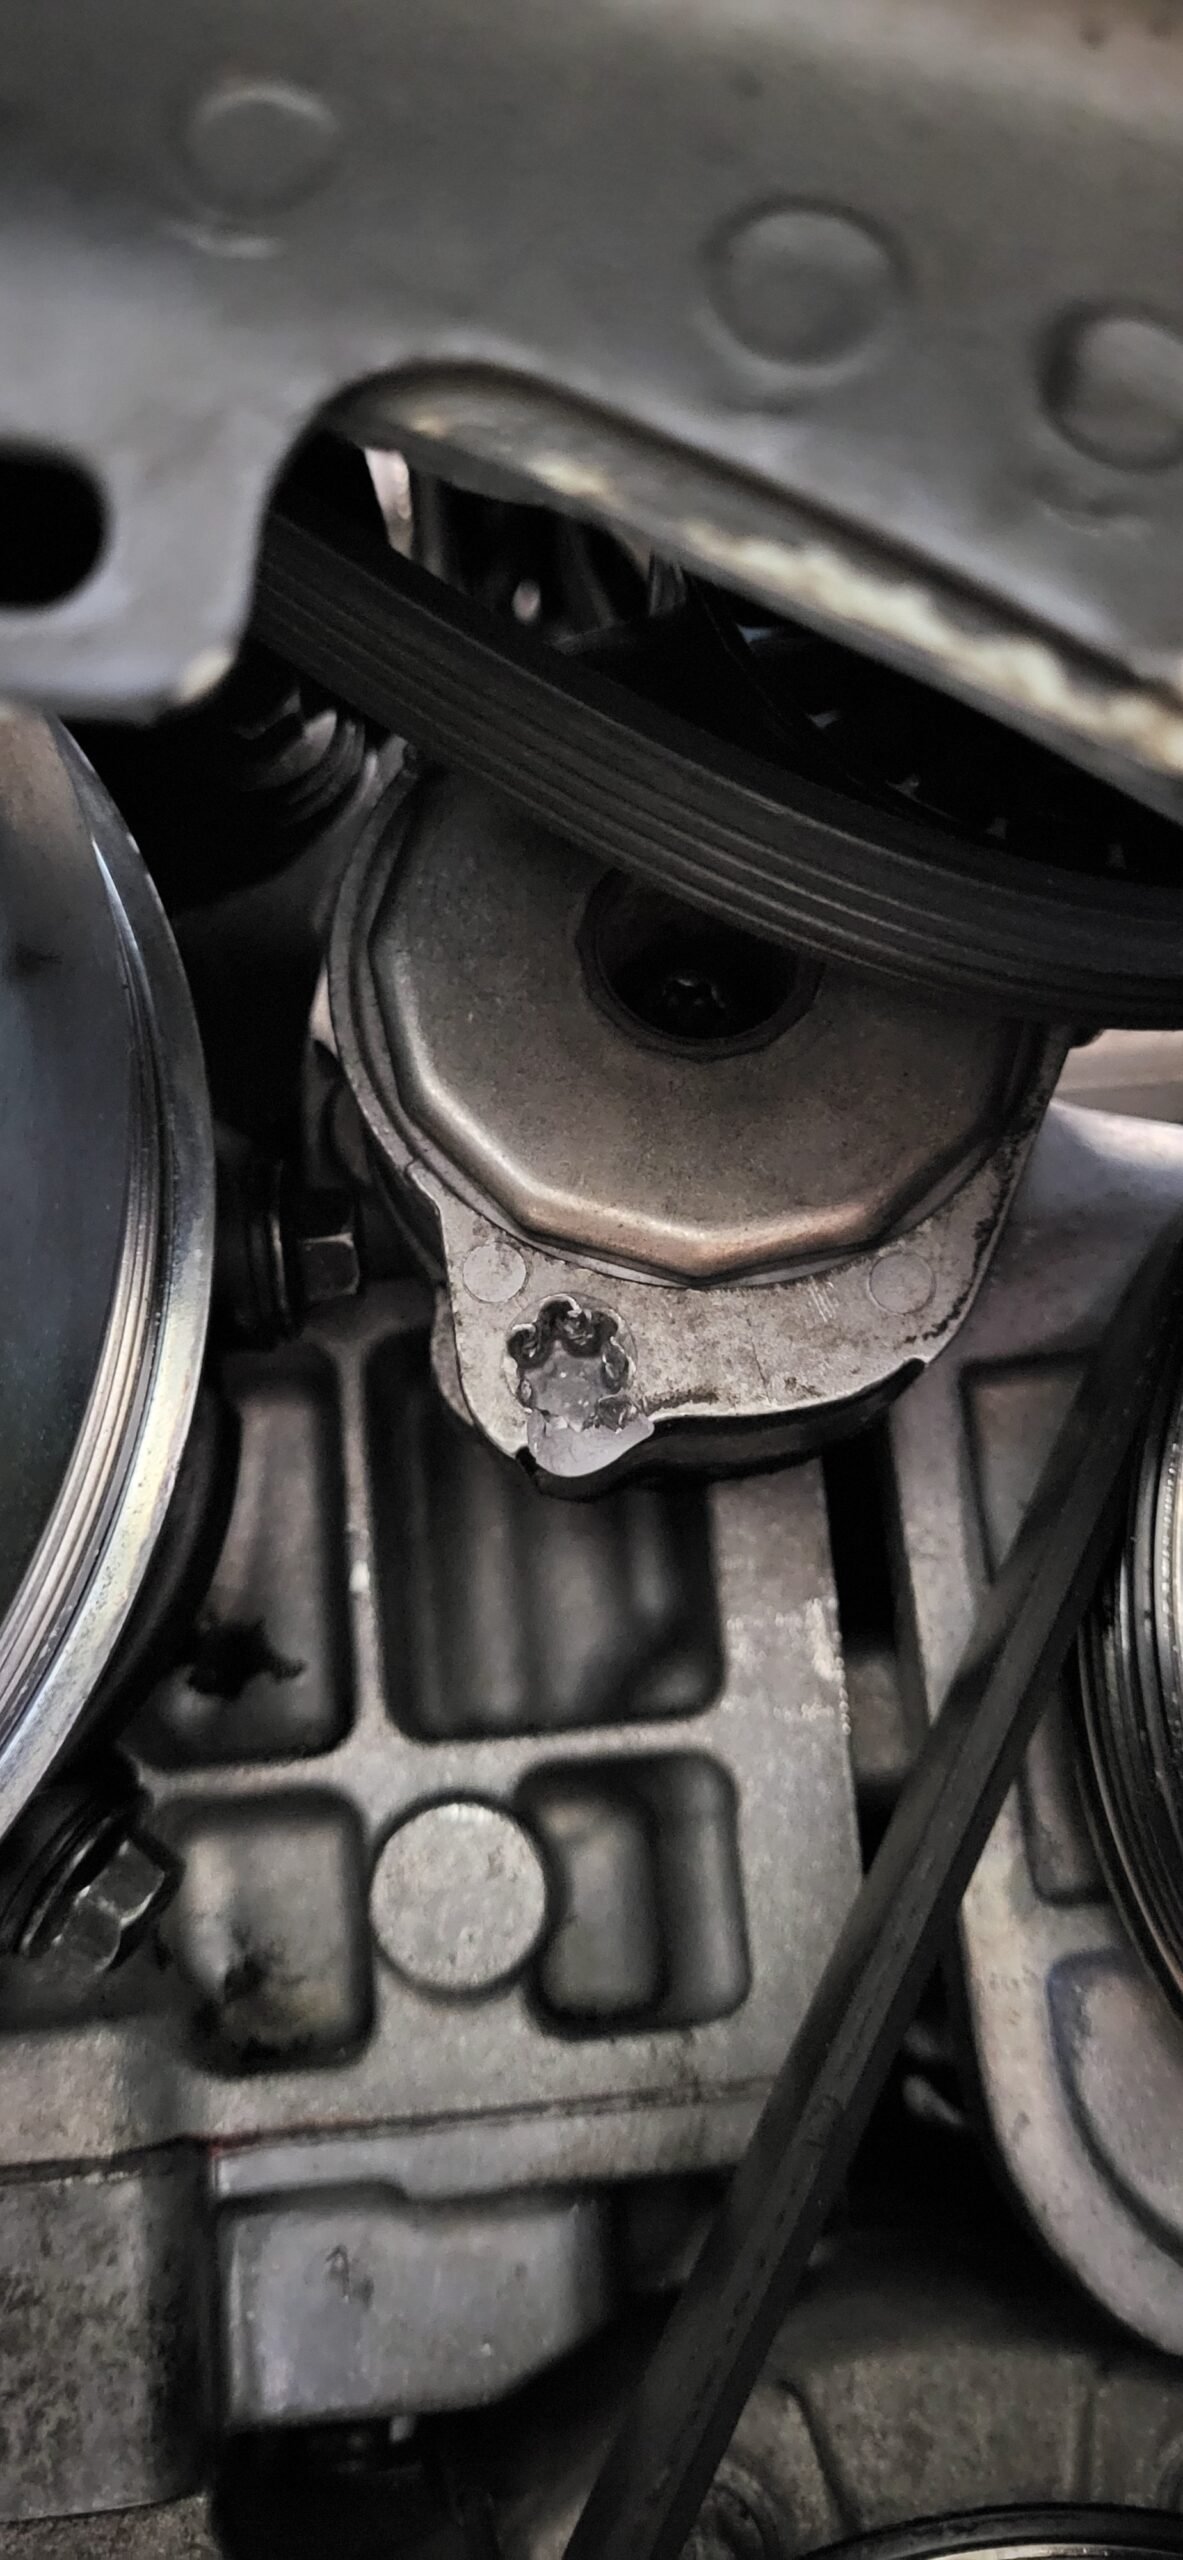
I sourced some genuine Volvo seals as I got to work dropping the box to access the rear main and removing the accessory belts and balancer to access the front main, it was slow going and I’m very much not stoked about the extra work in the cramped space. It takes quite a while before the engine bay is put back together ready for another test start and to make matters worse, I encounter the “common” snapped balancer fitting during the belt reinstallation, great.


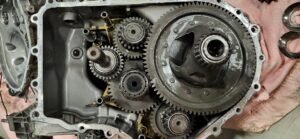
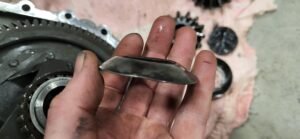
The good news is both the new seals are leak free, but celebrations are short lived as the car makes a horrible bang a few minutes after start up. It initially it sounds like the bottom end has failed, but it doesn’t take me long to trace the noise to the gearbox instead and work out what’s just happened.
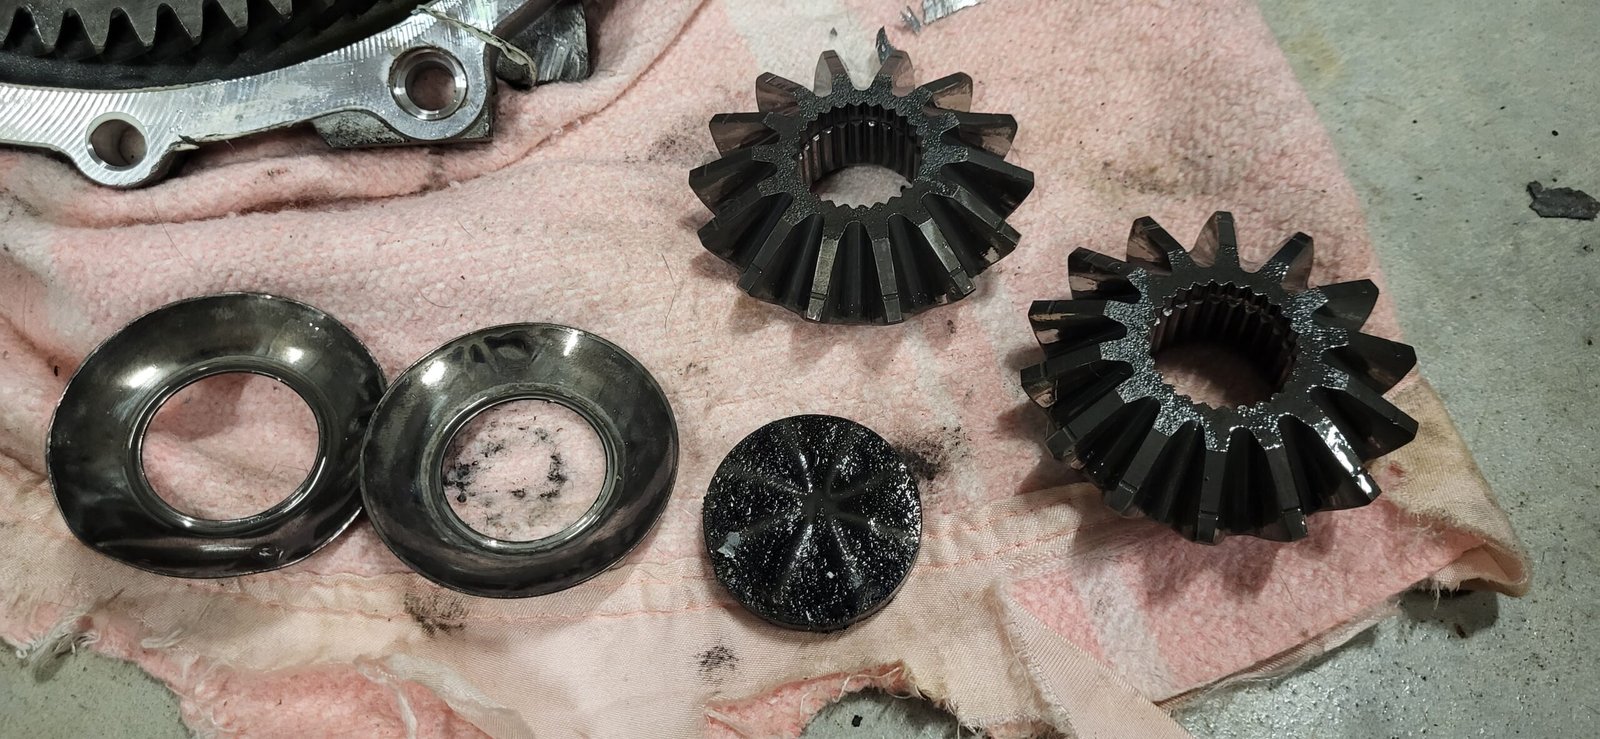
To start the car and test the seals, the gearbox must be reinstalled so the starter can be mounted, but to “save some time” in case the new rear main didn’t seal properly, and because it’s a shitful fiddly job, I did not reinstall the drive shafts or the shifter linkage, having put the box in neutral before the work was started. Rotation from the input shaft has allowed the transmission to just barely grab a gear and in doing so, spit bits out of the unsupported diff – you’ve gotta be kidding me…
I contemplate pulling the box from the donor car, but I really want to keep it as a full runner so it can be sold more easily later, I order a used trans with much lower k’s and wait for that to arrive as I start removing the transmission again, of course I open it up to check the damage.
I get the whole lot back together and this time put the driveshafts and shifter linkage back in place before starting the car again and doing a quick test drive out of the shed to make sure everything is working as it should, for the first time in a long time, the car is moving under its own power and not leaking any fluids. I put a little video together for Instagram and it’s not until I’m listening back to the original that I can hear an unusual whirring…


Maybe it’s just wearing in? Maybe it’s a vacuum leak? I go for a few small test drives to get the rings sealed and keep going over the car double checking dump pipe bolts, hose clamps, and various other connection points as I try and pinpoint the noise, which seems to be getting worse.
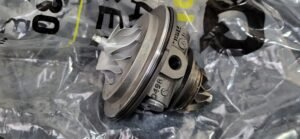
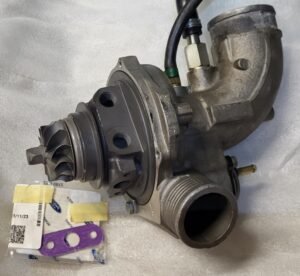
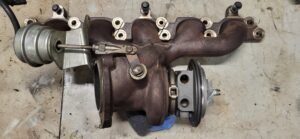
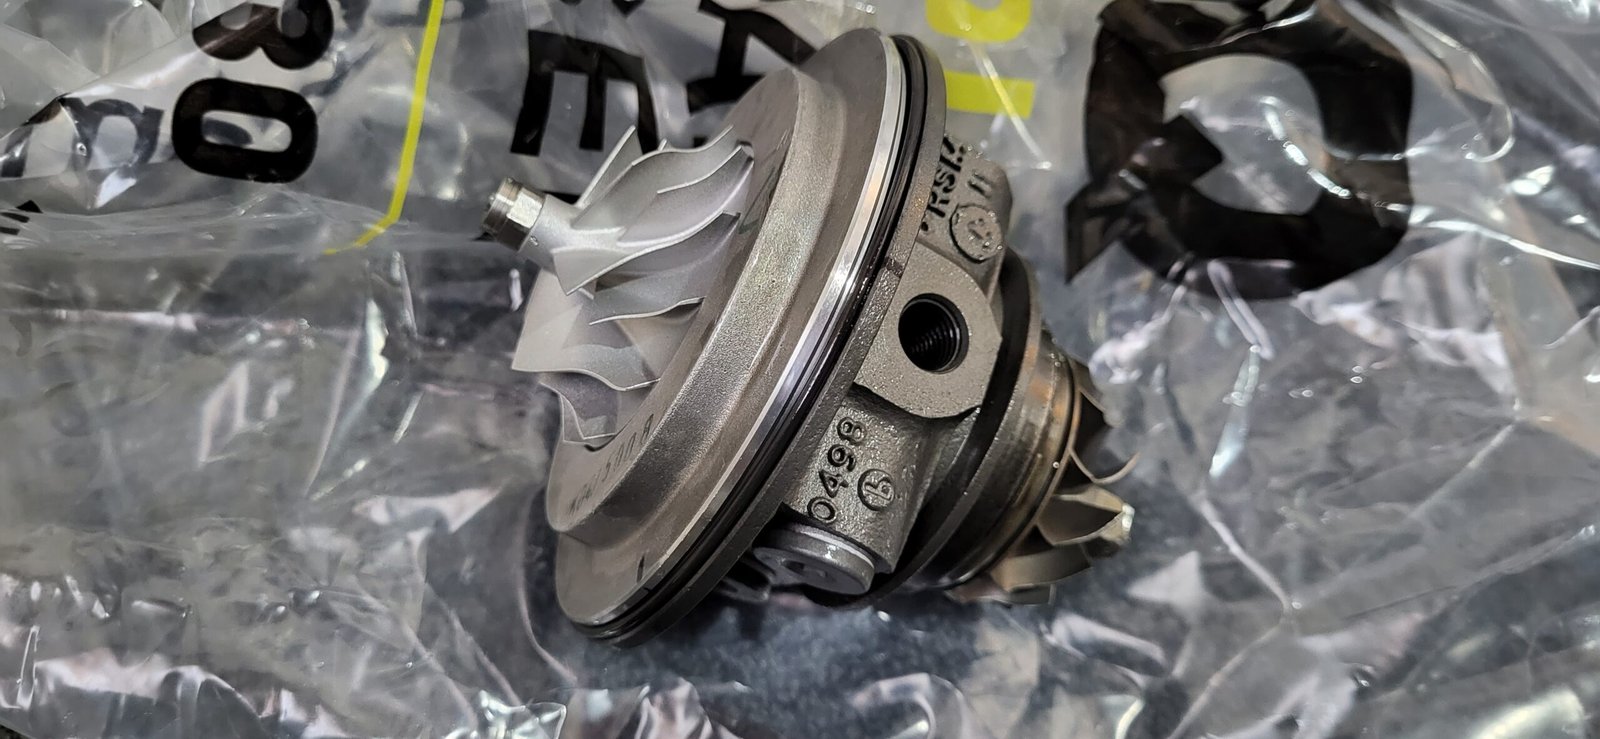
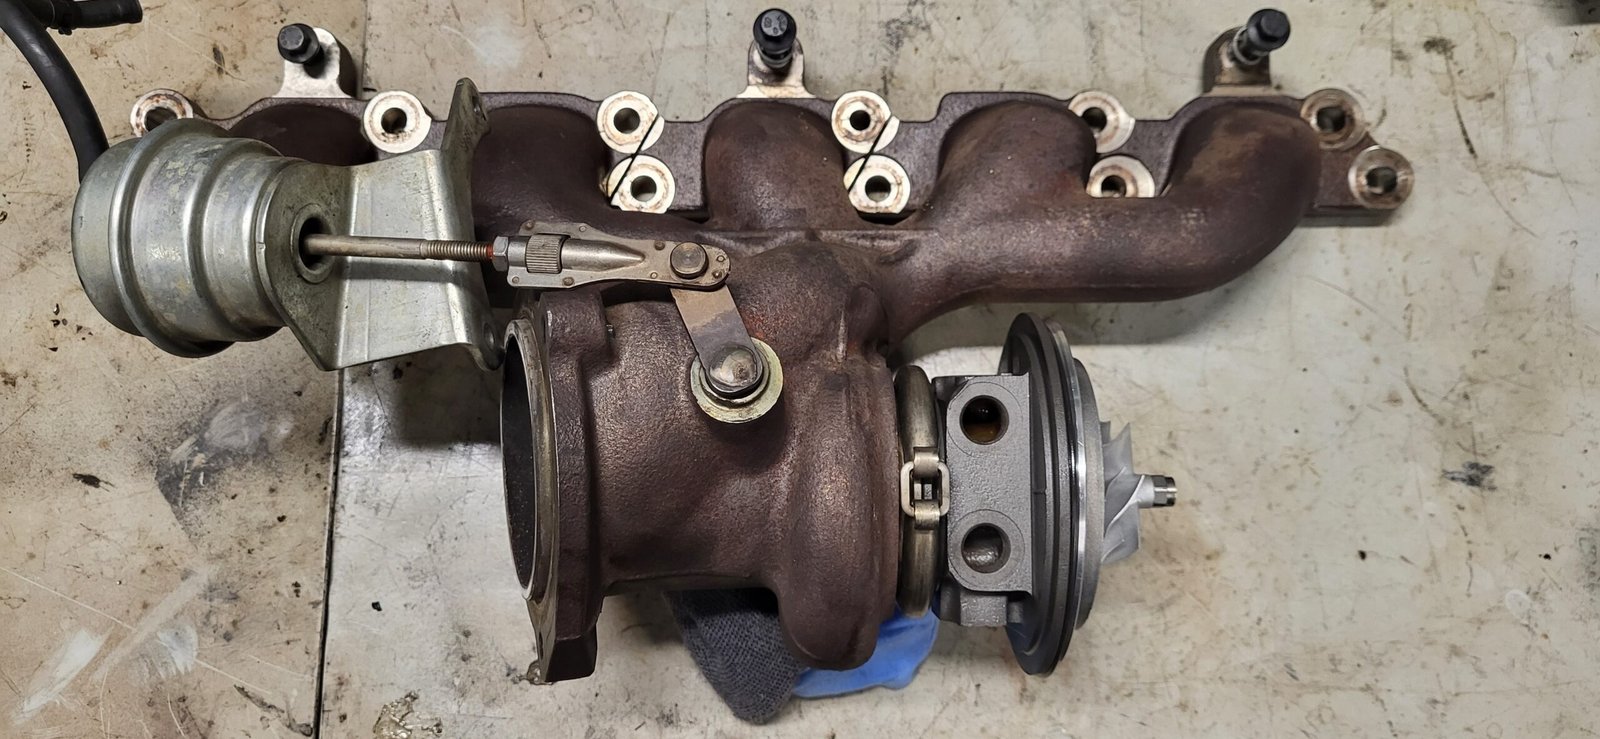
I’m pretty convinced it’s the turbo by this point, it wasn’t making these noise during the first inspection, but it seems to be the original core which means it’s done a lot of ks and these little bush bearing K04s aren’t known for extreme longevity. One of the more experienced XR5 community members, who specialises in turbo rebuilds, concurs with my testing and the call is made to remove it and send it up for inspection.
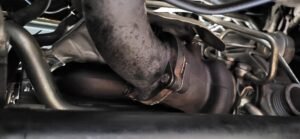
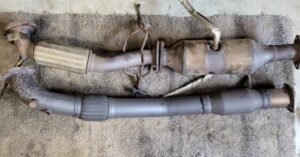
Thankfully, rebuilds are fast and cheap and it’s not long at all before the refreshed core is sent back and refitted to the car, not the most fun job on a FWD car, but nothing is on this car – I’m thankful for having used new exhaust manfiold studs at this point.


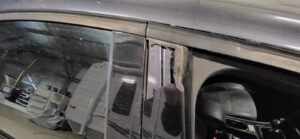
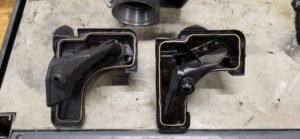
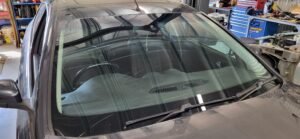
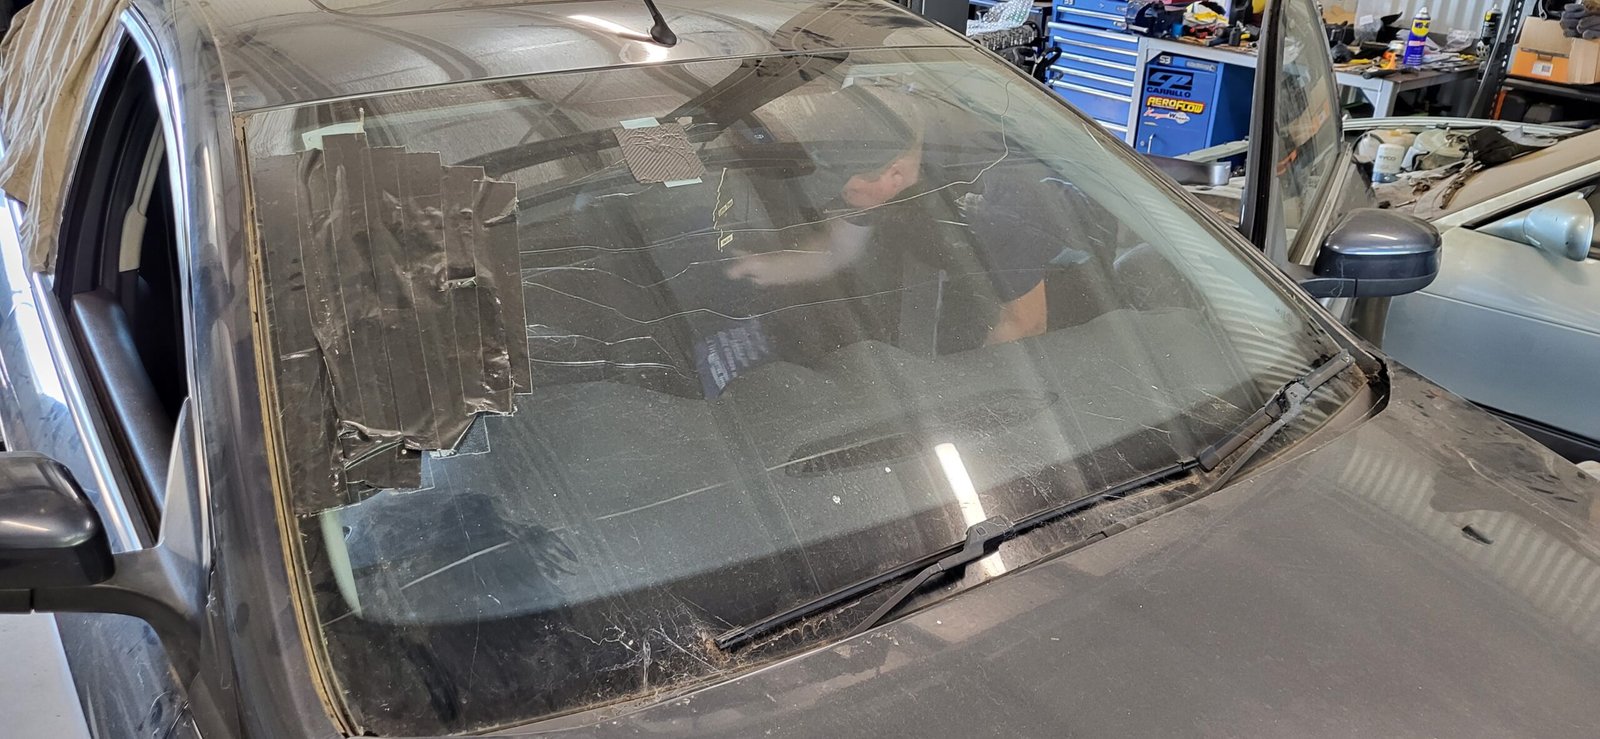
With the car now drivable again I continued with the run in, checking the filter pleats with each oil change – everything was looking good. It was now time to start prepping the car for a roadworthy inspection so I could start to daily it as intended. A new windscreen was fitted, as I got to work swapping out a leaking shock, fitting the better brakes from the donor car, and fixing a number of smaller and more obvious road worthy items.
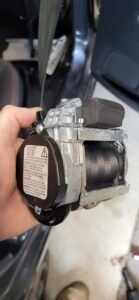
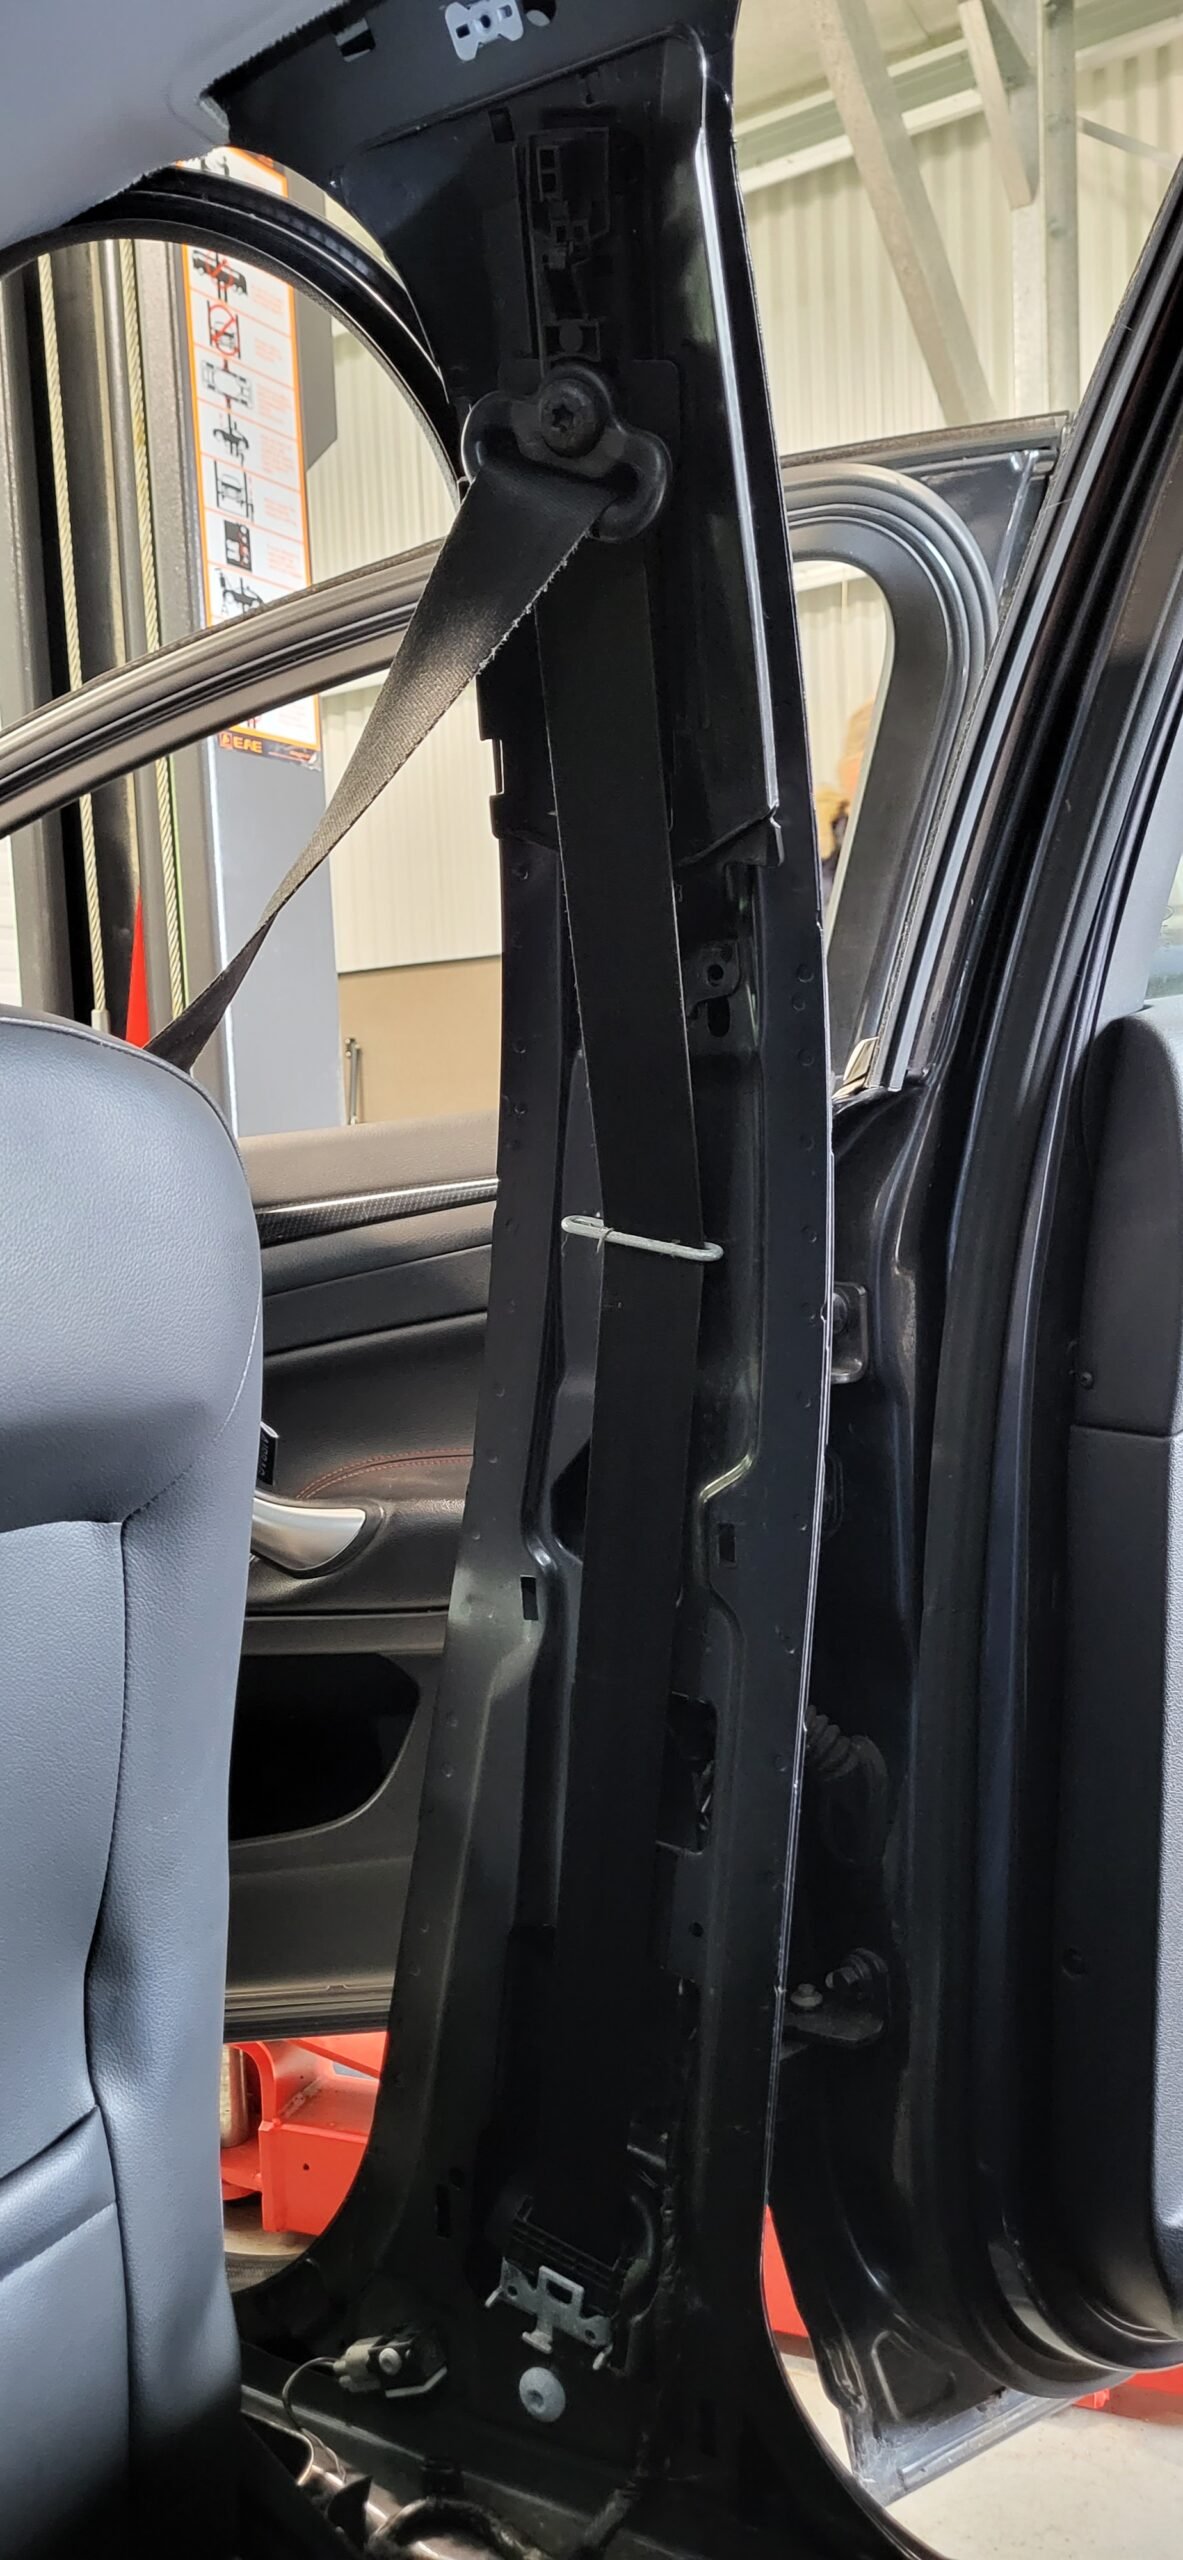
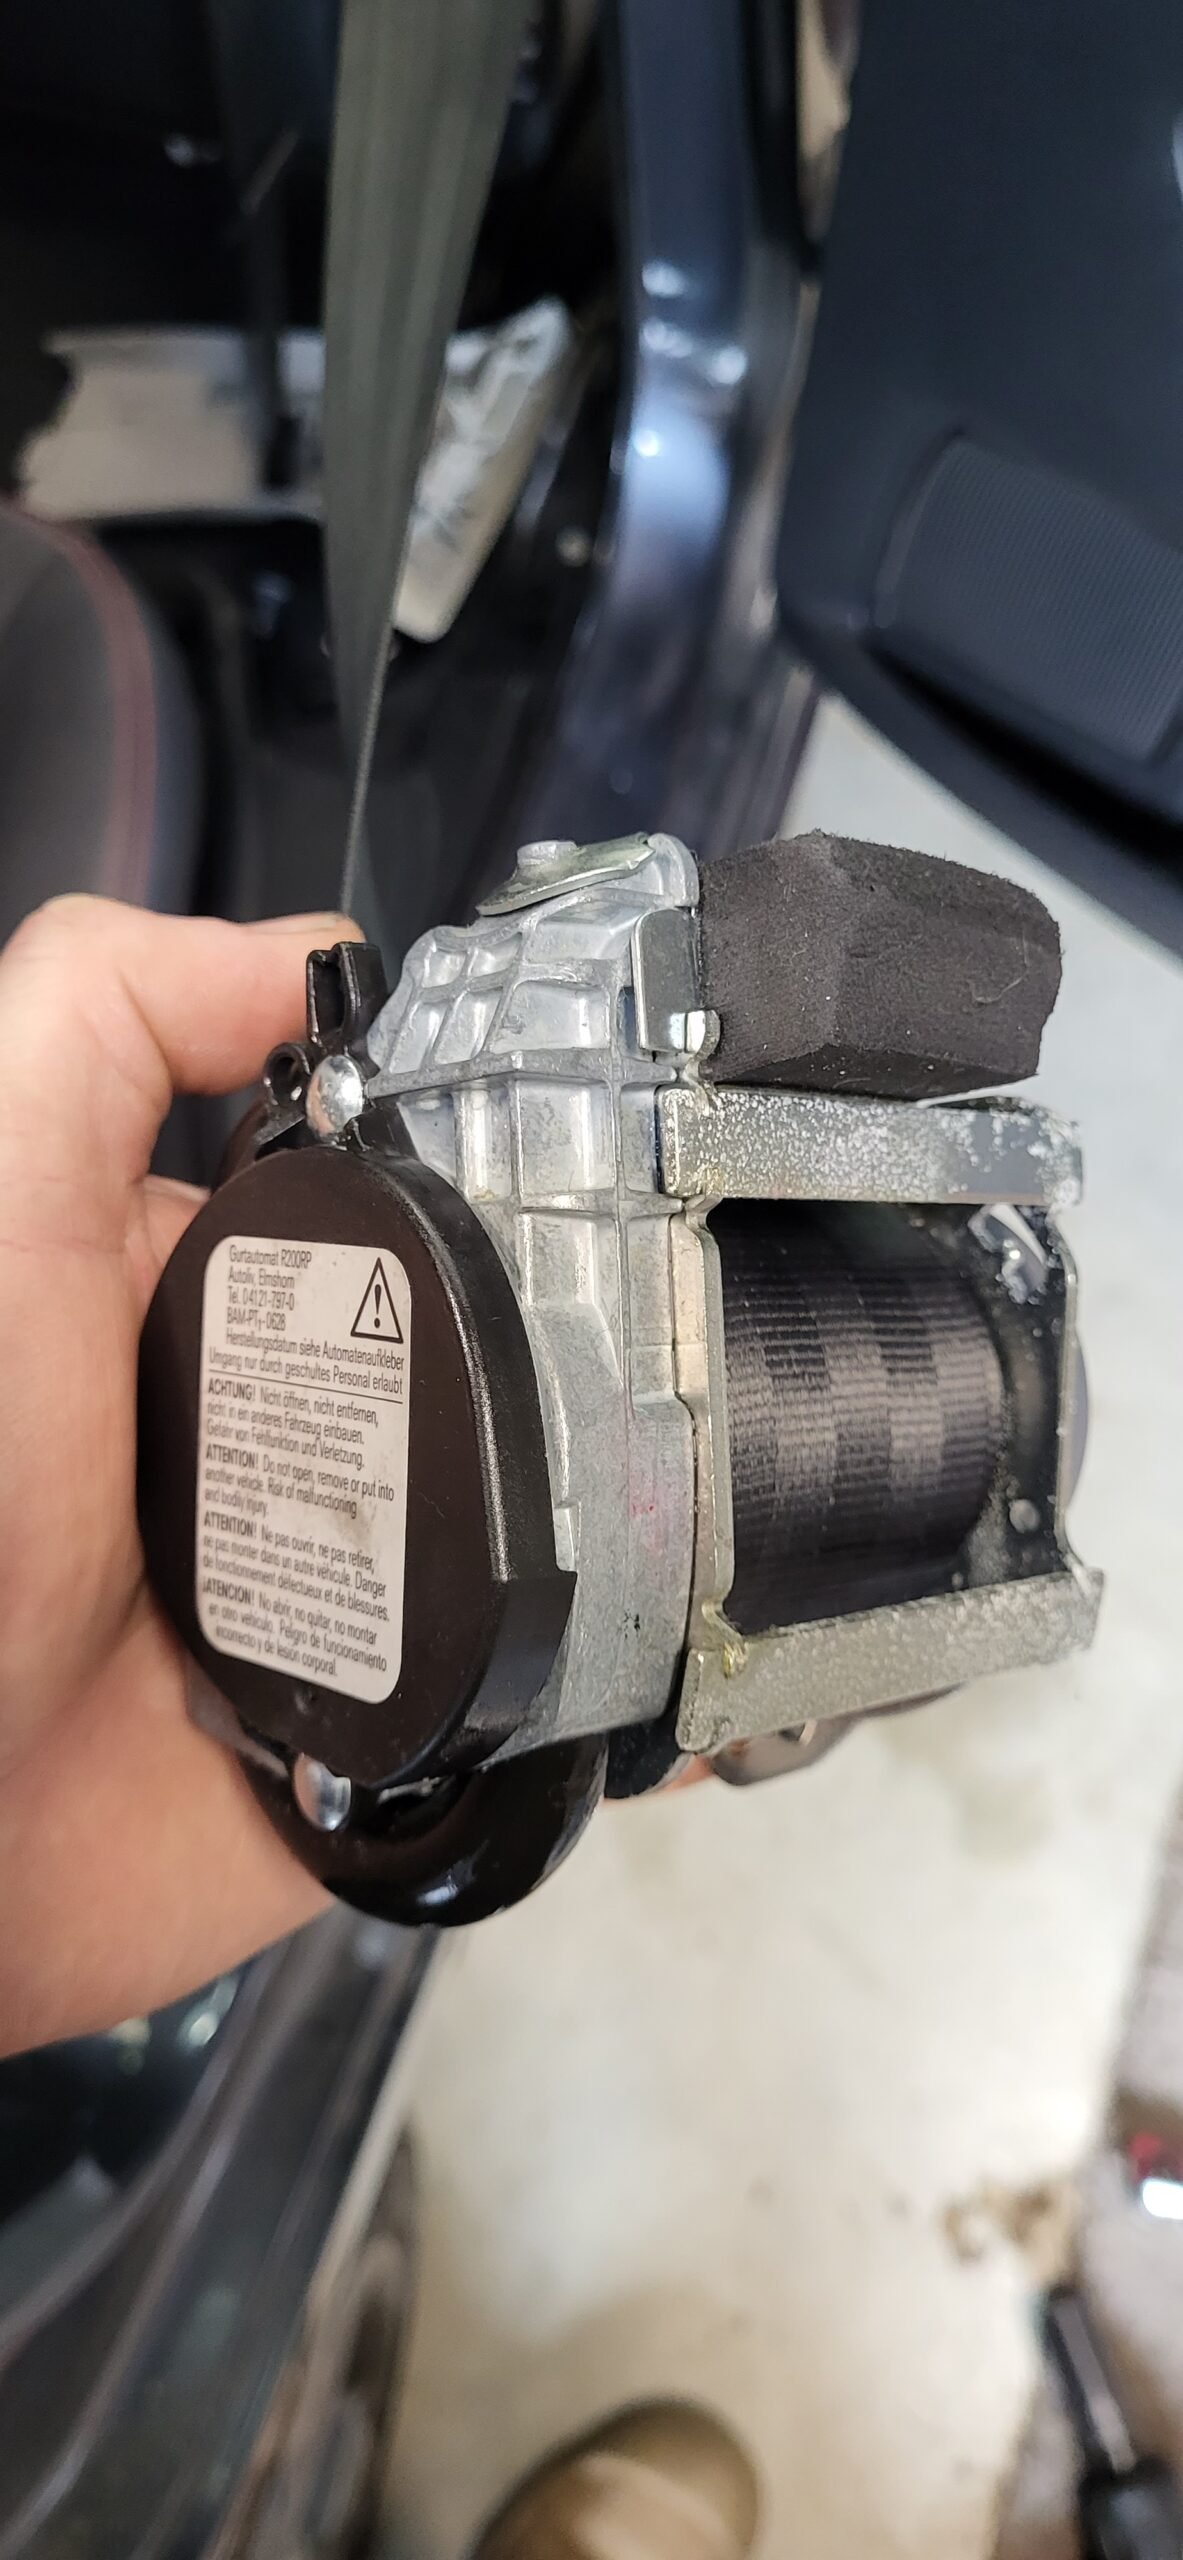
The car failed its first attempt as it “just” needed new tyres, I chanced it as I wanted to sue the stock rims, it also had a faulty seatbelt retraction mechanism and I noticed the radar cruise and airbag were throwing codes intermittently on the drive in. The donor car once again came to the rescue with some different wheels and tyres as well as another radar cruise module, as I stripped, cleaned, and repaired the seatbelt retractor. The airbag and cruise issues end up being two-fold, the radar module required calibration after disconnect and it seems the connection to the airbag itself was testing poorly at certain wheel positions according to the oscilloscope. With all that sorted, the car was now roadworthy and ready for registration.
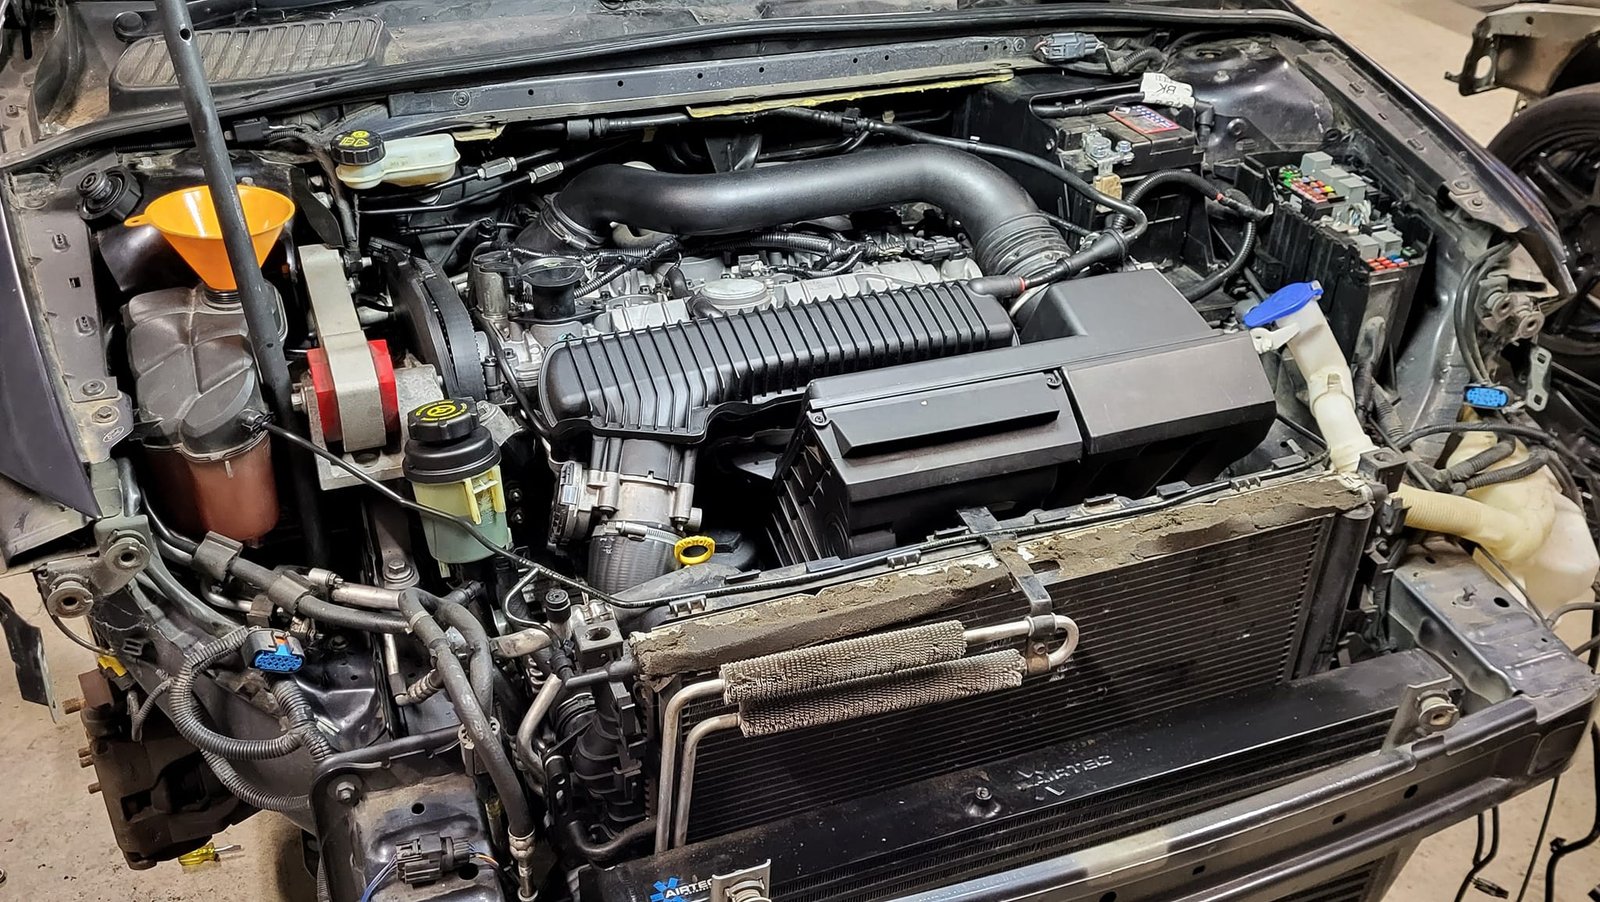
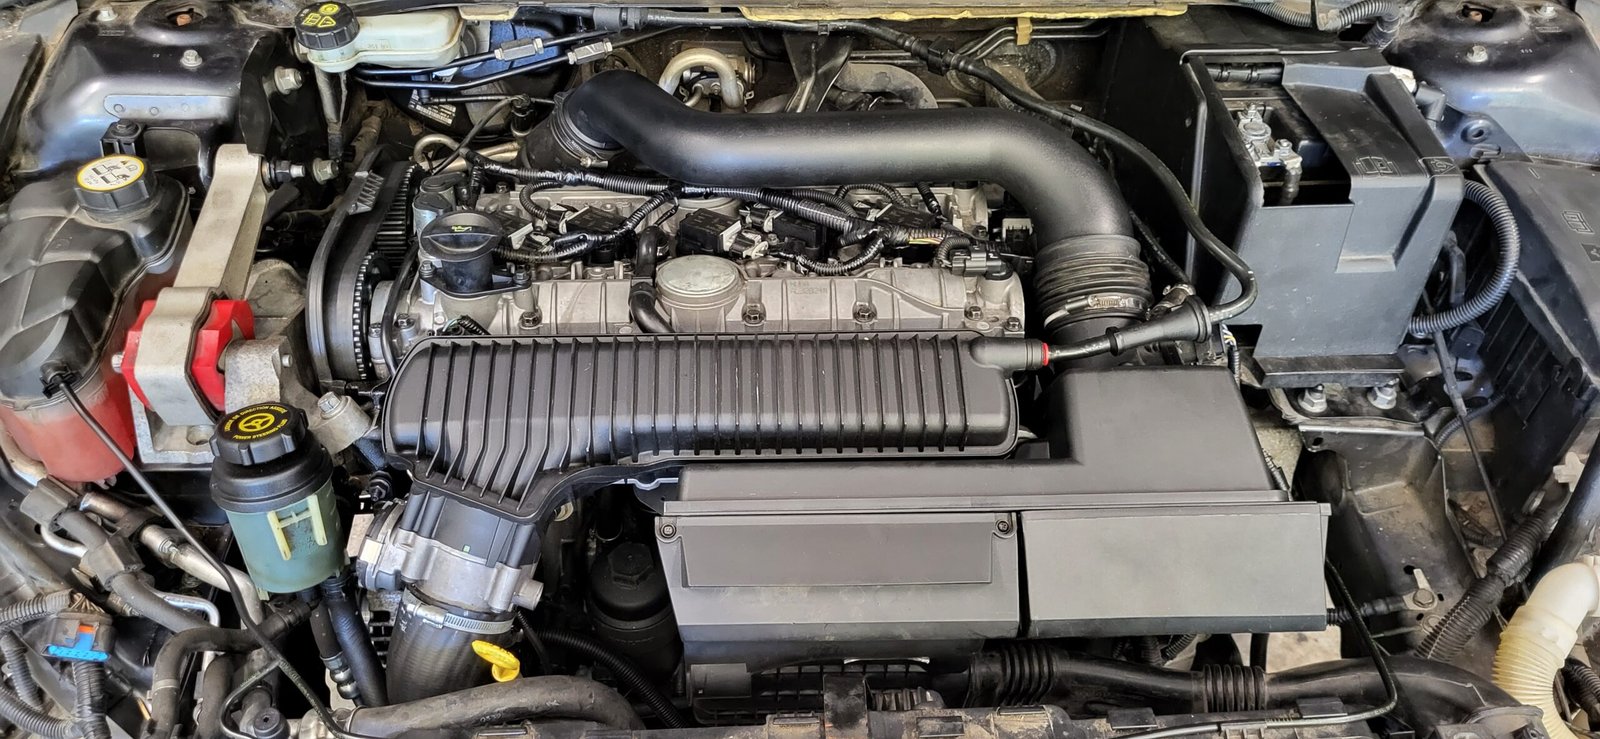
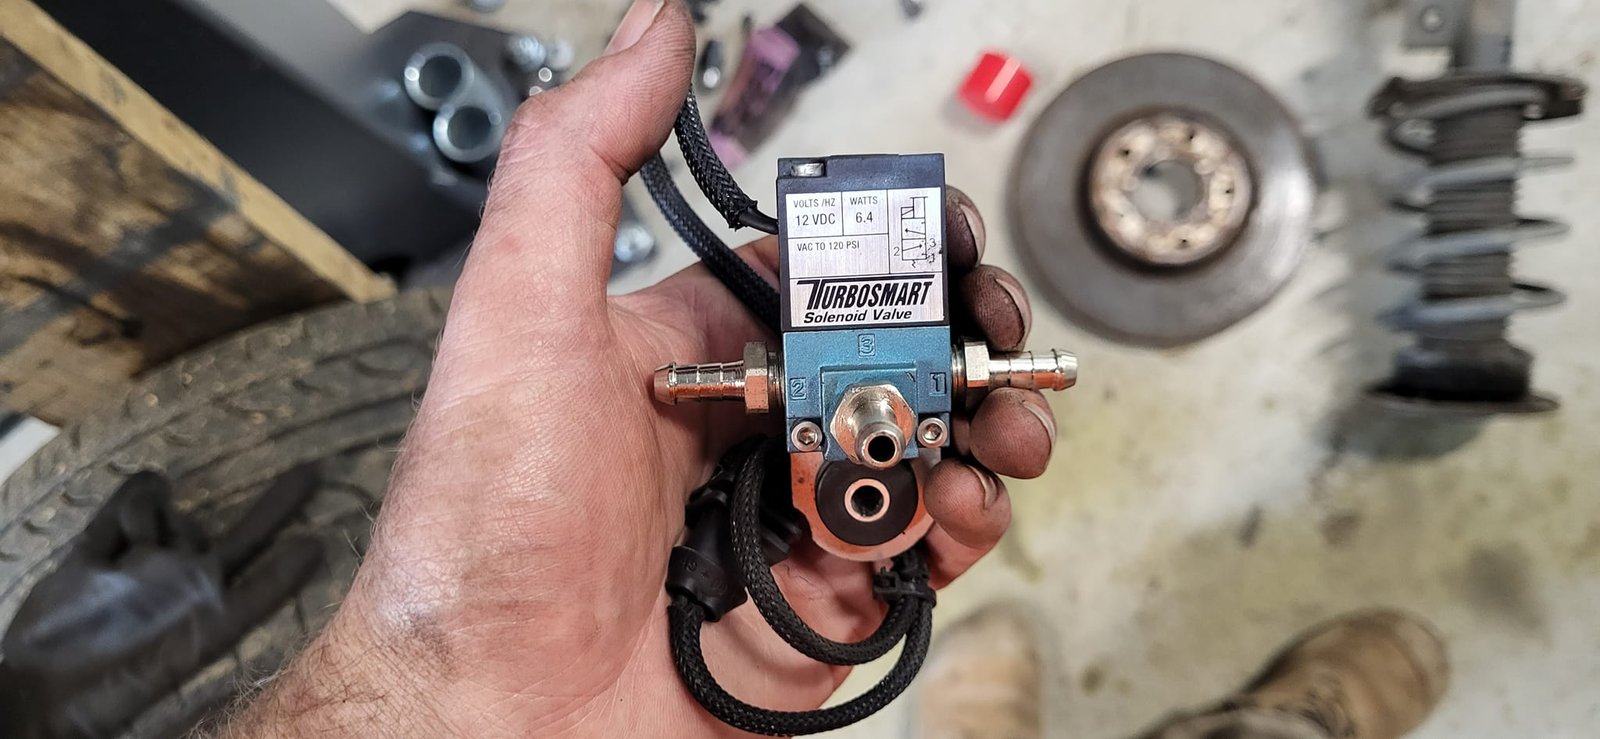
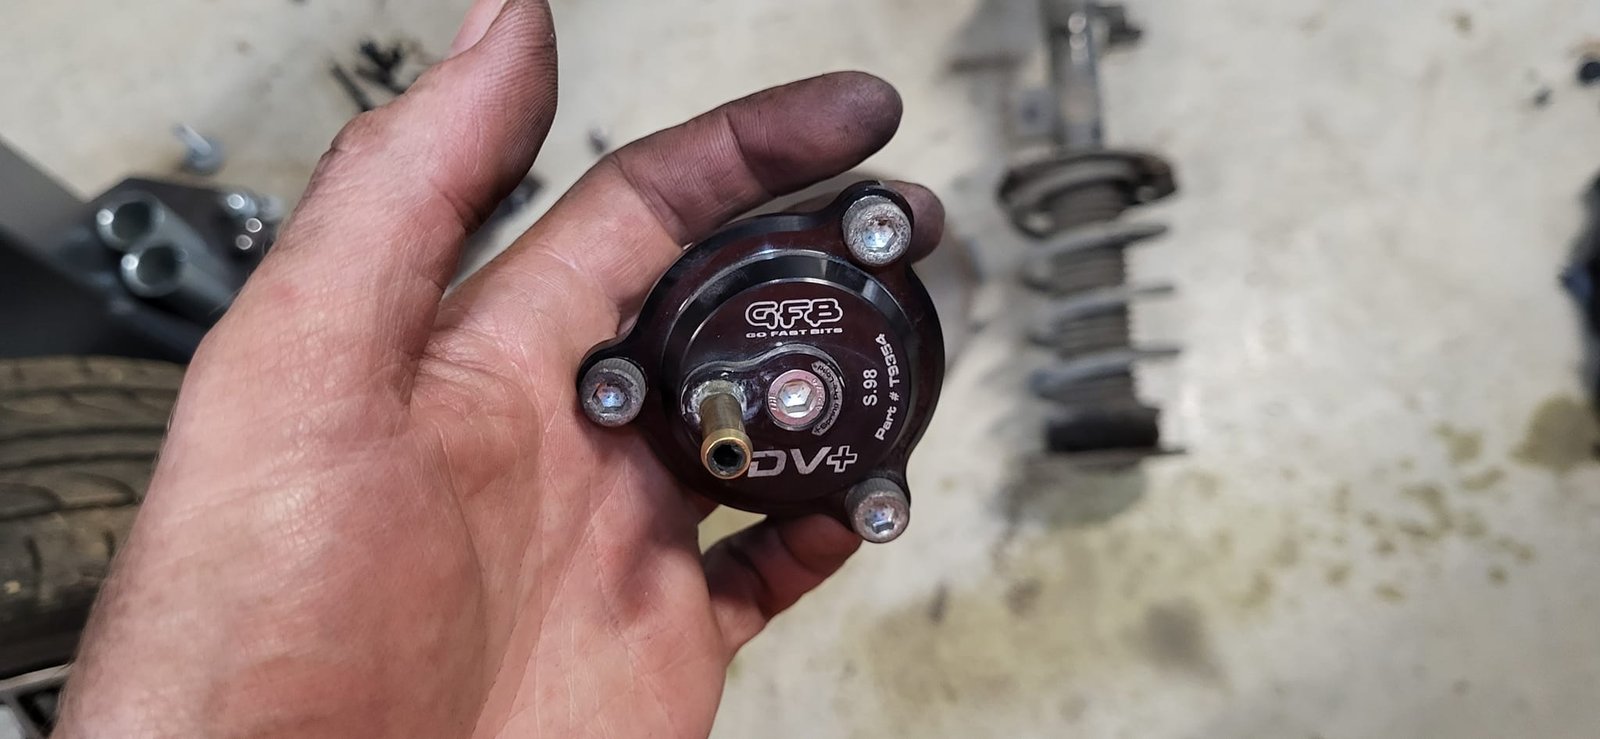
After quick trip to Vicroads, and no more prying eyes, it was time to fit some of the aftermarket parts, including the intake, CBV, TCV, RS ECU enclosure, a boost gauge, and flash on the Stage 3 tune from OEM Denied, as I started to use the car for daily duties. I made the call not to use the aftermarket cat back from donor car, it was just a bit too much for my tastes and usage, but I did my best to dose everyone whenever the option presented itself instead.


I get the AC re-gassed, after changing a failed compressor, fix the broken tensioner, and start putting on some decent k’ on the car, it’s a surprisingly comfortable and capable commuter. Economy ranges from mid 7L per hundred, when driven sensibly, to mid-teens and beyond, when driven enthusiastically, and I end up averaging somewhere in the low 8s for most refills.
I notice the coolant level dropping just a bit and can smell some oil burning occasionally so I go hunting for leaks. I’m not able to find anything and my big concern is the head gasket hasn’t fully sealed. I get a pressure tester to review, it tests perfectly, and I keep hunting. UV dye is suggested to help find the oil leak I think I can smell, it works a treat, and I end up finding a very small weep on the valve cover above the exhaust manifold. It turns out the coolant is also UV reactive and I find a tiny weep at a hose clamp.
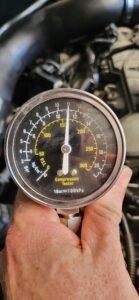
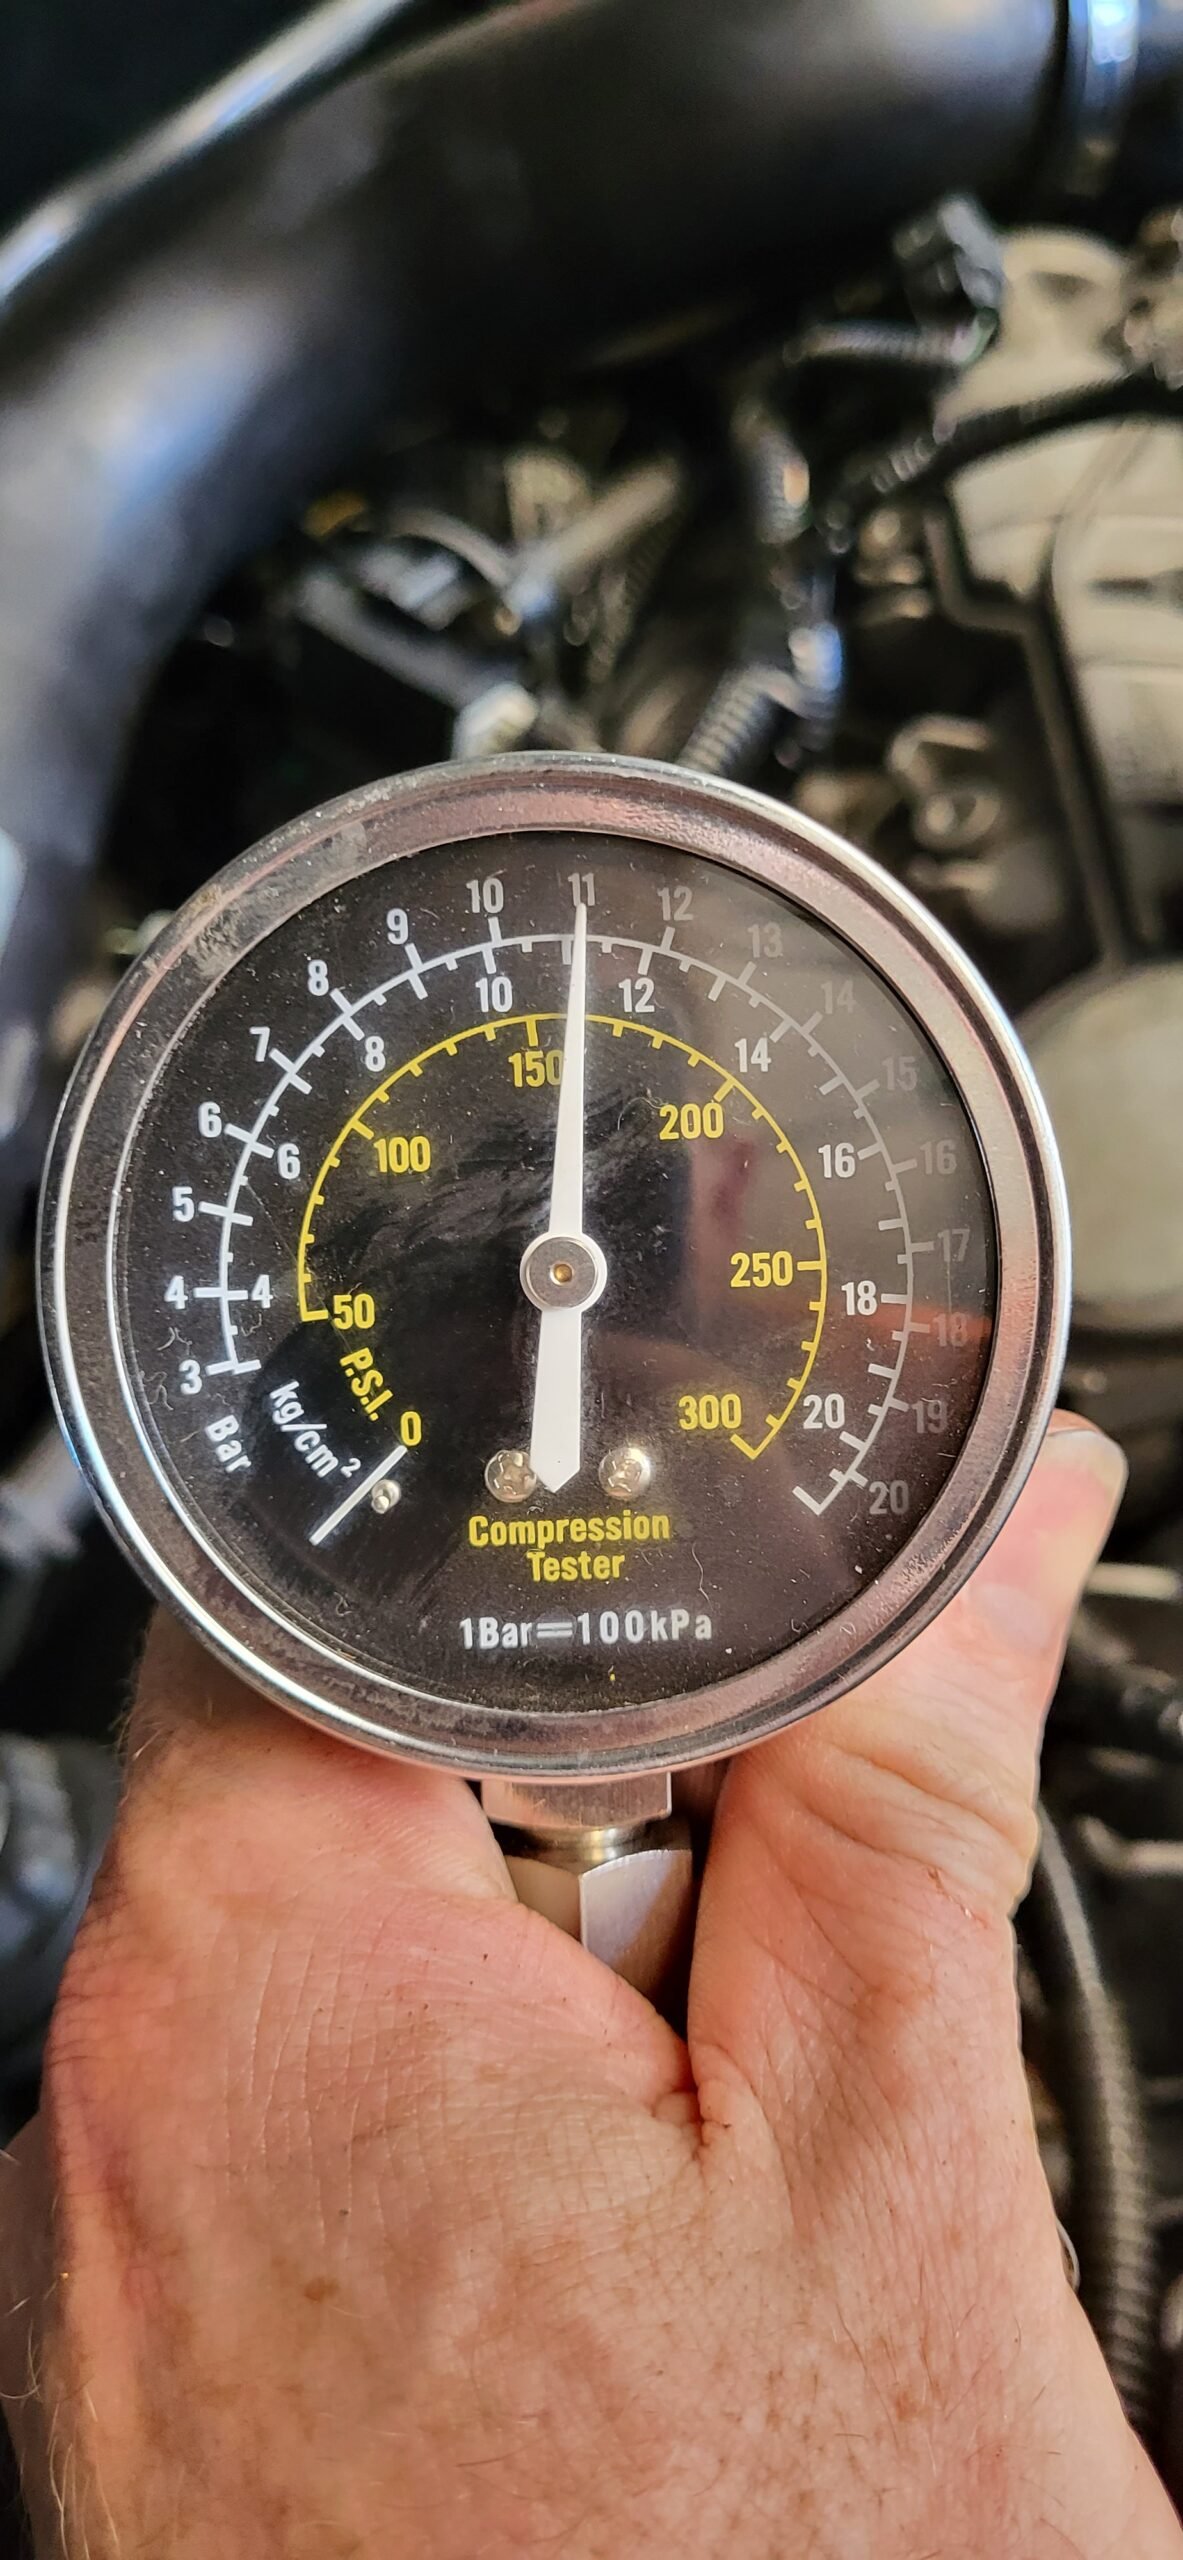
I am certain I can hear a small boost leak and go hunting for that also, sure enough there’s a couple clamps not holding pressure when tested above 1 bar. With this last issue sorted and a few thousand k’s put on the new engine, I do one last oil change then check the compression before listing the car for sale – the car tests at a beautifully even 160psi – phew!
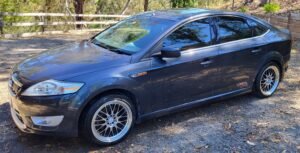
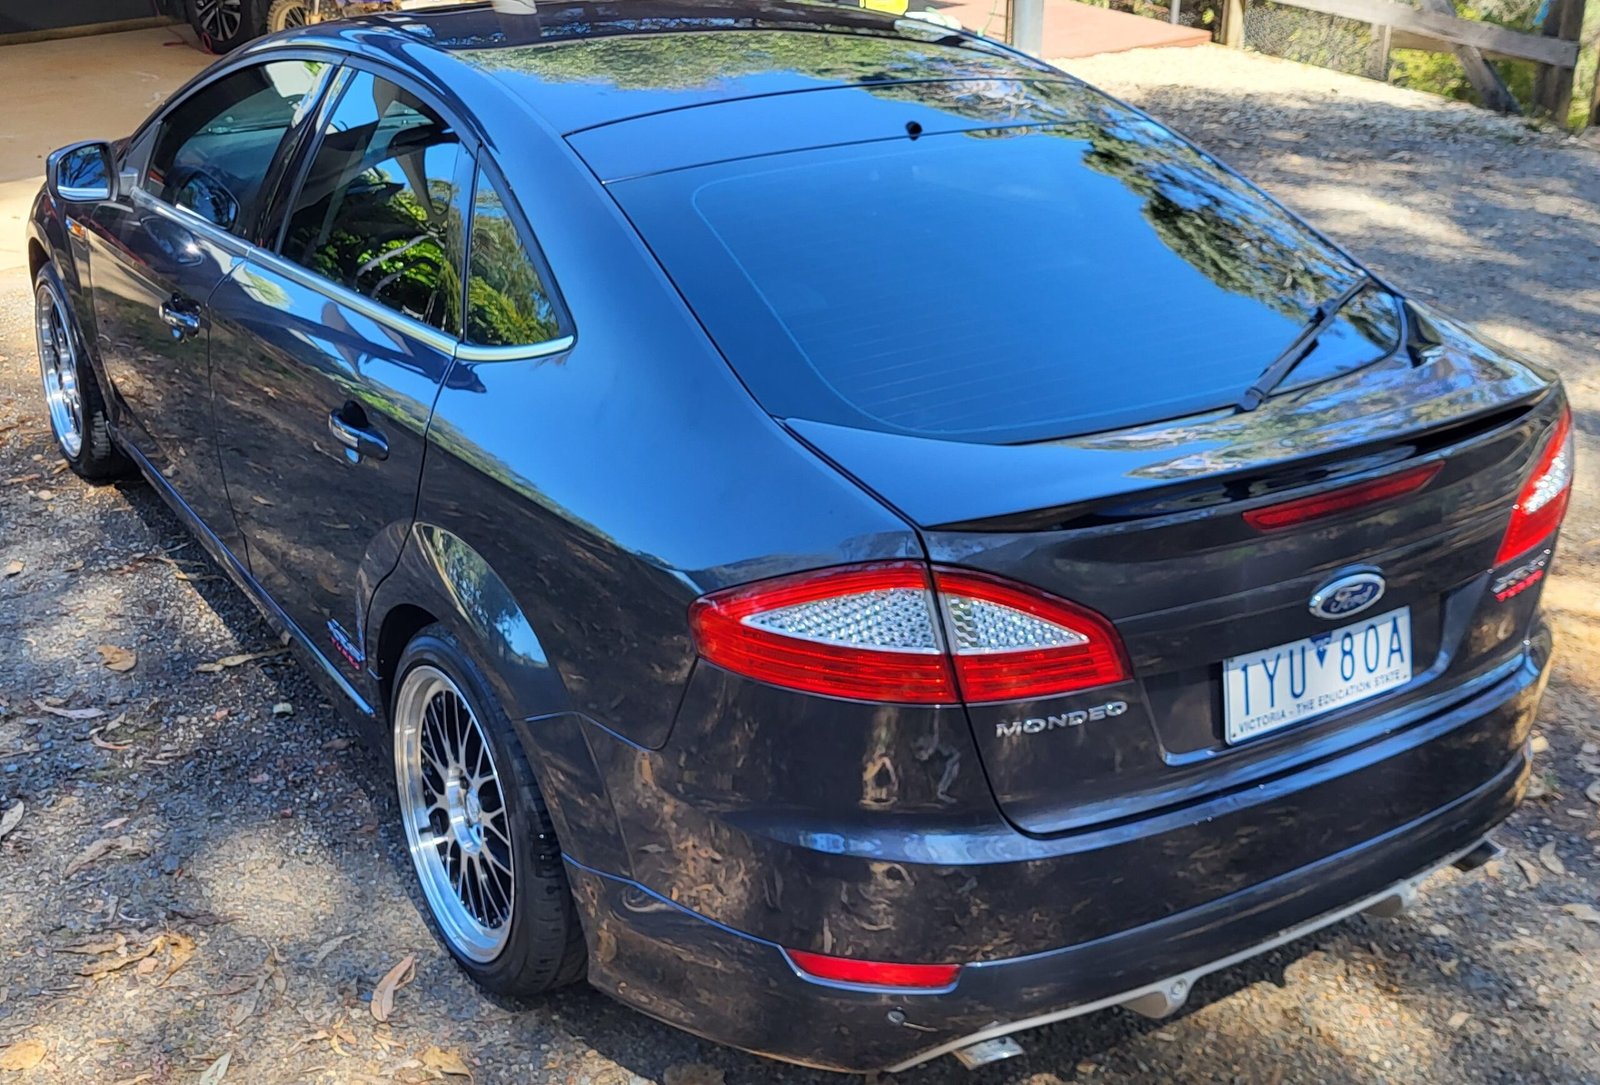
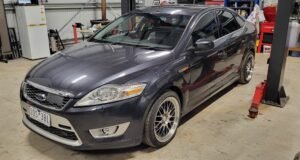
The car headed off to its new home, with the donor following not long after, and when last I checked in had clocked over 10,000 trouble free k’s, I’ll call that a success. Safe to say I learned a lot during this build and have an even greater respect for mechanics and engine builders having probably bitten off a bit more than I could chew initially.
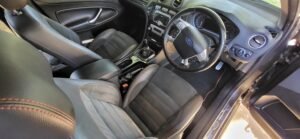
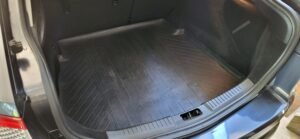
This car convinced me that I really wanted to get back into a sedan for daily duties, but it also rekindled my desire to drive fast which meant it was time to head back to the track. It wasn’t long before I found an 86 that ticked a lot of boxes, you can read about that build here, but I won’t forget the challenge and the reward of rebuilding this little XR5 – especially the comfy interior and cavernous boot!
Special thanks go to Jamie at OEM Denied and Jaden from Baxters, both of which were instrumental during this build providing parts and guidance at many points, if you are building your own XR5, you cannot go wrong with either of these guys, tell them NCR sent you.